
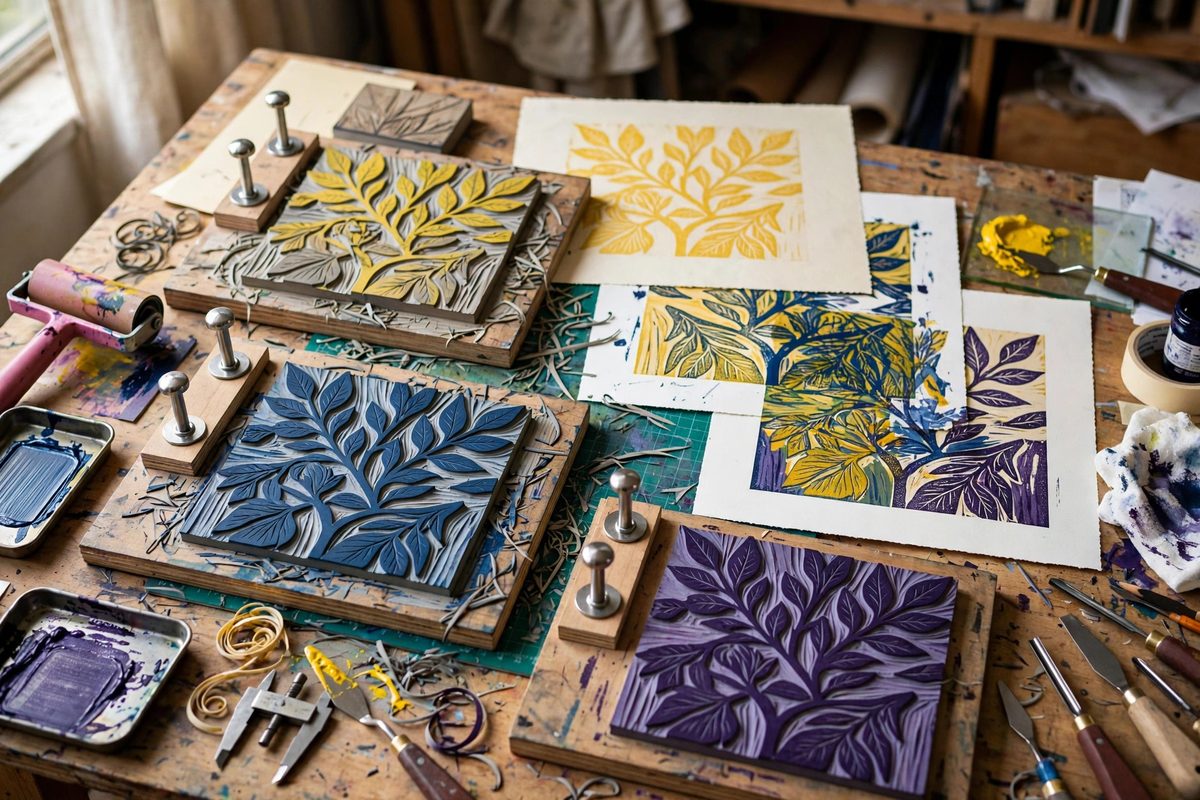
Reduction linocut destroys the block as it goes: each color layer is carved away after printing, so there is no going back to fix a misregistered layer. Registration pins are the mechanical insurance that makes this possible. By fixing the paper and the block to the same pin positions for every impression, you guarantee that each color lands exactly where it should, even though the block looks completely different by the final pass.
Why reduction printing demands perfect registration
In a multi-block print, each color has its own block, and a registration error ruins one block's layer. In a reduction print, there is only one block, and it is progressively destroyed. A registration error on layer three does not just waste paper; it wastes the entire edition, because the block can never be restored to print a corrected layer. The stakes are absolute, which is why reduction printers tend to be obsessive about their registration systems.
Pins solve this by removing judgment from the process. The paper goes onto the pins in the same position every time, the block sits against the same stops every time, and the layers align because the mechanics allow no alternative. Eyeballing registration, which works acceptably for single-layer prints, is not precise enough for reduction work.
The pin system: how it works
The classic setup uses two or three metal pins fixed to a registration board or directly to the press bed. The paper is punched or notched to fit over the pins, and the block is held against fixed stops or a second set of pins. For each color layer, you place the punched paper on the pins, position the block, print, and remove the paper. The next layer uses the same pins, the same paper position, and the block, now further carved, in the same position.
Punch the entire edition's paper before printing the first layer. Punching later introduces the risk of a slightly different punch position, and even a millimeter of difference will show as a halo or overlap error in the finished print. Use a dedicated punch or a simple jig so every sheet is identical.
Building the registration board
A registration board is a flat panel, plywood or MDF sealed against moisture, with the pins mounted at positions that clear the block and suit the paper size. The pins should be short enough that the paper lies flat over them but tall enough to locate positively; roughly the thickness of the paper stack plus a small margin. File or sand any sharp edges on the pins so they do not tear the punched holes over repeated use.
Mount the pins rigidly. A pin that wobbles or works loose mid-edition introduces exactly the error the system exists to prevent. Epoxy or screws through the board both work; what matters is that the pins do not move for the life of the edition. Mark the board clearly so the block goes back in the same orientation every time, since a rotated block on the same pins still misregisters.
Carving sequence and the disappearing block
Plan the color sequence from light to dark, carving away what stays the lightest color first. The first printing lays down the lightest color over the whole block; then you carve away everything that should remain that color, ink the block with the next darker color, and print again on the same paper, registered on the same pins. Each pass adds a darker color to a smaller area of the block.
Keep a proof of each stage. Because the block is being destroyed, the proofs are the only record of the intermediate states, and they are invaluable if a layer misprints and you need to diagnose whether the problem is registration, inking, or carving. Number the proofs to match the edition so the sequence stays clear.
Troubleshooting registration drift
If layers start drifting mid-edition, suspect the paper first. Paper expands and contracts with humidity, and a damp printing day can change the sheet dimensions enough to defeat the pins. Print in consistent conditions, and let the paper acclimate to the studio before punching. Next suspect the pins themselves: check that none have loosened. Finally, check the block stops; a block that has been trimmed or that swells with moisture will sit differently against its stops.
Pins do not make reduction printing easy, but they make it possible. Build the board once, punch carefully, and trust the mechanics over your eyes for every impression.
Related Guides
- V-Gouge Cutting Geometry on Mounted Linoleum: The V-gouge is the defining tool of linocut: it carves the lines that will print. But the V shape is not just a shape; it is a cutting geometry, and
- Oil-Based Relief Ink Tack Control on Wood Blocks: Relief printing lives or dies on ink tack: the stickiness that transfers ink from roller to block to paper cleanly. Oil-based relief inks are prized
- Baren Burnishing Pressure Limits on Kozo Papers: Kozo paper, the long-fibered Japanese paper beloved by printmakers, takes linocut ink beautifully when burnished by hand with a baren. But kozo's