
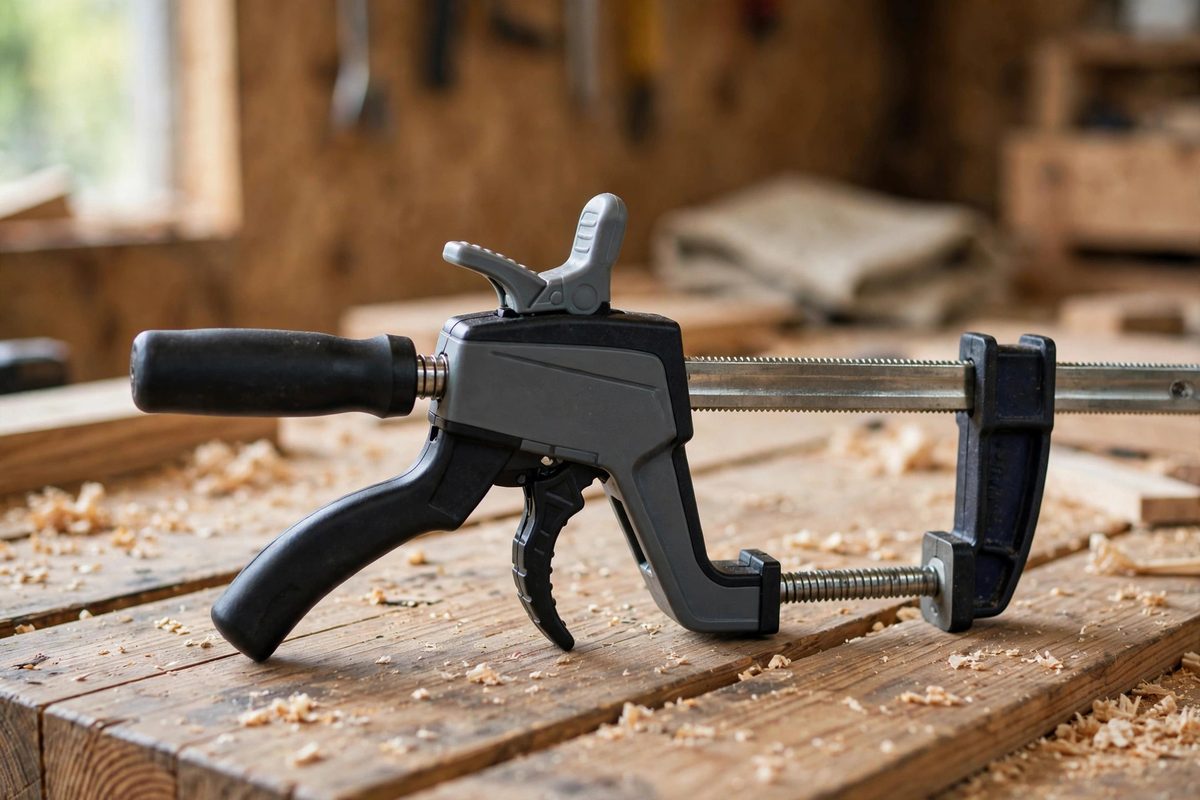
One-handed bar clamps are the solo woodworker's third hand: squeeze the trigger to advance the jaw, press the release to open it. But the trigger geometry, the shape, position, and leverage of that release mechanism, determines whether the clamp is genuinely operable with one hand or only nominally so. For makers with limited hand strength, missing digits, or single-hand use, the difference between a well-designed trigger and a poor one is the difference between independence and needing help. The geometry can be analyzed, compared, and chosen deliberately.
What the Trigger Must Do
The quick-release trigger has two jobs: disengage the locking mechanism that holds the jaw under load, and do so with force the user can produce comfortably while the other hand, or the same hand's remaining fingers, supports the workpiece. The locking mechanism is typically a friction plate or pawl that jams against the bar under load; releasing it requires overcoming both the mechanism's spring and the friction amplified by the clamping force. Under heavy clamping loads, the release force can be substantial: the trigger is fighting the very force the clamp was bought to produce. Good trigger geometry multiplies the user's input force through leverage so the release feels light even when the clamp is loaded hard. Poor geometry demands a grip strength that many users, and many situations, cannot provide.
Lever Geometry and Mechanical Advantage
The trigger is a lever, and its mechanical advantage follows the lever arm ratio: a long trigger with the pivot near the mechanism multiplies force effectively, while a short stubby trigger barely multiplies at all. The best designs place a broad, paddle-like trigger where the fingers naturally fall during the squeeze grip, giving a long lever arm without requiring finger repositioning. The pivot placement matters equally: a pivot close to the engagement point with a long finger arm maximizes advantage, but the travel increases proportionally, so the trigger must move far enough to fully disengage the lock. Insufficient travel is a common flaw: the trigger feels like it releases but the mechanism stays partially engaged, and the jaw moves sluggishly or not at all. Test any clamp under real load, not empty: the release force with the jaw clamping hard is the honest measurement.
Trigger Position and Hand Compatibility
Where the trigger sits relative to the grip determines which fingers operate it and whether the hand can simultaneously hold the clamp steady. The most accessible designs put the release trigger directly under the fingers in the natural squeeze position, so the same grip that holds the clamp operates the release: squeeze to tighten, shift finger pressure to release. Designs requiring the thumb to reach an awkwardly placed button, or requiring the hand to reposition entirely, fail one-handed users and frustrate everyone else. For users with specific limitations, the details dominate: a trigger operable by the side of the finger suits limited finger flexion; a broad paddle suits reduced sensation, since precise finger placement is not required; a trigger requiring minimal travel suits limited range of motion. There is no universally ideal trigger, which is why comparing geometries for the actual user matters more than brand reputation.
Release Under Load: The Critical Test
The defining test of a quick-release trigger is releasing under full clamping load with one hand. Many clamps pass the empty test beautifully and fail this one: under load, the friction in the locking mechanism multiplies, and the trigger force needed exceeds comfortable one-handed effort. When evaluating clamps, clamp a real glue-up's worth of force, then release one-handed: the jaw should open smoothly with moderate finger effort. If it requires straining, two hands, or a tool to poke the trigger, the clamp is not a one-handed clamp for that user at that load. Note that release force grows with clamping force, so a clamp adequate for light work may fail the test at its rated capacity. Size the clamp to the work with headroom, so the release is always operating well within its comfortable range.
Maintenance and Long-Term Operability
Trigger mechanisms degrade: dust and dried glue increase friction in the release linkage, springs weaken, and pivot wear introduces slop that wastes trigger travel. A clamp that released easily when new can become a two-handed struggle after years of shop dust. Maintain the mechanism: blow out dust, wipe the bar clean so the locking plates engage and release crisply, and apply a dry lubricant to the trigger pivots, avoiding wet oils that attract dust. Inspect the trigger for cracks, especially plastic triggers under heavy use; a trigger that flexes instead of pivoting wastes the user's force in deformation. Replace worn clamps rather than fighting them: the cost of a new clamp is trivial against the cost of a glue-up ruined because the clamp could not be released and repositioned in time.
One-handed clamp triggers are levers first and conveniences second: long paddle, good pivot placement, full travel, positioned for the natural grip, and tested under real load. Choose the geometry that the actual hand can operate, maintain the mechanism, and the clamp becomes the reliable third hand it promises to be.
Related Guides
- Bi-Directional Latch Geometries for Hand Weakness: Most latches assume a capable hand: pinch a small tab, push against a stiff spring, twist while pressing, all in one coordinated motion. For someone
- Universal Grip Geometry for Hand Tremors: Hand tremors turn ordinary tool handles into adversaries: the tool amplifies the shake, precision evaporates, and fatigue sets in fast. Universal
- Counterbalance Spring Tension in Heavy Lever Tools: Heavy lever tools, bolt cutters, long-handled loppers, big crimpers, ask the operator to fight gravity as well as the workpiece. The tool's own
- Single-Lever Quick Adjustment Mechanisms for Vises: A traditional vise demands two things many makers cannot easily give: the grip strength to spin a handle repeatedly and the patience to crank the jaw