
Small rooms have big bass problems: low frequencies pile up in corners and between parallel walls, creating boomy spots and dead spots that no amount of EQ can fix, because the problem is in the room, not the signal. Helmholtz resonators absorb sound at specific low frequencies by turning acoustic energy into heat through air friction in a narrow neck. Building them as slotted arrays in wall panels gives a studio targeted bass control that broadband absorbers cannot match.
The Helmholtz Principle in Plain Terms
A Helmholtz resonator is an air bottle: a cavity of air connected to the room through a narrow neck. Air in the neck acts as a mass, air in the cavity acts as a spring, and together they resonate at a frequency set by the neck's dimensions and the cavity's volume. At that resonant frequency, air pumps in and out of the neck vigorously, and friction in the narrow passage converts the motion to heat. The panel does not reflect the bass back into the room; it eats it. That is the entire trick, and it works at frequencies where fiberglass panels would need to be feet thick.
Why Slots Instead of Holes
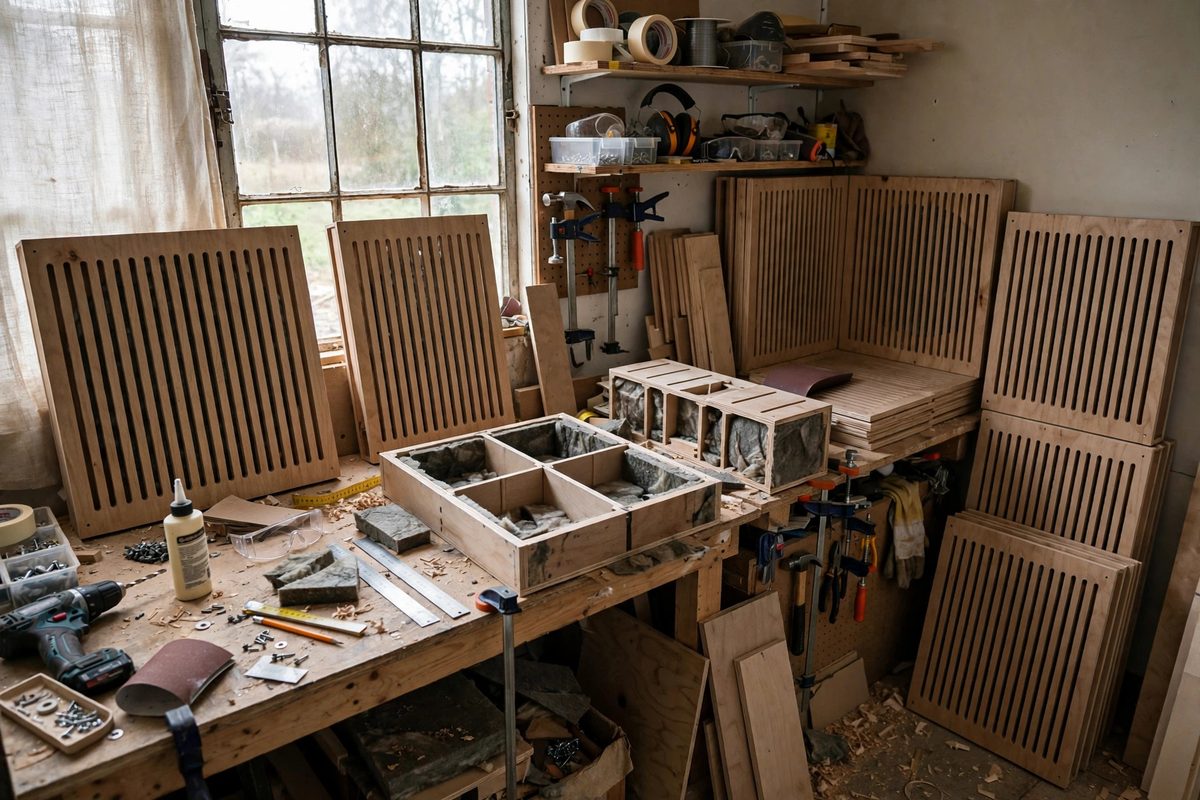
The classic resonator uses a round neck, but a slotted neck (a long narrow gap) offers practical advantages for panel building. Slots are easy to cut consistently with a router or table saw, and a single slot can serve a long cavity, simplifying construction. The slot's width and the panel thickness define the neck; the cavity depth behind the panel sets the volume. Multiple slots across a panel, each feeding its own cavity (or a shared cavity with dividers), create an array that absorbs across a band of frequencies rather than a single sharp peak.
Tuning to Your Room's Problem Frequencies
Before building, find the room's offending frequencies. Play sine sweeps or use a measurement microphone with room analysis software; the peaks in the low end (typically 40 to 120 Hz in small rooms) are your targets. The resonant frequency rises with larger neck area and falls with larger cavity volume, so you tune by adjusting slot width and cavity depth. Build the array to target the worst two or three peaks, not the entire bass range; broadband absorption handles the rest, and the resonators handle the specific resonances that broadband panels miss.
Array Layout and Cavity Design
Divide the panel's interior into separate cavities with dividers, because one big shared cavity behind multiple slots resonates at a single frequency, while divided cavities can be tuned to different frequencies for broader coverage. Cavity depths of 4 to 8 inches are typical for the 50 to 100 Hz range. Line the cavity interiors with a thin layer of absorptive material (light fiberglass or mineral wool) to damp the resonance and widen its effective bandwidth; an undamped resonator absorbs in a very narrow spike, while light damping spreads the absorption over a more useful range. Face the slotted side toward the room, obviously, and mount the panels at the room's pressure maxima: corners and wall-ceiling junctions for most modes.
Construction Details
Build the panel carcass from MDF or plywood for airtightness; leaks around the cavity edges detune the resonator and kill its effectiveness. Seal all interior joints with caulk. Cut slots cleanly and deburr them, because rough slot edges add unpredictable friction and shift the tuning. Make the front panel removable or build in an inspection port, since you may want to adjust damping material after measuring the installed result. Finish the panel to match the room; the slots can be hidden behind acoustically transparent fabric without affecting performance, as long as the fabric is truly open-weave.
Measuring the Result
After installation, re-measure the room. A working resonator array shows as reduced peak height and shorter decay time at the target frequencies on your measurement plots. If a target peak barely moved, check for air leaks first, then adjust: narrowing the slot or deepening the cavity lowers the resonant frequency, widening the slot or shallowing the cavity raises it. Tuning by measurement and adjustment beats calculating perfectly on the first try, because real rooms and real construction tolerances always differ from the math.
Slotted Helmholtz arrays are the precision tool of room treatment: targeted, buildable in a weekend, and effective exactly where broadband panels give up. Measure the room, tune the cavities, seal them tight, and the bass problems that EQ could never fix start disappearing from the plots and from your ears.
Related Guides
- Slotted Helmholtz Resonator Arrays for Sound Walls: A Helmholtz resonator is a bottle that hums at one note: a cavity of air with a narrow neck, tuned so the air in the neck bounces on the spring of
- Diffuser Splay Angles for Acoustic Stage Panels: Stage sound is a battle between clarity and chaos: the performers need to hear each other, the audience needs to hear the performers, and the room's
- Balanced XLR Ground Pin Wiring to Stop Ground Loops: The hum that appears when you connect two pieces of audio gear together, and vanishes when you disconnect them, is almost always a ground loop: an
- Acoustic Reflection Baffles for Stage Backdrops: A stage backdrop is usually designed for the eyes, but it is also a giant acoustic surface that shapes what the audience hears. A flat, hard backdrop
- Star Grounding Buses for High Gain Preamp Racks: High-gain preamps amplify everything, including the tiny voltage differences between ground points in the chassis. When grounds connect in a daisy