
Flex sensors fail at the connection point, almost always. The sensor itself is a robust strip designed to bend thousands of times, but where its stiff termination meets the soft wire or the fabric, every bend concentrates stress into a tiny zone. Without strain relief, that zone work-hardens and cracks, usually right in the middle of a demo. Strain relief stitching distributes the bending force over a longer section so no single point takes the full load.
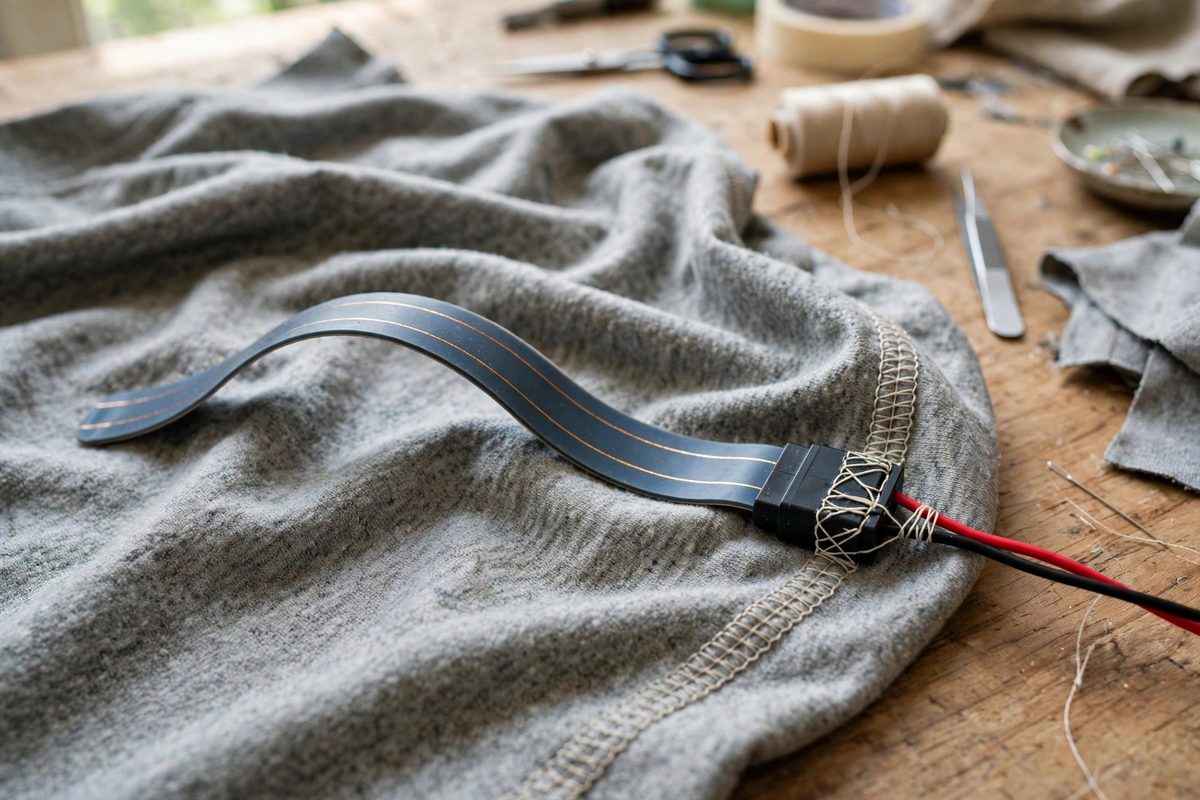
Where the stress concentrates
Bend a flex sensor and the curvature spreads along its length, which is what it is designed for. But at the rigid boundary where the sensor's contact pads meet the soldered wire or the connector, the flexible part keeps bending while the rigid part does not, and the transition between them becomes a hinge. All of the bending motion focuses at that hinge line. The conductive traces, the solder joints, and the wire strands all fatigue there first.
The same concentration happens where wires exit any rigid enclosure on a wearable: the Arduino board, a battery holder, a connector housing. Every rigid-to-flexible transition on the garment is a future failure point unless it is relieved. Stitching is the wearable maker's answer because it integrates the relief into the textile itself.
The stitching technique
The core method is to stitch the wire or sensor lead to the fabric along a gentle curve for several centimeters beyond the rigid termination, using a flexible stitch that holds the wire against the fabric without pinning it rigidly. A loose whipstitch or a couching stitch works well: the thread tacks the wire down at intervals, and between the tacks the wire can still move microscopically, which spreads the bending over the whole stitched length instead of concentrating it at the connector.
Route the wire in a shallow S-curve or service loop before it reaches the termination. The curve gives the wire slack to absorb motion; when the garment moves, the curve opens and closes instead of tugging at the solder joint. Stitch the curve in place so it keeps its shape through washing and wearing. This one detail, a deliberate slack loop stitched to the fabric, prevents more failures than any other single technique.
Reinforcing the termination itself
Stitching manages the wire; the solder joint still needs protection. After soldering the wire to the flex sensor's pads, cover the joint with a flexible encapsulant: a dab of flexible silicone adhesive, a short length of heat-shrink with adhesive lining, or a purpose-made flexible potting compound. The encapsulant's job is to make the stiffness transition gradual, extending the rigid zone a short distance onto the flexible lead so the hinge point moves out onto tougher material.
Keep the encapsulant flexible. Rigid epoxy on a flex sensor termination just moves the hinge point to the edge of the epoxy blob, where it fails the same way. The stiffness gradient should step down smoothly: rigid connector, then slightly flexible encapsulant, then stitched wire, then free sensor. Each step hands off to something only a little more flexible than itself.
Thread and fabric choices
Use a thread with some stretch, such as a polyester or a thread intended for knit fabrics, rather than a brittle cotton that will snap under repeated flexing. Stitch density matters: too sparse and the wire lifts and hinges between tacks; too dense and the stitching itself becomes a rigid section. Spacing the tacks roughly a wire-diameter apart is a good starting point, adjusted by feel.
Consider the fabric's own stretch. Stitching a wire firmly to a non-stretch panel is straightforward, but on a stretch panel the fabric moves under the stitching. Either place terminations on stable, non-stretch areas of the garment, or use a stretch stitch that moves with the fabric. A wire stitched rigidly to stretchy fabric will saw through the thread or tear the fabric at the stitch holes.
Testing before trusting
Flex every termination through its full range of motion a few dozen times before calling it done, and watch where the wire bends. If all the motion concentrates at one point, the relief is not working; adjust the stitching or the service loop until the bend distributes. Then wash-test a sacrificial sample if the garment will be washed, because water, agitation, and drying add failure modes that dry flexing does not reveal.
Strain relief is not decoration; it is the mechanical design of the connection. Stitch the transition, loop the slack, encapsulate the joint, and the wearable survives the wearing.
Related Guides
- Neoprene Substrate Flex Strain in E-Textiles: Neoprene is a tempting base for wearable electronics: it is soft, stretchy, water-resistant, and easy to cut and glue. But embedding circuits in a
- Conductive Thread Trace Routing Protocols: Conductive thread lets you sew circuits directly into fabric, but thread is a terrible wire by electronics standards: high resistance, fragile
- Washable Surface Mount Solder Bonds on Stretch Yarn: Wearable electronics live at the intersection of textiles and circuitry, and nowhere is that collision more demanding than in solder joints on
- Insulating Stainless Steel Thread Traces in Washables: Conductive stainless steel thread lets you sew circuits directly into washable garments, but bare conductive traces in a garment that goes through