
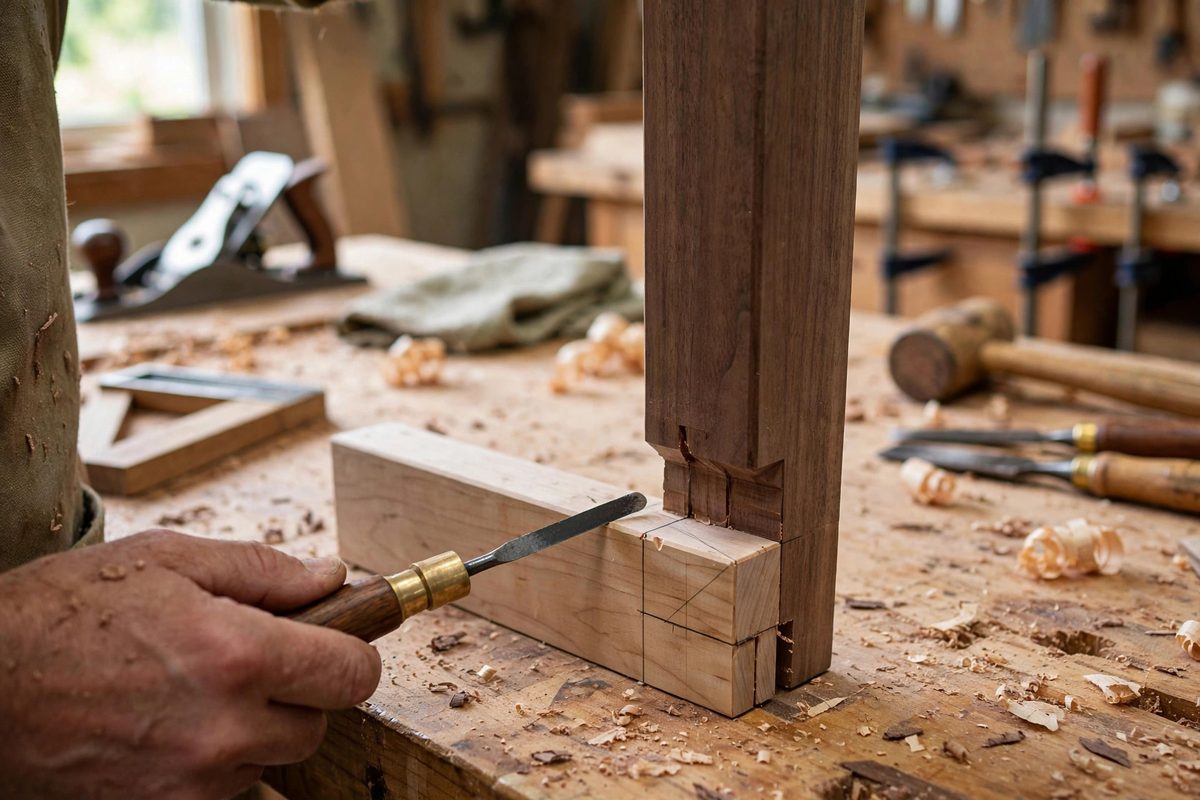
In fine furniture, the apron meets the leg with a mortise and tenon, and the tenon's shoulder must sit flush against the leg all around. When the apron is out of square, because the stock moved, the machining was imperfect, or the design intentionally rakes, a square-cut shoulder leaves gaps: tight on one edge, open on the other. Scribing, marking the shoulder directly from the leg's actual surface and cutting to that line, produces a joint that fits the reality of the parts rather than the ideal of the drawing. It is slower than cutting square, and it is the difference between a joint that looks machine-made and one that looks crafted.
Why Aprons Go Out of Square
Several causes produce out-of-square aprons. Wood moves after machining: a board that was square at the planer can twist or cup slightly as it acclimates, and even a fraction of a degree across a wide apron shows at the shoulder. Compound designs intentionally rake aprons: a table with splayed legs has aprons meeting legs at angles in two planes, so no square shoulder fits by definition. And sometimes the legs themselves are the issue: a leg that is slightly out of square presents a non-square face to a square apron. The common thread is that the parts as they exist differ from the parts as drawn, and the joint must fit the existing parts. Measuring the discrepancy and cutting square to a corrected angle works for simple, consistent angles; scribing works for everything, including irregularities that cannot be measured as a single angle.
The Scribing Process
Scribing transfers the mating surface's reality directly to the workpiece. Assemble the joint dry with the tenon slightly overlong or the shoulder left proud, position the apron exactly where it will sit in the finished piece, and use a marking knife or sharp pencil to trace the leg's surface onto the apron's shoulder. The marking tool must ride flat against the leg while marking the apron, so the line represents the true intersection. Then cut to the line: saw to the waste side and pare to the knife line for a gap-free fit. Test-fit frequently, because removing wood is easy and adding it back is joinery's hardest trick. The scribed shoulder should meet the leg with no visible gap and no rocking when pressed.
Reading the Scribe Line
The scribe line tells you what kind of error you are correcting, and reading it guides the cutting. A line that runs parallel to the square shoulder but offset indicates the apron is uniformly out of position, a simple shift. A line that angles across the shoulder indicates an angular error: cut more from one side. A line that curves or wanders indicates an irregular surface, a twist or a bump in the leg, and must be followed faithfully rather than averaged into a straight cut. Mark the waste side clearly on every scribe line; in the concentration of fitting, cutting to the wrong side of the line is the classic error, and it ruins the piece. For complex scribes, shade the waste with pencil so there is no ambiguity at the bench.
Cutting Tools for Scribed Shoulders
The shoulder is a visible surface, so the cutting must be clean. A sharp shoulder plane or a wide chisel, pared across the grain with the bevel oriented to avoid tearing, gives the finest control for small corrections. For larger corrections, saw to within a whisker of the line with a fine dovetail or carcass saw, then pare to the line. The paring cuts should work from the edges toward the middle on cross-grain shoulders to avoid blowing out the corners. Keep the chisel razor sharp: a dull chisel crushes fibers instead of cutting them, leaving a shoulder that looks fitted but compresses under clamping pressure and opens a gap later. Undercut the shoulder very slightly, a degree or two, so the visible outer edge meets first and any tiny gap hides inside the joint where it cannot be seen.
Fitting Sequence in Assembly
Scribe and fit before glue-up, obviously, but also in the right order relative to other operations. Fit the scribed shoulders with the tenons at final dimension but before any finish is applied, since finish changes dimensions and contaminates glue surfaces. Fit all four aprons to their legs before gluing any of them: the assembly is a system, and fitting one joint can shift the geometry the next joint was scribed to. Number the joints and keep each apron with its leg; scribed joints are mated pairs, not interchangeable parts. During glue-up, the scribed shoulders should close with hand pressure plus light clamping: if a scribed joint needs heavy clamping to close, something moved between fitting and glue-up, and forcing it introduces stress that will open the joint later. Dry-fit the entire base assembly as the final check before opening the glue bottle.
Scribing is the admission that real parts differ from drawings, and the technique for making that difference invisible. Mark from reality, cut to the line, pare sharp, and fit the system before gluing. The shoulders will sit flush because they were made for the legs they meet, not for the legs on the plan.
Related Guides
- Calculating Compound Miter Splay Angles for Aprons: A table apron that meets splayed legs has to solve two angles at once: the miter across the face of the board and the bevel through its thickness
- Scribing Complex Table Apron Tenons for Sloped Legs: When table legs splay or slope, the apron meets the leg at a compound angle, and the tenon shoulder has to match that angle exactly or the joint
- Install Simple Floating Shelves: Add Storage and Style with Floating Shelves Floating shelves are the secret weapon of home decorating. They provide storage without taking up floor
- Golden Ratio Proportions in Table Leg Design: The golden ratio, roughly 1 to 1.618, shows up in furniture design conversations the way it shows up everywhere: part geometry, part mythology. Strip
- Calculating Wood Sag Deflection in Long Bookcases: Every bookcase shelf that looks straight on day one starts moving the moment books go on it. Wood creeps under constant load, and a span that seems