
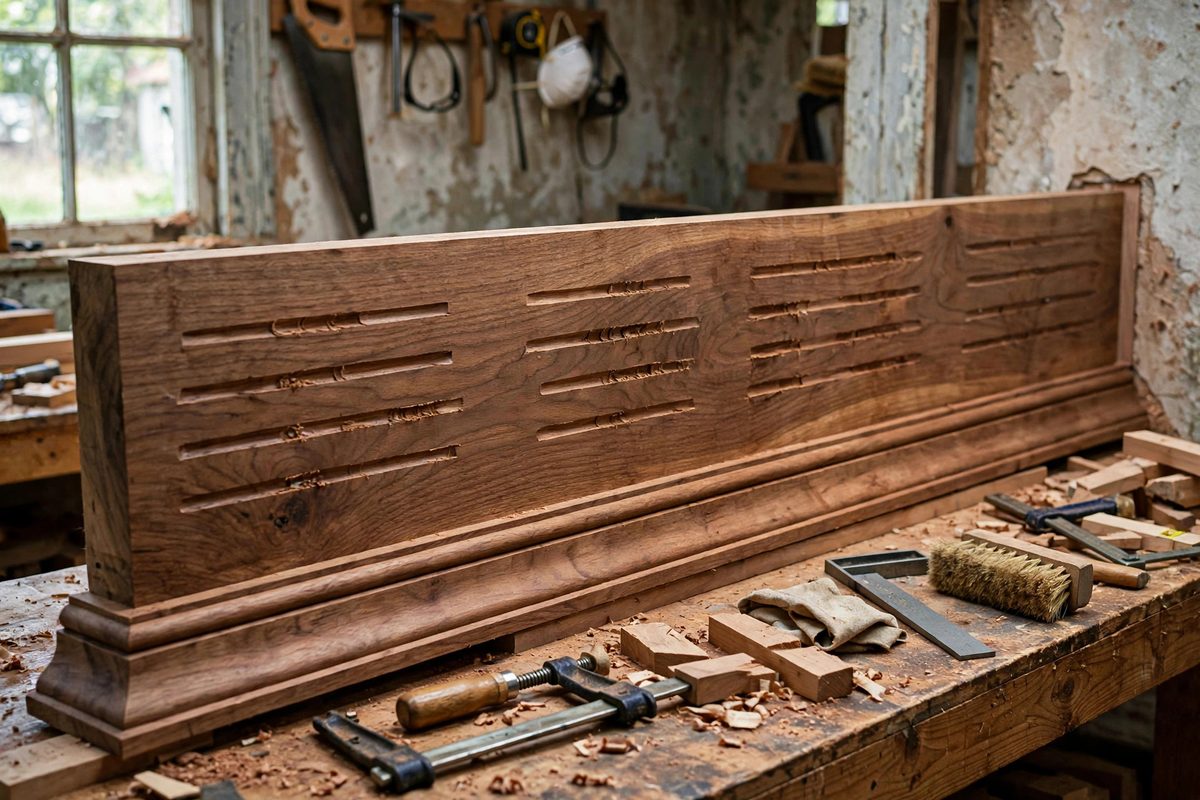
Wide hardwood architrave, the trim casing around doors and windows, looks substantial and beautiful, but wide solid stock moves with humidity and rarely sits flat against an imperfect wall. Back-relief kerfing, a series of shallow saw cuts on the unseen back face, relieves the internal stresses and lets the moulding conform without cupping or rocking. It is invisible in the finished work and makes the difference between trim that stays put and trim that fights you.
Why Wide Mouldings Need Relief
A wide board has more wood across its width to expand and contract, and any uneven moisture or internal stress cups it: the face goes concave or convex. On an architrave, cupping shows as gaps along the edges where the trim meets the wall or the door jamb, and no amount of nailing fully corrects a badly cupped piece; the nails just dimple the face while the edges spring back. Kerfing the back breaks the continuous wood fibers into narrower strips, each of which can move slightly independently, so the internal stresses relieve through the kerfs instead of cupping the face. The kerfs also give the moulding flexibility to follow slight irregularities in the wall, letting it bed down flat instead of bridging across humps.
Cutting the Relief Kerfs
Cut the kerfs on the table saw or with a circular saw guided by a straightedge, running them along the length of the moulding on the back face. Space them roughly an inch to an inch and a half apart, and cut to about two-thirds of the stock thickness; deep enough to relieve effectively, shallow enough to leave the face intact and strong. Keep the kerfs straight and parallel, since wandering kerfs can break through the face on thin profiles. On very wide architrave, two rows of staggered kerfs relieve more evenly than a single row. Cut the kerfs before applying the finish, and ease any sharp arrises left by the saw so they do not telegraph through or snag during installation.
Kerfing and the Moulding Profile
Plan the kerf layout around the profile. Keep kerfs clear of the thin sections of the profile, like delicate beads or quirk details, where a kerf too close to the face could weaken or break through. On the back face, the flat areas between profile features are the natural kerf locations. If the architrave has a deep back rebate to fit over the jamb, the kerfs go in the remaining solid back areas. The goal is relief without compromising the moulding's structure or its finished face. A kerf that breaks through the face ruins the piece, so when in doubt, cut shallower and add another kerf rather than cutting deeper.
Installation Benefits
Relieved architrave installs noticeably easier. It sits flat against walls that are not perfectly straight, it takes nails without the face distorting, and it stays put through seasonal humidity swings instead of opening gaps at the edges. Nail through the solid sections between kerfs where possible, so the fastener bears on full-thickness wood. Use construction adhesive in addition to nails on wide architrave; the adhesive bonds the relieved back to the wall and the kerfs actually improve the bond by giving the adhesive more surface and slight mechanical keying. Caulk the wall-side joint after installation for a crisp paint line, and the relieved trim will hold that line through the seasons.
When Kerfing Is Not Enough
Kerfing relieves stress and adds conformability, but it cannot fix badly warped stock or bridge large wall irregularities. Inspect each length before kerfing: pieces with severe twist or bow should be rejected or cut into shorter lengths, since kerfing a twisted board just gives you a relieved twisted board. For walls that wave significantly, scribe the architrave to the wall or shim behind it; kerfing complements these techniques but does not replace them. And remember that kerfing is for the back only; the face must remain pristine. A well-kerfed, well-installed hardwood architrave looks like it grew around the door, which is exactly the effect wide trim is supposed to achieve.
Back-relief kerfing lets wide hardwood architrave lie flat and stay flat: shallow lengthwise kerfs on the back face, kept clear of the profile's thin spots, cut before finishing. Invisible, quick, and the reason good trim work still looks good years later.
Related Guides
- Coping Inside Corner Joints on Baseboard Trim: Inside corners in baseboard look simple until you try to miter one: two 45-degree cuts that meet perfectly in theory and gap in practice, because
- Scribing Apron Miters Against Out-of-Plumb Walls: A window or door apron that looks crisp on the bench and sloppy on the wall almost always lost the fight at the scribe line. Walls lean, corner beads
- Compound Miter Scribing for Crown Return Terminations: Crown molding has to die into something at the end of a run: a wall, a cabinet, or a return that folds the profile back on itself. A return