
Quadruped robots live on carbon fiber tubes: light, stiff, and easy to source. But tubes alone make a floppy structure; the joints where tubes meet are where stiffness is won or lost. Gussets, small reinforcing plates bonded across tube joints, transform a collection of tubes into a rigid chassis. The bonding is the whole game: a gusset is only as good as its adhesive joint, and carbon fiber's particular surface chemistry makes that joint trickier than bonding aluminum or wood. Get the bonding right and the quadruped's legs track precisely; get it wrong and the joints creep, crack, and fail under dynamic loads.
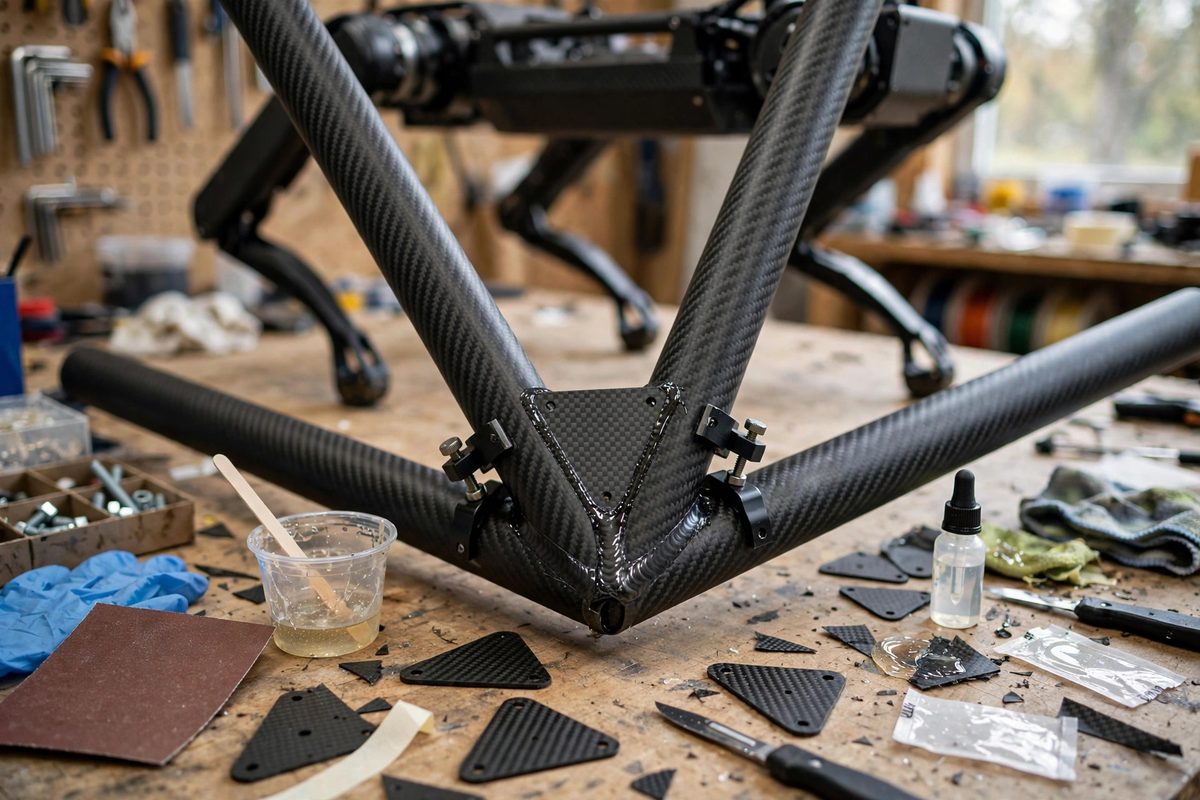
Why Joints Need Gussets
A tube-to-tube joint bonded end-to-end or at an angle concentrates all the load transfer through a small adhesive area, and adhesive in a small area sees high shear and peel stresses. Quadruped legs amplify this: every footstep sends an impact up the leg, the hip joints see reversing bending moments with each stride, and the whole chassis vibrates. A gusset spreads the load transfer over a much larger bonded area and, critically, converts peel stresses into shear: the gusset plate bonded along the tube's side loads the adhesive primarily in shear, which adhesives handle well, instead of in peel, which they handle poorly. The gusset also adds a second load path, so the joint is redundant rather than single-point. On a dynamic machine that falls over, gets kicked, and runs into furniture, redundancy is not luxury.
Surface Preparation: The Non-Negotiable Step
Carbon fiber composites bond poorly without surface preparation, because the tube's outer surface is cured epoxy resin, smooth, glossy, and chemically inert, sometimes with mold-release residue from manufacturing. Adhesive applied to that surface grabs the glossy skin, not the structure, and the joint fails at low load with the adhesive peeling cleanly off. The preparation is mechanical abrasion: sand the bonding areas with medium-fine abrasive until the gloss is gone and the surface is uniformly matte, exposing fresh resin with tooth for the adhesive. Sand only the bonding zone, and do not cut into the fibers: breaking surface fibers weakens the tube wall. After sanding, clean thoroughly with a solvent that leaves no residue, isopropyl alcohol is the standard, wiping with a clean cloth and letting it flash off completely. Bond promptly after preparation; a prepared surface left sitting re-contaminates from the air and handling. Wear gloves from the sanding step onward: skin oils are a premier bond-killer.
Adhesive Selection
The adhesive must bond to abraded epoxy, tolerate the chassis's operating temperatures, and handle dynamic shear and peel. Toughened structural epoxies are the default: they bond well to prepared composite, have good peel resistance from their toughening agents, and cure to a rigid joint that matches the chassis stiffness. Avoid brittle un-toughened epoxies for dynamic joints; they crack under impact. Polyurethane adhesives offer more flexibility and better gap-filling but lower stiffness, a reasonable choice for joints that need some compliance. Cyanoacrylate is tempting for its speed but brittle and poor in peel: fine for tacking parts in position before the real adhesive goes on, not for structural joints. Whatever the choice, respect the cure: full strength needs full cure time at adequate temperature, and a joint loaded before cure is a joint that fails early.
Gusset Design and Fit-Up
The gusset's geometry determines how well it does its job. Size the gusset to provide generous bonded area along each tube, extending well past the joint in both directions; short gussets concentrate stress at their ends, which is merely relocating the problem. Match the gusset to the tube's curvature: a flat plate bonded to a round tube contacts only along a line, starving the joint of area. Use gussets formed or machined to nest against the tube, or bond the gusset to a flattened or filled section. Control the bond-line thickness: too thin starves the joint, too thick weakens it, with a thin, uniform layer, roughly the thickness of a sheet of paper to a business card, being the target. Achieve this with light, even clamping pressure during cure, not crushing force, which squeezes out the adhesive. Dry-fit everything before mixing adhesive; the working time is for bonding, not for figuring out the assembly.
Testing Before Trusting
A quadruped chassis earns trust through testing, not through adhesive datasheets. After full cure, load each joint by hand well beyond expected service loads, feeling for creep, cracking sounds, or visible separation. Then run the robot: walking, turning, and the inevitable falls, while inspecting the joints afterward. Pay special attention after the first real impacts, because impact loads find the weak bonds that static loads miss. If a joint fails, diagnose honestly: adhesive still stuck to one side means surface prep failure; adhesive split through its own thickness means the joint was overloaded or the adhesive was wrong; tube damage means the gusset transferred load into a tube section that needed reinforcement. Fix the cause, not the symptom, and re-test. A chassis that survives its test program will survive its service life.
Gusset bonding on carbon tube quadrupeds comes down to preparation, adhesive choice, and geometry: abrade to matte, clean without touching, bond with toughened epoxy in a thin uniform line, and size the gusset for real bonded area. Test hard, inspect honestly, and the chassis will outlast the electronics bolted to it.
Related Guides
- Monocoque Carbon Layup Thickness for Robot Pods: A monocoque robot pod, where the carbon fiber shell itself is the structure rather than a skin over a frame, offers the best strength-to-weight ratio
- Torsional Rigidity in 6061 Extruded Frames: Robot chassis built from 6061 aluminum extrusion are easy to assemble and tempting to under-engineer. The failure mode that bites is rarely bending
- Triangulated Space Frame Bracing for Tubular Rovers: A tubular rover chassis built from straight tubes and simple joints has a natural enemy: the rectangle. Four tubes joined in a rectangle will fold
- Torsional Deflection Testing on Box Extrusions: Robot chassis built from aluminum box extrusions are stiff in bending and surprisingly willing to twist, and twist is what ruins precision. A chassis