
The hamon, the visible line separating hardened edge from softer spine, is the signature of a differentially hardened blade. On 1095 steel, the clay coating controls where the quench hardens and where it does not, and the thickness of that clay decides whether the hamon is a crisp defined line or a muddy suggestion. Getting the clay right is a craft of its own.
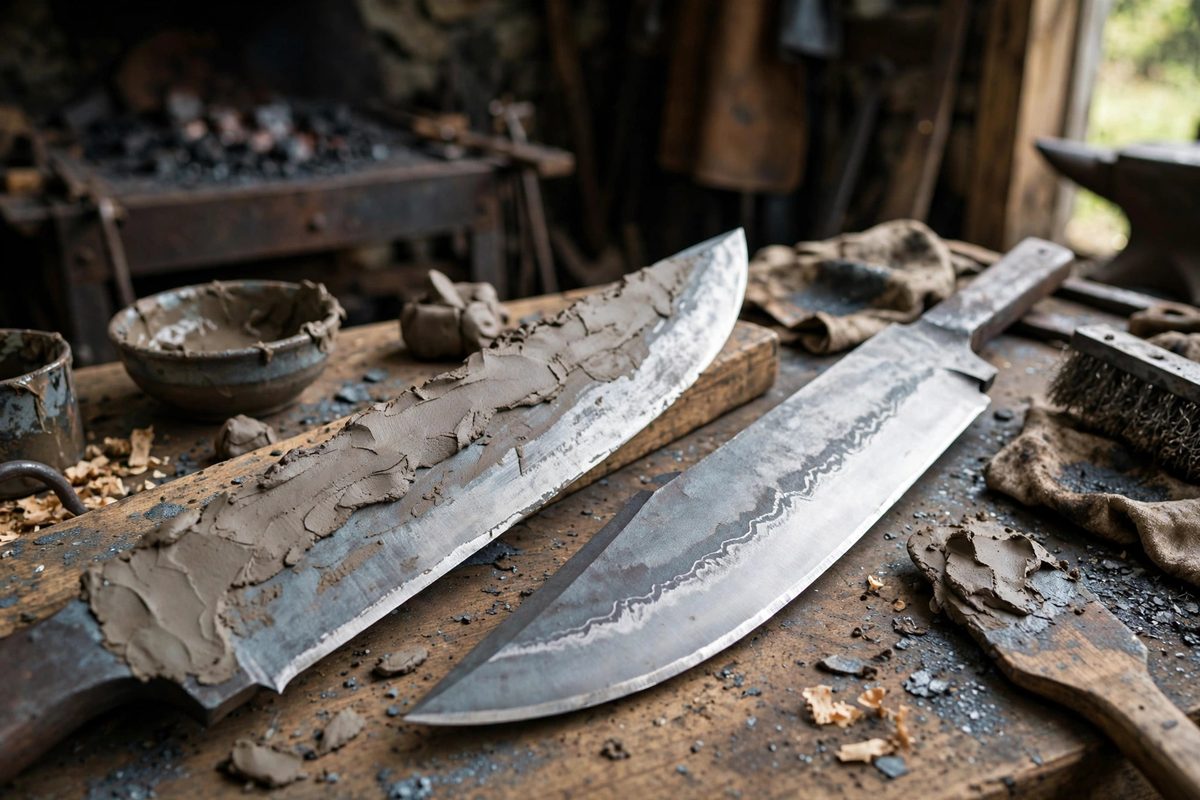
How the Clay Creates the Hamon
Clay on the spine insulates it during the quench, slowing the cooling rate below the critical speed so the spine forms softer pearlite instead of hard martensite. The exposed edge cools fast and hardens fully. The hamon marks the boundary between these two zones. Clay thickness controls the insulation: thin clay slows cooling only slightly, letting hardness creep up the blade, while thick clay insulates strongly and keeps the transition low and sharp. The line you see after polishing and etching is the physical record of where the cooling rate crossed the critical threshold.
Thickness Guidelines
A practical starting point is a thin wash over the whole blade, roughly a millimeter or less, with a thicker buildup along the spine, around three to six millimeters, feathered down toward the intended hamon line. The feathered transition zone is where the art lives: an abrupt thick-to-thin step produces a harsh straight line, while a gradual taper lets the hamon develop organic activity, the wisps and clouds that make a hamon beautiful. Apply the clay in layers, letting each dry, rather than one thick glob that cracks and falls off in the quench. The edge itself stays bare or nearly so for maximum hardness.
Clay Composition and Adhesion
The clay mix must stick through heating and survive the quench without spalling off. Traditional mixes combine clay with ash, charcoal powder, or other refractory material that prevents cracking as the coating dries and heats. The blade must be clean and slightly roughened for adhesion; oil or scale under the clay guarantees it lets go at the worst moment. Dry the coated blade thoroughly before heating, because steam from wet clay blows the coating off in the forge. A cracked clay coat in the quench produces a hamon that follows the cracks, which is rarely the look anyone wanted.
Quench Technique With Clay
Heat the blade evenly to the target temperature, watching the clay-covered spine and the bare edge come up together; uneven heating moves the hamon regardless of clay thickness. Quench edge-first with a smooth, decisive motion, and keep the blade moving slightly in the quenchant to break up vapor pockets. The clay's job is insulation, but agitation still matters at the exposed edge. Do not dawdle between the forge and the quench; the spine under thick clay holds heat longer, but the bare edge loses it fast, and a slow transfer softens the edge you worked to harden.
Revealing and Evaluating the Hamon
After tempering, the hamon hides under the quench scale and needs hand sanding and etching to reveal. Sand progressively to a fine finish, then etch lightly; the hardened and soft zones etch at different rates and the line appears. If the hamon is too high or too diffuse, the clay was too thin or the transition too gradual; if it is harsh and straight, the step was too abrupt. Each blade teaches the next coating. Keep notes on clay thickness, mix, and the resulting hamon, because the knowledge compounds and the tenth blade benefits from the first nine.
Defined hamons come from deliberate clay: thin at the edge, thick at the spine, feathered between, dried hard, and quenched decisively. The line that emerges from the etch is the record of every decision you made with the brush.
Related Guides
- Differential Clay Quenching for Clean Hamons: The hamon, the visible line separating the hardened edge from the softer spine on a differentially hardened blade, is both beautiful and functional
- Normalizing High Carbon Steel Before Quenching: Between forging a blade and hardening it lies a heat treatment step that beginners routinely skip and experienced smiths never do: normalizing
- Forging Tapered Tangs on High Carbon Hunting Knives: A tapered tang, thinning from the blade toward the butt, is the mark of a well-made hunting knife. It moves the balance point forward toward the