
The hamon, the visible line separating the hardened edge from the softer spine on a differentially hardened blade, is both beautiful and functional: a hard edge that holds sharpness backed by a tough spine that absorbs shock. The traditional method uses clay: coat the spine thickly, leave the edge thinly coated or bare, and quench. The clay insulates the spine so it cools slowly into softer structures while the edge transforms to hard martensite. A clean, vivid hamon comes from controlling the clay, not from luck.
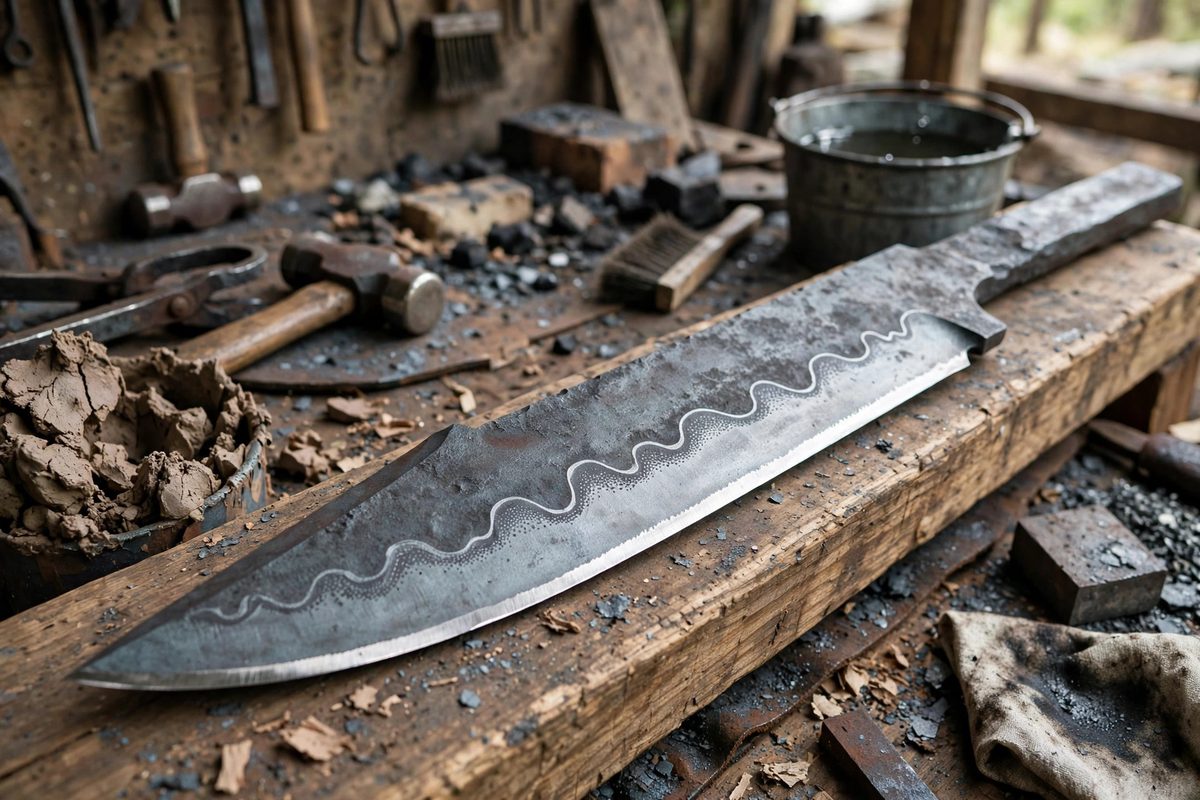
How the clay creates the differential
Quenching is a race between cooling rate and steel transformation. The thinly coated edge sheds heat instantly into the quenchant and converts fully to martensite (hard). The thickly coated spine cools slowly, giving the steel time to form pearlite and other softer structures (tough). The hamon marks the boundary between these cooling regimes. Its character, wispy or bold, straight or active, is set by the clay's thickness profile along the blade: a sharp transition in clay thickness makes a crisp hamon line, while a graduated transition makes a soft, cloudy one.
Clay mixture and application
The traditional clay mixture combines clay, charcoal powder, and sometimes crushed stone or other refractory material; the additives prevent cracking and control insulation. Modern smiths use various refractory mixtures with equal success; what matters is that the coating adheres through the quench without flaking off. Apply the spine coat thickly, roughly an eighth of an inch or more, tapering it toward the edge in the pattern you want the hamon to follow. The edge gets a thin wash or nothing at all. Let the coating dry completely before heating; wet clay steams explosively in the forge and blows off the blade.
Designing the hamon pattern
The hamon's shape follows the clay's edge: a straight clay line gives a straight hamon, while an undulating or pointed clay edge produces the classic wave and mountain patterns. Paint the pattern deliberately with the clay's taper; the transition zone's width determines the hamon's activity. Keep the pattern consistent on both sides of the blade, since asymmetric clay gives an asymmetric hamon that looks like a mistake. Mark the intended pattern on the blade first and follow it; freehand clay application drifts.
Heating and quenching
Heat the blade evenly to the steel's critical temperature, watching for the shadow of the transformation (decalescence) and confirming with a magnet if needed; the whole blade must reach temperature uniformly, since cold spots will not harden regardless of clay. Quench decisively in the appropriate quenchant for the steel, edge-first, with no hesitation; fumbling the quench is the most common cause of a failed hamon. The clay must stay adhered through the quench; if it flakes off the spine, that area hardens fully and the hamon is lost there. After quenching, temper promptly; the hardened edge is brittle and stressed.
Revealing and evaluating the hamon
The hamon appears during finishing: hand-sand the blade through progressively finer grits, then etch lightly to reveal the differential structure. A clean hamon shows as a distinct, bright line with visible activity (the cloudy martensite structures) along the edge side. If the hamon is faint or absent, the usual causes are uneven heating, clay failure during quench, or a steel that does not show hamons well (shallow-hardening steels like 1095 and W2 show them best; deep-hardening steels barely do). Each blade teaches; log the clay pattern, steel, and result.
Coat with intent, dry completely, heat evenly, quench decisively, and reveal patiently. The hamon is the record of everything done right.
Related Guides
- Clay Coat Thickness for Defined Hamons in 1095 Steel: The hamon, the visible line separating hardened edge from softer spine, is the signature of a differentially hardened blade. On 1095 steel, the clay
- Normalizing High Carbon Steel Before Quenching: Between forging a blade and hardening it lies a heat treatment step that beginners routinely skip and experienced smiths never do: normalizing
- Forging Tapered Tangs on High Carbon Hunting Knives: A tapered tang, thinning from the blade toward the butt, is the mark of a well-made hunting knife. It moves the balance point forward toward the