
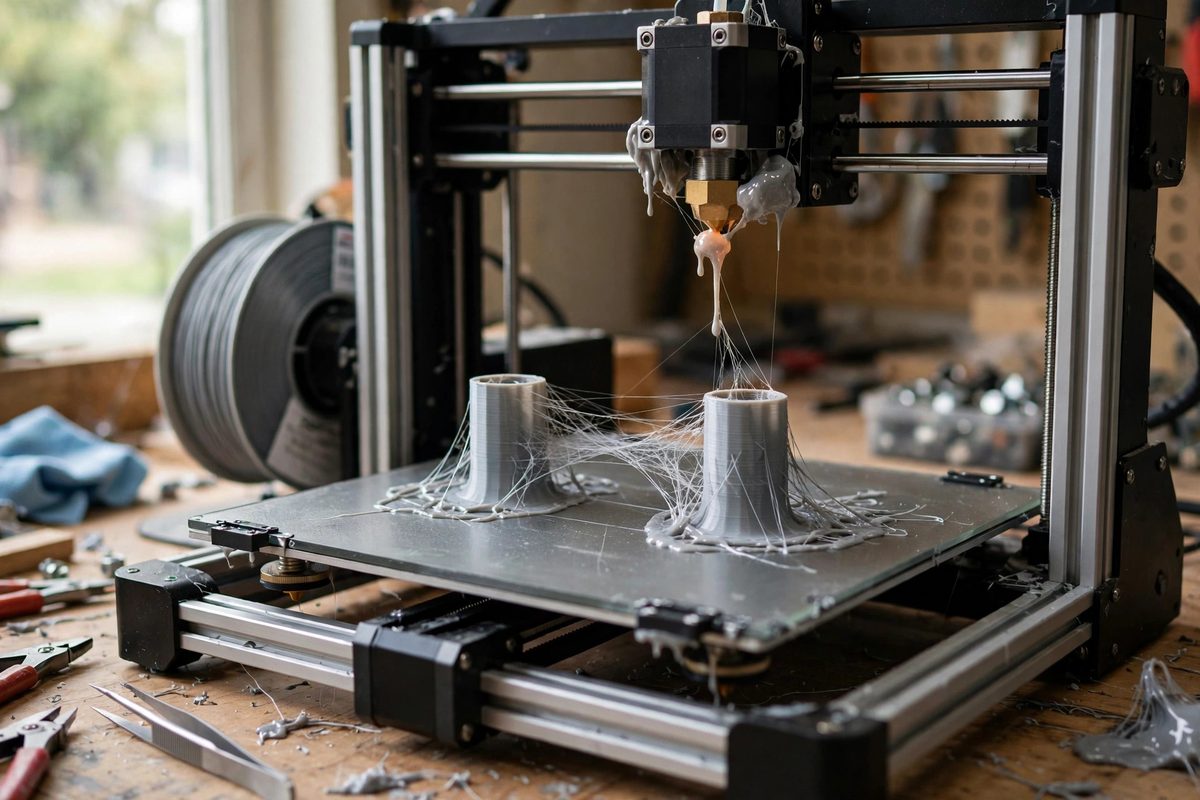
Stringing, the fine cobwebs of plastic stretching between separate parts of a print, is oozing made visible: molten filament leaking from the nozzle during travel moves. Retraction is the usual fix, but it is not the only one, and on some materials it is not the best one. Coasting, stopping the extruder slightly before the end of a printed segment so the residual pressure finishes the line, attacks stringing at its source: the pressure built up in the hotend that keeps pushing plastic out after the extruder stops. Tuned correctly, coasting eliminates the ooze that retraction alone cannot.
Why Pressure Causes Stringing
The hotend is a pressurized system during printing. The extruder pushes filament in, the melt zone resists, and pressure builds; when the extruder stops at the end of a segment, that residual pressure continues pushing molten plastic out the nozzle during the travel move. The result is a string dragged across the gap. Retraction relieves pressure by pulling filament back, but it acts after the fact and cannot fully cancel the pressure already in the melt.
Coasting works before the fact. By stopping extrusion a short distance before the segment ends, it lets the residual pressure do the last bit of extruding, so that by the time the nozzle lifts for travel, the pressure is spent and there is nothing left to ooze. It is the difference between braking early and slamming the brakes at the line.
Setting the Coast Distance
Coast distance, the length of the segment's end printed on residual pressure, is the primary setting. Start small, around a few tenths of a millimeter, and increase until stringing diminishes. Too little coasting leaves pressure unspent and strings persist; too much starves the segment's end, leaving gaps and weak seams where the line ran dry before reaching its endpoint.
The right distance depends on the material and temperature: runny materials at high temperatures build more pressure and benefit from longer coasts, while stiff materials need less. It also interacts with print speed; faster printing builds more pressure, shifting the optimal coast longer. Tune it for the material and profile you actually use, not from a generic recommendation.
Coasting Versus Retraction
Coasting and retraction are complementary, not competing. Coasting handles the pressure at the segment's end; retraction handles the nozzle's state during travel. Used together, a moderate coast plus a moderate retraction typically outperforms an aggressive retraction alone, with less wear on the extruder and less risk of the grinding and heat-creep issues that excessive retraction causes.
- Enable coasting before increasing retraction; it addresses the cause more directly.
- Reduce retraction slightly when adding coasting; the two overlap and overdoing both starves the print.
- Watch the seam quality as you tune; coasting's failure mode shows at the segment ends.
- Different materials want different balances; flexible filaments often prefer more coast and less retraction.
Wipe as the Third Partner
Many slicers offer a wipe move, dragging the nozzle a short distance along the just-printed path after extrusion stops, which smears any residual ooze back onto the print instead of letting it string across the gap. Wipe combines naturally with coasting: the coast spends the pressure, and the wipe cleans up whatever remains. Together they handle the travel transition about as well as current slicing technology allows.
Set the wipe distance modestly; an excessive wipe drags the nozzle across already-printed material and can scar the surface. The wipe should just kiss the segment's end, not travel it.
Testing Methodically
Print a stringing test model, the classic two-tower or comb shape, with one variable changed at a time. Start from your current profile, enable a small coast, and print; evaluate the strings and the seam quality together, since coasting trades one against the other. Increase the coast in steps until strings are gone or seams suffer, then back off to the best compromise.
Record the winning settings per material. Coasting tuned for PLA will not suit PETG, and neither suits TPU; each material's pressure behavior is its own, and the slicer profile should reflect that. The test print takes twenty minutes; the clean prints it enables last the whole spool.
Coast to spend the pressure, retract moderately to secure the nozzle, wipe to clean the transition, and test per material. Stringing is pressure escaping where it should not; coasting is pressure spent where it should be.
Related Guides
- Adaptive Layer Heights for Organic Curves: Organic curves, the smooth domes, fillets, and freeform surfaces on a model, are where fixed layer heights show their weakness. Print a curved
- Seam Placement Optimization for Cylindrical Shells: Every 3D print has a seam: the point where each layer's perimeter starts and stops, leaving a tiny vertical scar. On a box you can hide it in a
- Scarf Joint Seam Alignment on Precision Cylinders: The seam, where each printed layer starts and stops, is the visible scar on an otherwise smooth 3D print. On precision cylinders, like bearing
- Z-Hop Height Tuning to Prevent Thin Wall Collisions: Z-hop lifts the nozzle during travel moves so it does not drag across already-printed plastic, and thin walls are where that protection matters most