
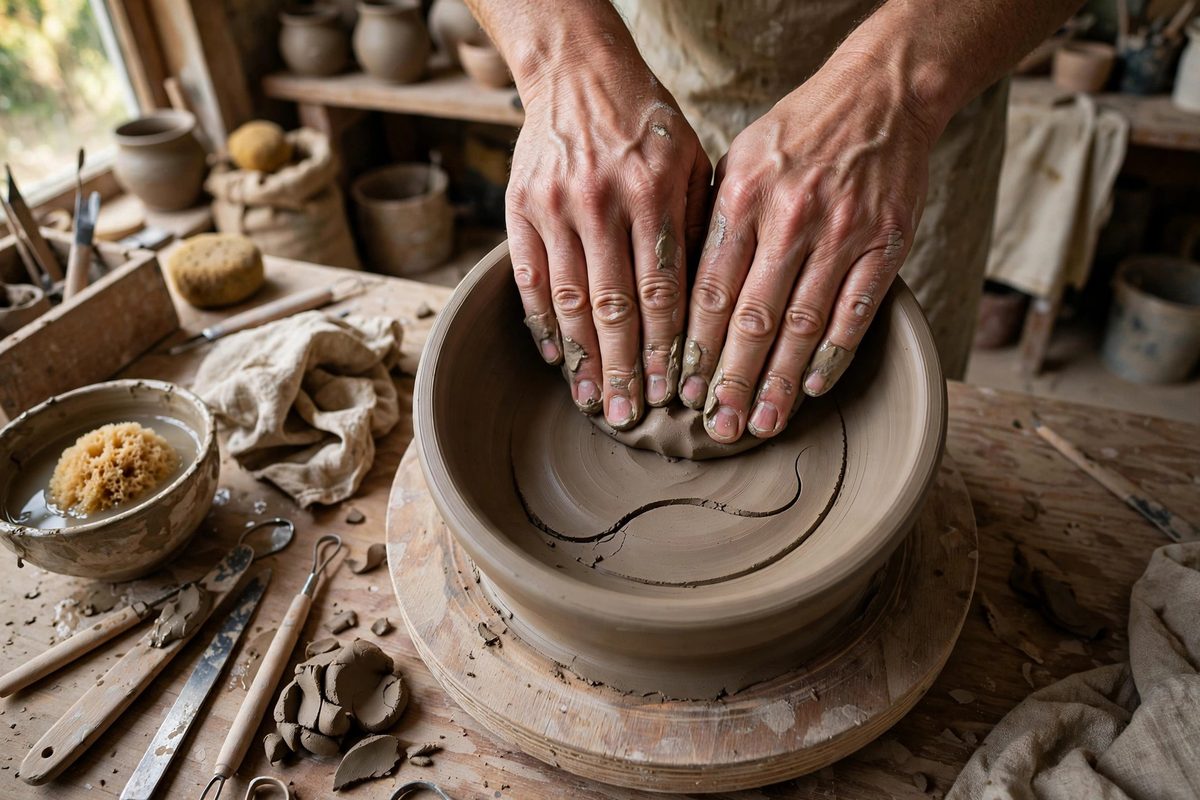
S-cracks are the spiral fractures that open in the bottom of thrown pots during drying or firing, shaped like a lazy S across the base. They are not a glaze problem or a firing problem; they are a throwing problem, and the fix happens at the wheel in the first two minutes of the pot's life. The bottom of the pot is under more stress than any other part, and unless the clay particles there are compressed into a tight, aligned structure, water leaves unevenly, the base warps, and the crack follows the spiral of the wheel head.
Why the Base Cracks and the Walls Do Not
When clay is thrown, the wheel spins it in one direction, and the spiral of that rotation gets locked into the base, especially in the thick clay where the bottom meets the wall. As the pot dries, the base shrinks more than the thinner walls, and the spiral becomes a stress concentrator: the crack runs along the path of least resistance, which is the spiral itself.
Compression changes the structure. Pressing the clay particles down and inward squeezes out excess water and aligns the plate-like clay particles flat against each other, which makes the base denser and more uniform. A well-compressed base dries evenly because there is no loose, waterlogged zone shrinking faster than the rest. The walls rarely S-crack because pulling thins them and aligns their particles naturally; the base gets no such treatment unless you give it deliberately.
The Compression Sequence
After centering and opening, before you start pulling walls, compress the floor. With the wheel turning at moderate speed, press down firmly with the heel of your hand or your knuckles on the interior floor of the pot, working from the center outward to the corner where floor meets wall. Then compress the outside base with a rib, pressing the clay inward and slightly down around the exterior bottom edge.
The pressure should be firm enough to feel the clay densify, but not so aggressive that you thin the floor out. A floor that is too thin dries faster than the walls and can crack for the opposite reason. The goal is density, not thinness: same thickness, tighter structure.
Reading the Floor as You Work
A properly compressed floor looks and feels different. It has a smooth, almost burnished surface with no soft, pillowy spots when you press a fingertip into it. The thickness should be even across the whole base: press through the wall from the outside with one finger while your other hand is inside the pot, and check that the pinch feels the same everywhere.
- Check the center: throwers often leave a thick lump in the middle of the floor, which dries slowest and pulls the crack open.
- Check the corner: the inside corner where floor meets wall collects water during throwing, so sponge it out and compress it specifically.
- Check the outside: run a rib around the exterior base to compress and true it, since the outside is what the kiln shelf sees.
- Do not leave standing water in the bottom of the pot between steps; it soaks back in and undoes the compression.
Water Management Matters as Much as Pressure
Compression fights a losing battle if the base is waterlogged. Every pass with wet hands adds water that the clay must later give up, and the base, being thickest, holds onto it longest. Use as little water as the clay will tolerate, and sponge out the interior bottom after opening rather than leaving a puddle to soak in.
Wire the pot off the wheel cleanly with a taut wire, and do not leave the pot sitting on a wet bat. A damp bat wicks water back into the base from below, re-softening exactly the zone you compressed. Move the pot to a dry ware board promptly, or cover the bat with a dry cloth before setting the pot down.
Drying the Base Evenly
Even a well-compressed base will crack if one side dries faster than the other. Dry pots upside down for the first stage so the base is exposed to air, or at least turn the pot regularly. Avoid drafts and direct heat on the base; a pot near a heater or in a sunbeam dries from the outside in, and the differential shrinkage is exactly what opens S-cracks.
Covering the pot loosely with plastic slows the whole process and gives the thick base time to keep pace with the thinner walls. Slow, even drying is the quiet partner of compression: compression makes the clay uniform, and slow drying lets that uniformity pay off.
Compress the floor every time, manage the water, and dry with patience. S-cracks are one of the most preventable defects in throwing, which is both the good news and, when they appear, the frustrating part. The fix is always in the first minutes at the wheel.
Related Guides
- Scoring and Slumping Slab Joints Without Cracking: Slab-built pottery joins flat pieces of clay into three-dimensional forms, and every joint is a potential crack. The joint fails when the two pieces
- Internal Chamfer Ribbing for Tall Coil Built Vessels: Tall coil-built vessels want to slump, belly out, or crack at the coil joints as they rise. Internal chamfer ribbing, a series of angled ribs worked
- Paddle Beating Slabs to Relieve Internal Drying Shear: A clay slab looks uniform but often is not: rolling and handling leave internal stresses, with the top and bottom surfaces compressed differently