
Slab-built pottery joins flat pieces of clay into three-dimensional forms, and every joint is a potential crack. The joint fails when the two pieces do not truly bond: they dry at different rates, shrink apart, and separate along a clean, heartbreaking line. Scoring and slipping, scratching the joining surfaces and wetting them with clay slurry, is the standard bonding method, but the technique only works when the details are right. Understanding why joints crack turns score-and-slip from a ritual into a reliable weld.
Why slab joints crack
A clay joint is a marriage of two pieces that must shrink together as they dry. Cracking happens when they do not: one piece dries and shrinks while the other is still wet and large, and the differential movement tears the bond. The usual causes are joining pieces at different moisture levels (a leather-hard slab to a wet slab), joining pieces of different thickness (thin dries faster than thick), and failing to create a true clay-to-clay bond, leaving the pieces merely stuck together rather than welded. Slumping, the gentle sagging of a slab under its own weight, adds a mechanical stress: if a joint is weak, the slab's own weight pulls it apart as it slumps over a form. Every anti-crack measure addresses one of these causes: matched moisture, matched thickness, genuine bonding, and support during the vulnerable stage.
Scoring and slipping properly
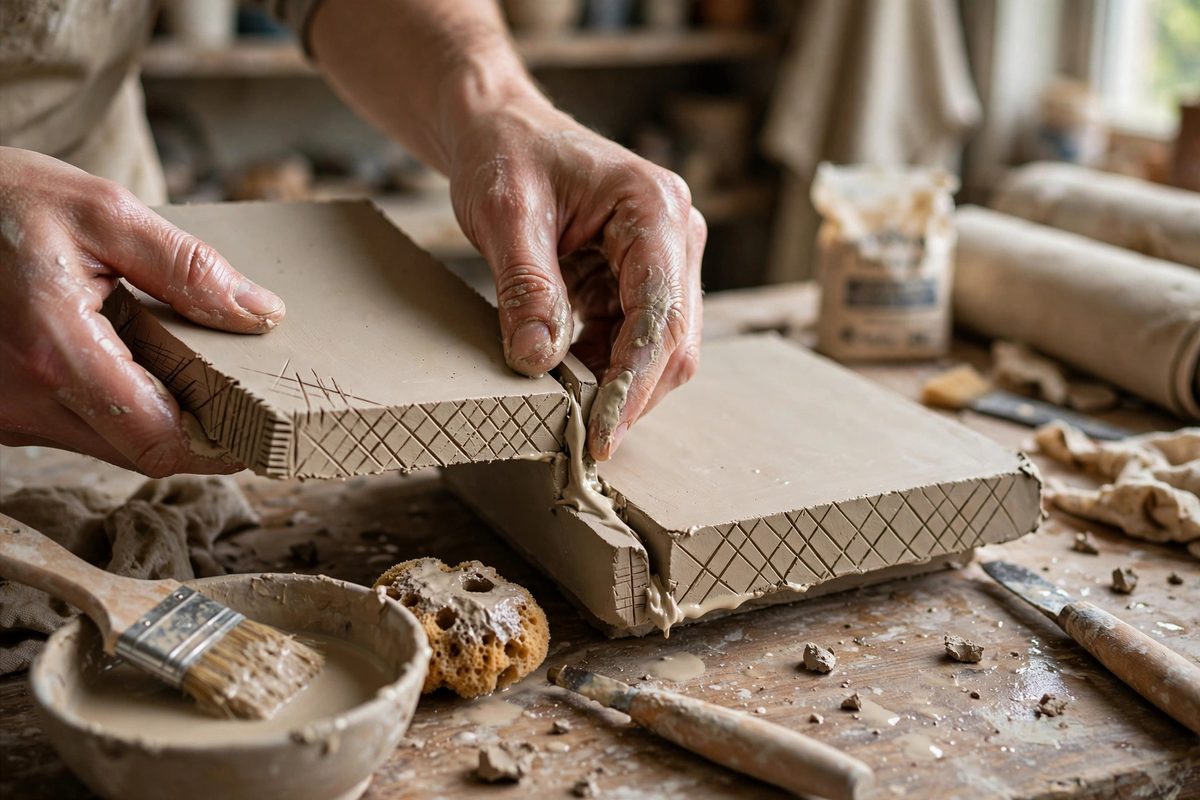
Score both joining surfaces, not just one: crosshatch scratches with a serrated rib or a pin tool, deep enough to create real tooth but not so deep they weaken the slab. The scratches multiply the surface area and give the slip something to key into. Then apply slip, a slurry of the same clay body, to both scored surfaces; the slip must be the same clay as the slabs, because different bodies shrink differently and a foreign slip creates its own differential. Press the pieces together firmly, working out air pockets, and then reinforce the joint: add a small coil of soft clay along the inside of the joint and blend it in, which thickens the connection and gives it material to draw on as it shrinks. Clean up the outside with a rib, compressing the joint rather than just smoothing it; compression aligns the clay particles across the bond and strengthens it measurably.
Matching moisture and thickness
Join pieces at the same stage of dryness: both soft leather-hard is ideal, stiff enough to handle, wet enough to bond. If one piece has dried further than the other, wrap the drier piece to slow it or mist it lightly to bring it back; do not soak it, which creates the opposite mismatch. Keep slab thickness consistent across joined pieces, or at least avoid joining very thin to very thick, since the thin piece will always win the drying race. When a design requires different thicknesses, dry the assembly slowly and evenly to minimize the differential. These are not fussy rules; they are the physics of the joint, and every cracked seam in the drying room is a lesson in which one was ignored.
Supporting slabs against slumping
Fresh slab joints are weak, and gravity is patient. Support the form during construction and drying: build over or inside molds, prop walls with soft supports, and avoid moving the piece until the joints have firmed up. When slumping a slab over a form deliberately, as in a platter or shallow bowl, the joint areas need particular attention, since the slumping action stresses exactly the bonds you just made. Let the piece set up to leather-hard on its support before moving it; premature handling flexes the joints and starts cracks that appear days later. Dry the finished piece slowly under loose plastic, which equalizes the drying rate across thick and thin sections and gives every joint its best chance. Fast drying is the enemy of every joint in the piece.
Reading and rescuing joints
Inspect joints as the piece dries: hairline cracks appearing along a seam mean the bond is failing, and early intervention can save it. Re-wet the crack lightly, work slip into it, compress it closed, and slow the drying further. A crack caught at the hairline stage often heals invisibly; the same crack ignored becomes a structural failure. After bisque firing, small joint cracks can sometimes be filled, but a joint that failed in drying will always be the weak point of the piece. The honest approach is prevention: matched pieces, real scoring and slipping, compression, support, and slow drying. Joints made this way survive the kiln and the years; joints made hastily do not.
Score both sides, slip with the same clay, compress the bond, match the moisture, support the form, and dry slowly. The joint is a weld, not a glue joint, and welds hold when they are made with full commitment.
Related Guides
- Compressing Base Clay to Stop S-Cracks in Pots: S-cracks are the spiral fractures that open in the bottom of thrown pots during drying or firing, shaped like a lazy S across the base. They are not
- Internal Chamfer Ribbing for Tall Coil Built Vessels: Tall coil-built vessels want to slump, belly out, or crack at the coil joints as they rise. Internal chamfer ribbing, a series of angled ribs worked
- Paddle Beating Slabs to Relieve Internal Drying Shear: A clay slab looks uniform but often is not: rolling and handling leave internal stresses, with the top and bottom surfaces compressed differently