
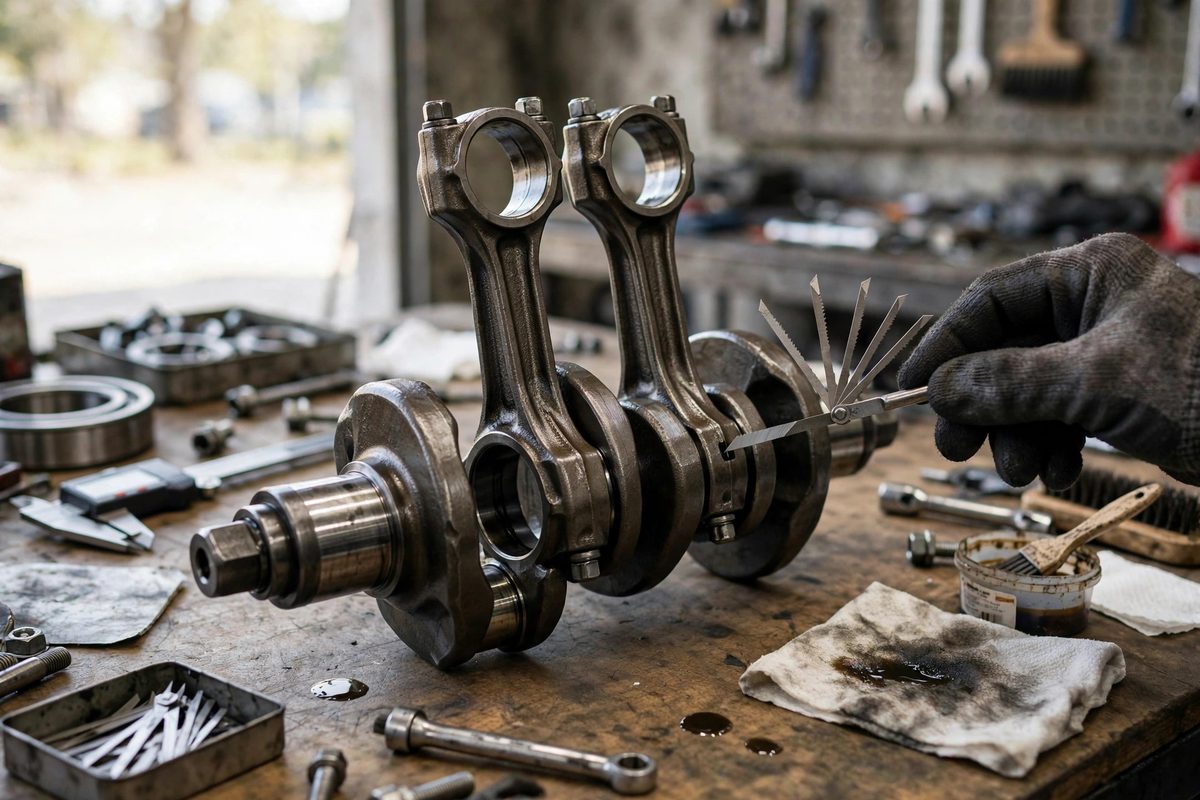
When two connecting rods share a single crankshaft pin, as they do on most V8s, the side clearance between them is a small measurement with large consequences. Too tight and the rods bind, overheat, and scuff; too loose and the rods hammer sideways, the engine rattles, and oil control suffers. Sizing this clearance correctly is a standard part of any careful engine rebuild.
What Side Clearance Does
Side clearance is the axial play between the sides of the connecting rod big ends and the cheeks of the crankshaft, or between paired rods on a shared pin. It serves two purposes. First, it gives the rods room to move slightly as the crank flexes and as thermal expansion changes dimensions; without that room, the rods would bind against the crank cheeks. Second, it meters oil: the clearance lets a controlled amount of oil escape from the rod bearings, and that escaping oil is what lubricates the cylinder walls and cools the pistons on many engine designs. The clearance is therefore not just empty space; it is part of the engine's oiling system. This is why both extremes cause trouble: tight clearance starves the splash oiling, and excessive clearance dumps oil pressure.
Measuring the Clearance
Measure side clearance with a feeler gauge set, sliding progressively thicker blades between the rod sides until you find the largest blade that fits without forcing. Measure at several points around the pin, because rods can sit slightly cocked. The measurement is taken with the rods and crank assembled but before the pistons go on, when access is easy. Typical specifications for classic V8 rebuilds fall in the range of roughly ten to twenty-five thousandths of an inch, but always use the specification for the particular engine; performance builds sometimes run slightly more clearance for extra oiling, and some designs are tighter. Record every measurement by cylinder so you can spot the odd one out.
Correcting Tight Clearance
If the clearance is below specification, the usual correction is to machine a small amount from the side of the rod big end. This is precision work done on a surface grinder or mill, removing equal amounts to keep the rod centered; taking material from only one side shifts the rod's position on the pin and can cause piston and bore alignment issues. Remove the minimum needed to reach the middle of the specification range, then deburr and polish the machined surface so no sharp edge remains to scuff the crank cheek. Re-measure after machining. Never file rod sides by hand to gain clearance; hand filing cannot hold the parallelism the bearing needs, and an out-of-square rod side loads the crank cheek unevenly.
Correcting Excessive Clearance
Excessive clearance usually means worn rods, a worn crank, or a mismatched set of parts. If the rods are serviceable but the clearance is over specification, the correct fix depends on the cause. Worn rod sides can sometimes be corrected by replacing the rods; crank cheeks worn from years of rod contact may need welding and regrinding, which is a machine shop job. In a restoration context, resist the temptation to shim the clearance with makeshift spacers; shims change the rod's axial position and can walk out under the pounding loads of the big end. If the clearance is only slightly over and the engine is a mild street build, some builders accept it, since the penalty is extra oil throw-off rather than immediate failure. But large excess clearance hammers the rods sideways and should be corrected properly.
Assembly Habits That Protect the Clearance
Keep the rod sides and crank cheeks surgically clean during assembly; a single piece of grit trapped in the side clearance becomes a grinding compound. Lubricate the sides lightly with assembly lube. When installing the rods on the pin, verify that each rod moves freely side to side by hand before the caps are torqued; a rod that feels tight during hand assembly will be tighter at operating temperature. After final assembly, rotate the crankshaft through several full revolutions and feel for any binding or tight spots. Side clearance is one of those measurements that is easy to check and miserable to fix after the engine is together, so verify it while correction is still cheap.
Side clearance meters oil and accommodates movement; size it to specification with feeler gauges, correct tight rods by careful machining, address excessive clearance at its source, and verify free movement during assembly. Small measurement, big consequences, easy to get right.
Related Guides
- Plastigauge Clearance Checks on Crank Bearings: Crankshaft bearings live on a film of oil thinner than a human hair, and the thickness of that film is set by the clearance between the bearing and
- Piston Ring End Gap Filing for Thermal Growth: Piston rings seal the combustion chamber, but they are split rings with a gap at their ends, and that gap is a critical dimension. Too small and the
- Dial Bore Indicator Calibration on Crank Journals: Crank journals live on clearances measured in thousandths, and the dial bore indicator is the tool that reads them. But the indicator only tells the