
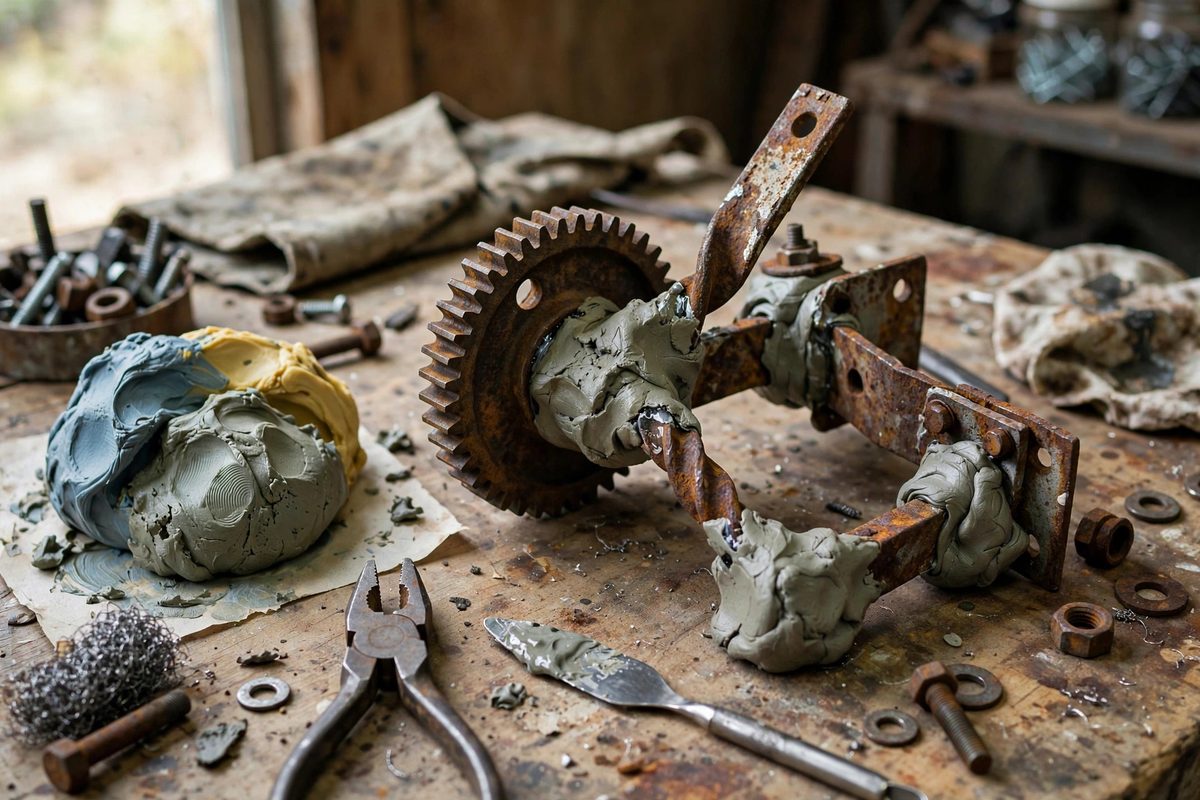
Assemblage lives on found metal: rusted gears, bent brackets, weathered hardware, each with a history and a surface that no adhesive trusts. Epoxy putty, the kneadable two-part compound that cures into a rock-hard mass, bonds to these difficult surfaces better than almost anything, but its real strength in assemblage comes from mechanical anchoring, not just adhesion. Shaping the putty so it physically locks around and through the metal's features creates a joint that holds even when the surface bond eventually lets go. Design for the lock, not just the stick.
Why Found Metal Defeats Simple Gluing
Found metal brings three adhesion enemies: oxidation, which forms a weak powdery layer between the adhesive and the sound metal; contamination, the oil, dirt, and patina of its former life; and smooth or nonporous surfaces that give adhesives nothing to grip. Epoxy putty adheres better than most to these surfaces, but adhesion to rust scale is adhesion to something that is already falling off. The bond is only as good as the layer it grabs.
Mechanical anchoring sidesteps the problem. Instead of relying on the putty sticking to the surface, you shape the putty so it wraps around edges, fills holes, and locks into undercuts, creating a physical capture. Even if the surface bond fails completely, the metal cannot come free without breaking the cured putty. The anchor is geometry, not chemistry.
Preparing the Metal
Preparation still matters, because the anchor works best combined with the best adhesion you can get. Remove loose rust and scale with a wire brush; the putty should meet the most solid surface available. Degrease with a solvent wipe; oil is the universal bond-killer. You do not need bright metal, and on found objects you usually do not want it, but you need stable metal: if the surface crumbles under a fingernail, no anchor design saves it.
Identify the anchor features before mixing: holes the putty can plug through, edges it can wrap, textures it can key into, undercuts it can fill. Plan the putty's shape around these features the way a jeweler plans a setting around a stone's girdle.
Designing the Anchor
The strongest anchor configurations share a principle: the putty must be unable to leave without deforming. Wrapping putty fully around a rod or edge creates a collar that cannot slide off. Pressing putty through a hole and mushrooming it on both sides creates a rivet that cannot pull through. Filling an undercut or a textured recess creates a key that cannot withdraw.
- Use through-holes wherever they exist; a putty rivet through a hole is the most reliable anchor.
- Wrap edges completely rather than buttering one face; one-sided putty peels, wrapped putty locks.
- Build the putty mass generously; thin putty shells crack under load while chunky masses hold.
- Roughen smooth metal where the putty will sit; scratches give the adhesive component something to bite.
Combine multiple anchor types on important joints: a wrap plus a through-hole plug is dramatically stronger than either alone. Redundancy in anchoring is cheap insurance.
Working the Putty
Knead the two parts until the color is completely uniform; unmixed streaks are uncured weak spots. You have a working time measured in minutes, so have the metal prepared and the anchor design clear before mixing. Press the putty firmly into and around the anchor features, working out air pockets that would become voids in the cured mass.
Shape the putty while it is workable, then leave it alone. Fiddling with partially cured putty breaks the forming bonds and weakens the result. Support the assembly so nothing moves during cure; even slight shifting while the putty sets compromises the anchor's fit to the metal's features.
Finishing and Longevity
Cured epoxy putty can be filed, sanded, drilled, and painted, which means the anchor can disappear into the assemblage visually. Sand the cured mass to blend it with surrounding forms, and paint or patinate it to match the found metal's character. The best anchors are invisible: the viewer sees metal joined to metal with no visible means.
For outdoor or high-stress assemblage, consider the putty's limits: it is strong in compression and decent in shear, but brittle under sharp impact compared to the metal it joins. Design anchors that put the putty in compression where possible, and protect exposed putty masses from direct blows. The anchor will outlast the maker's doubts if the geometry is sound.
Clean to stable metal, find the holes and edges, wrap and plug and key, and let the geometry do the holding. Epoxy putty's adhesion is good; its mechanical anchoring, designed deliberately, is what makes found-metal assemblage permanent.
Related Guides
- Mechanical Fastener Cleats for Mixed Media Art: Mixed media assemblage lives or dies by its joins. Glue alone fails on heavy, dissimilar materials: wood to metal, plaster to canvas, found objects
- Fastening Heavy Cast Iron Hardware to Wood Panels: Assemblage art often marries heavy cast iron hardware, old hinges, brackets, gears, escutcheons, to wood panels, and the joint between them carries
- Drilling and Tapping Cast Metals for Mixed Media Beds: Cast metal objects, the old hardware, plumbing fittings, and found fragments that end up in assemblage work, are wonderful as mixed media beds and