
Ceiling drywall joints are the most unforgiving surface in a house. Raking light from windows and fixtures throws every ridge and hollow into relief, and a joint that looked fine on the wall screams from the ceiling. Recessed tapered joints, the factory edges designed to be filled, are the kindest case, but only if the fill is feathered wide and flat. High-build joint compound, formulated to fill deep without excessive shrinkage, is the right material for the job. The technique is all about width, flatness, and patience between coats.
Why ceilings punish bad joints
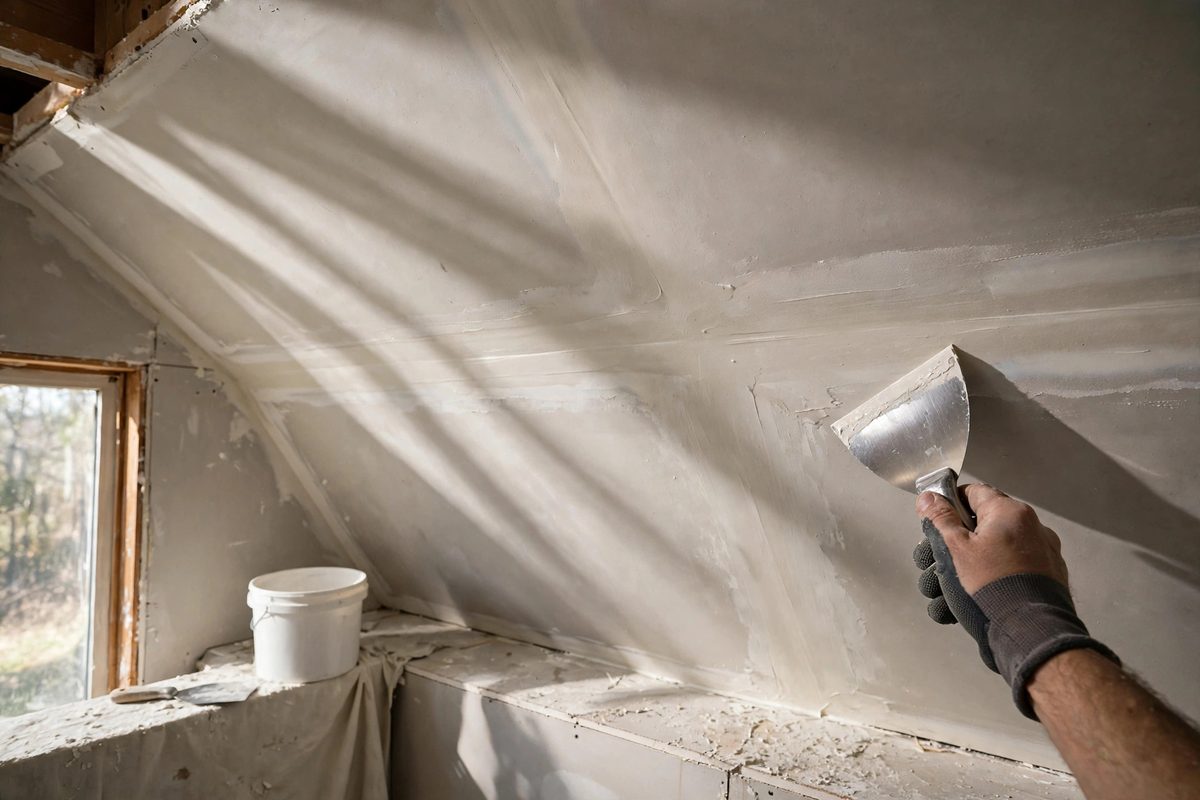
A wall joint is usually viewed straight on, in diffuse light. A ceiling joint is viewed at a grazing angle under directional light, which is the harshest possible inspection. Any deviation from flat, a crown of just a sixteenth of an inch, casts a visible shadow line. Recessed joints help because the tapered edges create a shallow valley that the compound fills flush, rather than a butt joint that must be built up into a wide, flat hump. But the recess only works if you fill it completely and feather the edges far enough that the transition from compound to bare board is gradual. Narrow, thick fills crown. Wide, thin fills disappear. That single principle governs the whole job.
Choosing high-build compound
Standard lightweight compound shrinks as it dries, which means deep fills need many coats to stay flush. High-build formulations contain more solids and shrink less, so each coat leaves more material behind. This matters on ceilings because every additional coat is another round of overhead work and another drying cycle. Use setting-type compound for the fill coats if the schedule allows; it hardens chemically rather than by evaporation, shrinks minimally, and can be recoated as soon as it sets rather than after a full dry. Save the lightweight drying-type compound for the final skim coats, where its easy sanding is an asset. Whatever you choose, mix or pull it to a smooth, creamy consistency with no lumps; lumps trowel into ridges that you will sand off later at the cost of the surrounding fill.
The three-coat sequence
Work the joint in three passes of increasing width. The first coat, the fill, beds the tape and fills the recess; keep it tight to the joint, roughly the width of the recess plus a little, and do not worry about perfection. The second coat, after the first is fully dry or set, extends several inches wider on each side, filling the remaining hollow and beginning the feather. The third coat goes wider still, a broad skim that brings the total feathered width to something like eighteen to twenty-four inches on a ceiling. Each coat should be thinner than the last. The most common error is reversing this: a wide first coat and narrow later coats builds a plateau with a hard edge, exactly the visible defect you are trying to avoid. Between coats, knock down ridges and dried crumbs with the knife, but do not sand aggressively; sanding between coats is for defects, not for leveling, which is the next coat's job.
Knife technique for flat feathering
The knife does the leveling, and pressure control is the skill. Hold the knife nearly flat to the ceiling for the feathering passes, with firm, even pressure that flexes the blade slightly; the blade's flex is what bridges small hollows and shaves small ridges. Work with the joint, not across it, in long smooth strokes, and keep the blade clean, wiping the edge frequently so dried compound does not drag grooves through the fresh coat. Overlap each stroke slightly and avoid stopping mid-joint, since starts and stops leave marks. On the final skim, some finishers thin the compound slightly and pull it almost translucent at the feathered edges; the goal is a transition so gradual that neither eye nor hand can find where compound ends and board begins. Check your work with a straightedge held across the joint and with a raking work light, which reveals what overhead room light hides.
Sanding without ruining the feather
Sand only after the final coat is bone dry, and sand to remove texture, not to reshape the joint. A pole sander with fine abrasive and light pressure is the ceiling finisher's friend; aggressive hand sanding with coarse paper cuts through the feathered edges and exposes the joint line you worked to hide. Sand in the direction of the joint, keep the sander moving, and check constantly with the raking light. The moment the surface feels uniformly smooth and the light shows no ridges, stop. Over-sanding is the great undoer of good coating work: it thins the feathered edges first, recreating the visible transition. Prime before painting, because joint compound and paper face absorb paint differently, and unprimed joints flash through even the best paint as dull bands.
Protecting yourself overhead
Ceiling work is physically punishing, so set up for it. A sturdy platform beats a ladder for long runs, giving you stable footing and both hands free. Wear eye protection; compound drips and sanding dust fall directly toward your face on ceilings. A respirator matters during sanding, since fine gypsum dust hangs in the air of the room. Pace the work and protect your neck and shoulders; fatigue degrades knife control long before you notice, and the joints coated tired are the ones you sand twice.
Flat ceiling joints come from wide feathers, thin coats, and honest raking-light inspection. Fill the recess with high-build compound, widen each coat, keep the knife flat and clean, sand lightly, and prime before paint. The ceiling will not thank you, but nobody will ever notice the joints, which is the entire point.
Related Guides
- Feathering High-Build Mud Over Recessed Ceiling Screws: Ceiling screw heads are unforgiving. Light rakes across a ceiling at a low angle, and every poorly finished screw shows up as a bump, a dip, or a
- Fiberglass Mesh Placement on High Stress Wall Ceilings: Ceilings crack. Gravity, framing movement, and temperature swings all pull at drywall joints overhead, and some spots crack no matter how carefully
- Level Five Drywall Skim Coat Blade Selection: A Level 5 finish, the thin skim coat over the entire drywall surface, is what makes walls look flawless under critical lighting: glossy paint, large
- Paper Tape Embedding Pressure to Prevent Bubble Blisters: Bubble blisters under drywall paper tape, the raised ridges and pockets that appear along a joint after the mud dries, are almost always an embedding