
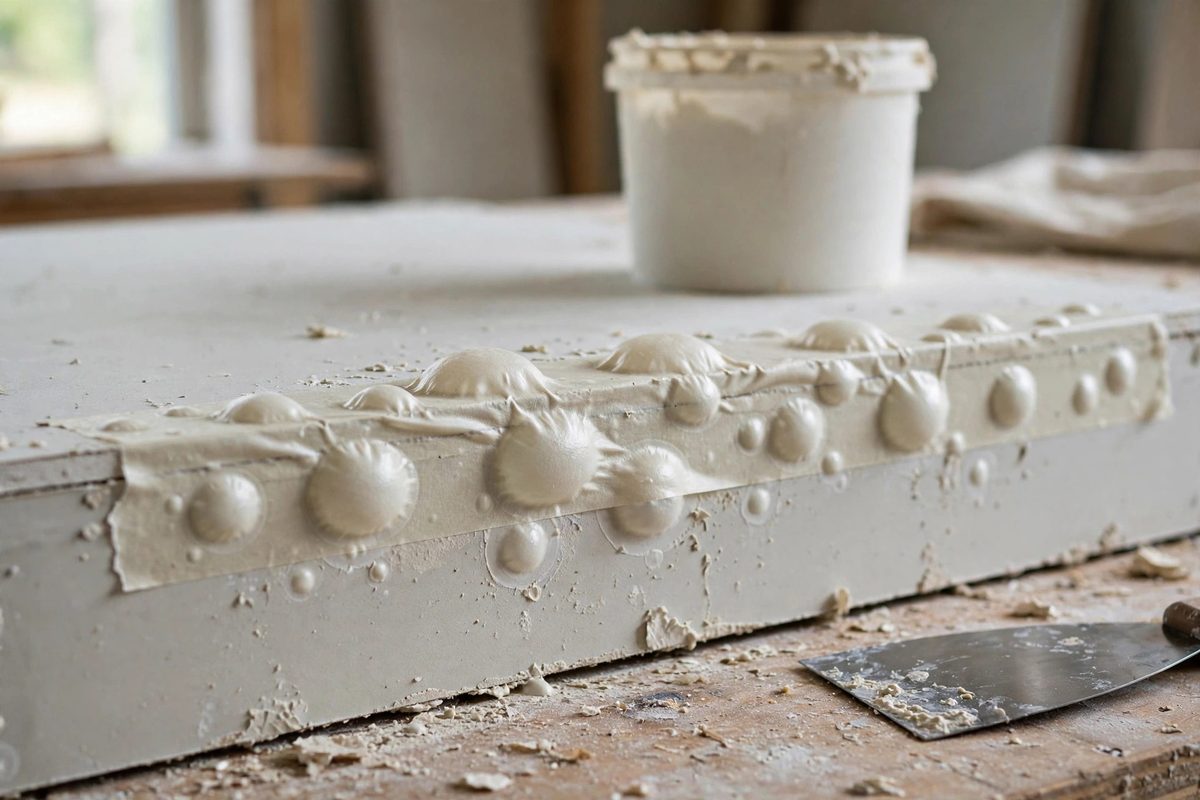
Bubble blisters under drywall paper tape, the raised ridges and pockets that appear along a joint after the mud dries, are almost always an embedding problem, not a materials problem. The tape must be pressed firmly into a bed of joint compound so the mud squeezes through the tape's pores and bonds it to the drywall on both sides. Where the embedding pressure was insufficient, air or dry spots remain under the tape, and they show up as blisters once everything dries. The fix is technique: enough mud, enough pressure, applied in the right sequence.
How Blisters Form
Paper tape bonds through the mud, not to the mud: compound pressed through the tape's porous structure keys into both the drywall face and the tape fibers, creating a unified joint. A blister is a spot where that through-bonding failed. The usual cause is a dry spot, an area where the mud bed was too thin or the tape was pressed down onto mud that had already started to skin, so no wet compound transferred through the pores. Air trapped under the tape is the other cause: the tape laid down without enough pressure to squeeze air out ahead of it, leaving pockets. Both produce the same symptom, a raised bubble that flexes when pressed, but the dry-spot blister is the more common and the more preventable. The telltale sign of systematic embedding failure is blisters running the full length of a joint rather than isolated spots: the whole bed was too thin or the pressure too light.
Laying the Mud Bed
The bed coat must be generous: a thick, even layer of compound, roughly an eighth of an inch, covering the full joint width plus a margin. The common error is spreading the bed too thin, treating it like a finish coat, which leaves no excess mud to squeeze through the tape. Use an all-purpose or taping compound for the bed, not lightweight topping compound, which lacks the adhesive strength and shrinkage characteristics for embedding. Apply the bed to a manageable length, a few feet at a time, because compound skins quickly in dry conditions, and tape laid onto skinned mud does not bond. If the bed starts to dull or skin before the tape goes on, scrape it off and relay fresh: embedding into compromised mud guarantees blisters. The bed should look wet and creamy when the tape touches it, not matte.
Embedding Pressure Technique
Press the tape into the bed with firm, deliberate strokes of the taping knife, working from the middle of the length outward toward both ends. The center-outward direction pushes air ahead of the knife instead of trapping it. The pressure must be enough to squeeze a thin ribbon of mud out from under both edges of the tape: that squeeze-out is the visible proof that the bed was adequate and the pressure sufficient. No squeeze-out means either the bed was too thin or the pressure too light, and the joint should be redone, not hoped over. Hold the knife at a moderate angle and use the blade's flex: a rigid scraping angle can cut the tape or push it off-center, while too flat an angle merely skims the surface without embedding. The tape should end up flat, centered, and visibly saturated, with mud showing through its surface texture.
Handling Long Joints and Corners
Long joints magnify every embedding error, so work them in sections: bed and tape a few feet, embed fully, then move on, slightly overlapping the sections. Trying to bed a twelve-foot joint in one go means the far end skins before the tape arrives. Inside corners get the tape folded lengthwise and embedded into both faces; the fold must be crisp and centered, and each face needs its own embedding pressure, because pressing one face does not embed the other. Outside corners with paper-faced bead follow the same principle with the bead's flanges. In all cases, resist the urge to overwork the tape once embedded: repeated knife passes after the initial embedding disturb the bond and can pull the tape loose. Embed once, firmly, and leave it.
Repairing Blisters
Small blisters can be repaired without re-taping the whole joint. Cut the blister open with a sharp utility knife, cutting out the unbonded tape in a neat shape, and check that the surrounding tape is solidly bonded by pressing around the cut. Fill the void with compound, pressing it firmly into the opening so it keys to the drywall beneath, let it dry, and recoat to level. For blisters that run extensively along a joint, the honest repair is to remove the failed tape section and re-tape: patching a dozen blisters takes longer and looks worse than one clean re-tape. After any repair, the subsequent finish coats proceed normally, but allow full drying between coats; rushing the recoat over a repair traps moisture and invites the blister's cousins, shrinkage cracks and soft spots.
Blister-free taping is a pressure discipline: a generous wet bed, tape laid before it skins, firm center-outward embedding with visible squeeze-out, and no second-guessing passes. The joint disappears under the finish coats because it was built correctly from the mud up.
Related Guides
- Level Five Drywall Skim Coat Blade Selection: A Level 5 finish, the thin skim coat over the entire drywall surface, is what makes walls look flawless under critical lighting: glossy paint, large
- Fiberglass Mesh Placement on High Stress Wall Ceilings: Ceilings crack. Gravity, framing movement, and temperature swings all pull at drywall joints overhead, and some spots crack no matter how carefully
- Feathering High-Build Mud Over Recessed Ceiling Joints: Ceiling drywall joints are the most unforgiving surface in a house. Raking light from windows and fixtures throws every ridge and hollow into relief
- Feathering High-Build Mud Over Recessed Ceiling Screws: Ceiling screw heads are unforgiving. Light rakes across a ceiling at a low angle, and every poorly finished screw shows up as a bump, a dip, or a