
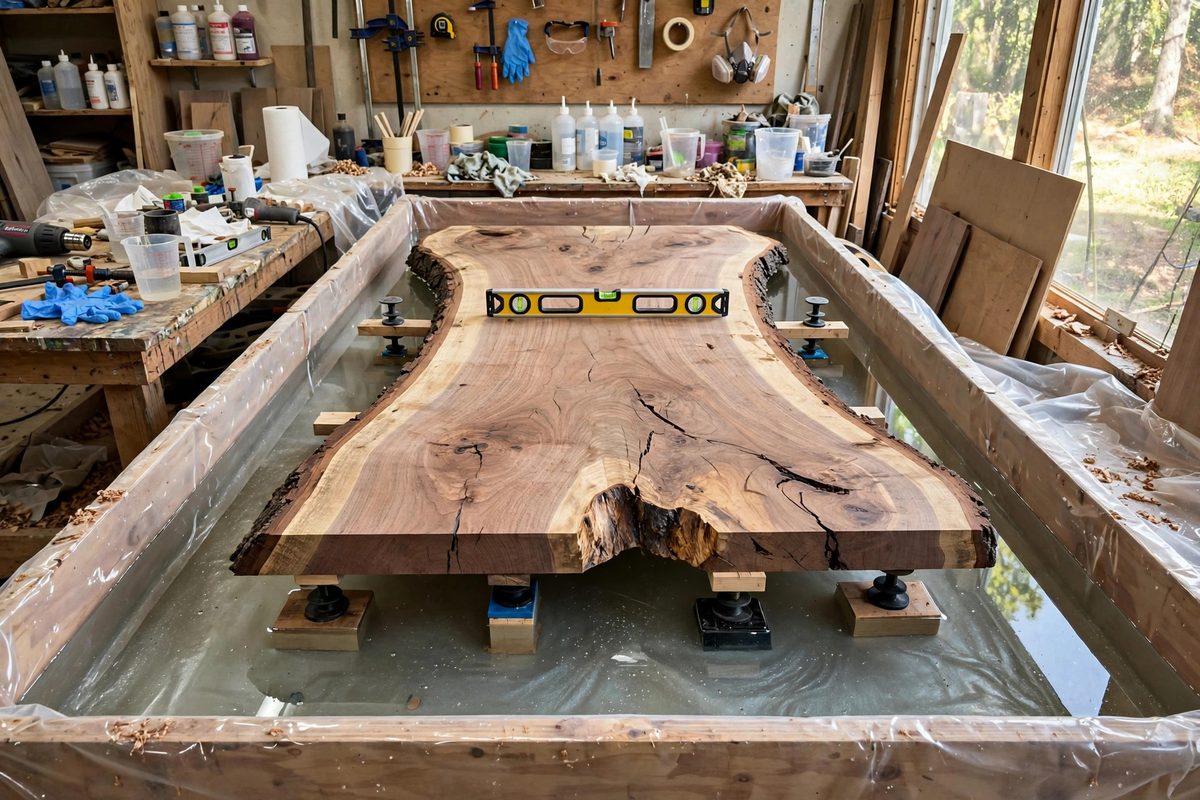
River tables and live edge resin tabletops start with a slab suspended in a trough, resin poured around it, and a prayer that everything ends up flat. Leveling is the unglamorous step that determines whether the finished top is a precision surface or a wavy disappointment. A large live edge slab is heavy, irregular, and prone to moving as resin flows around it; the trough must hold it level through the pour and the cure. Get the leveling right and the surfacing work afterward is minimal; get it wrong and no amount of sanding fixes a fundamentally tilted pour.
Why Slabs Move During the Pour
Resin is dense and exerts real buoyant force on a wood slab; a large slab can float or shift as the pour rises around it. The pour also flows unevenly, pushing the slab laterally, and the exothermic cure can warp the slab if one face heats more than the other. Clamping the slab's position is not optional for large work; gravity and friction alone will not hold it.
The slab's own irregularity complicates leveling. Live edges are not flat, the faces may be rough-sawn and uneven, and the slab may have twist or cup. Leveling means establishing a reference plane for the finished top and holding the slab in a fixed relationship to that plane, not making the slab itself flat; the surfacing after cure handles the slab's faces.
Building the Trough Level
Start with the trough itself dead level. Shim the trough's base until a long level reads true in both directions; the resin's surface will self-level to gravity, so the trough's level determines the resin's level. A trough out of level by even a degree produces a visibly uneven resin surface across a large table, with resin pooling deep on one side and starving the other.
Seal the trough meticulously. Resin finds every gap, and a leak mid-pour is a disaster that is also a leveling failure: the resin level drops, the slab shifts, and the pour is ruined. Test the trough's seals with water before committing resin; water is cheaper than epoxy and reveals the same gaps.
Fixturing the Slab
Hold the slab with a fixturing system that resists buoyancy and lateral flow: screws or brackets from the trough walls, weighted hold-downs, or a frame that captures the slab's position. The fixture must hold the slab at the correct height (setting the resin depth around it) and prevent rotation. Tighten everything before pouring; adjusting mid-pour disturbs the resin and introduces bubbles.
- Support the slab from below as well as the sides; long slabs sag under their own weight plus resin pressure.
- Protect the slab's show faces from the fixturing; clamp marks in the finished top are permanent.
- Account for wood movement; the slab may swell slightly as it absorbs resin at its surfaces.
- Double-check level after fixturing and again after the first inches of pour; the pour's weight shifts things.
Pouring Strategy for Level Results
Pour in controlled stages rather than dumping the full volume at once. Early shallow pours lock the slab's position with minimal buoyant force; once the slab is encapsulated and immobilized, subsequent pours build depth without moving it. This staged approach also manages exotherm, which matters enormously in large trough pours.
Pour evenly around the slab, not all on one side. Asymmetric pouring pushes the slab laterally and creates uneven thermal mass; distribute the resin to keep forces balanced. Between stages, verify that the slab has not shifted; catching movement early allows correction before the resin locks it in.
Post-Cure Surfacing
Even a perfectly leveled pour needs surfacing: the resin's top surface, while level, carries minor imperfections, and the slab's faces need flattening to the reference plane. A router sled or wide-belt sander brings the whole top to flat, removing the minimum necessary to true the surface. The leveling work during the pour determines how much material must be removed here; good leveling means light surfacing, bad leveling means grinding away expensive resin and wood.
Surface in stages, checking flatness with a straightedge as you go. The goal is a top that is flat, with the slab and resin coplanar; the eye reads any step between wood and resin as a defect. Take light passes and let the tool do the work.
Level the trough, fixture the slab against buoyancy, pour in stages, and verify constantly. The finished tabletop's flatness is decided long before the sander comes out; it is decided in the quiet work of shims, brackets, and levels while the resin is still in the bucket.
Related Guides
- Surface Leveling Tension on Large River Tables: A river table is a large, heavy, unforgiving object: two wood slabs with a channel of epoxy between them, spanning several feet. Getting that top
- Routing Structural C-Channel Slots in Live Edge Wood: Live edge slabs make stunning river tables and tabletops, but wide slabs move, cup, and crack with seasonal humidity changes. Steel C-channel
- Flattening Sled Track Alignment for Level River Pours: A river table pour is only as level as the slab was before the resin went in, and the slab is only as level as the flattening sled's tracks. The