
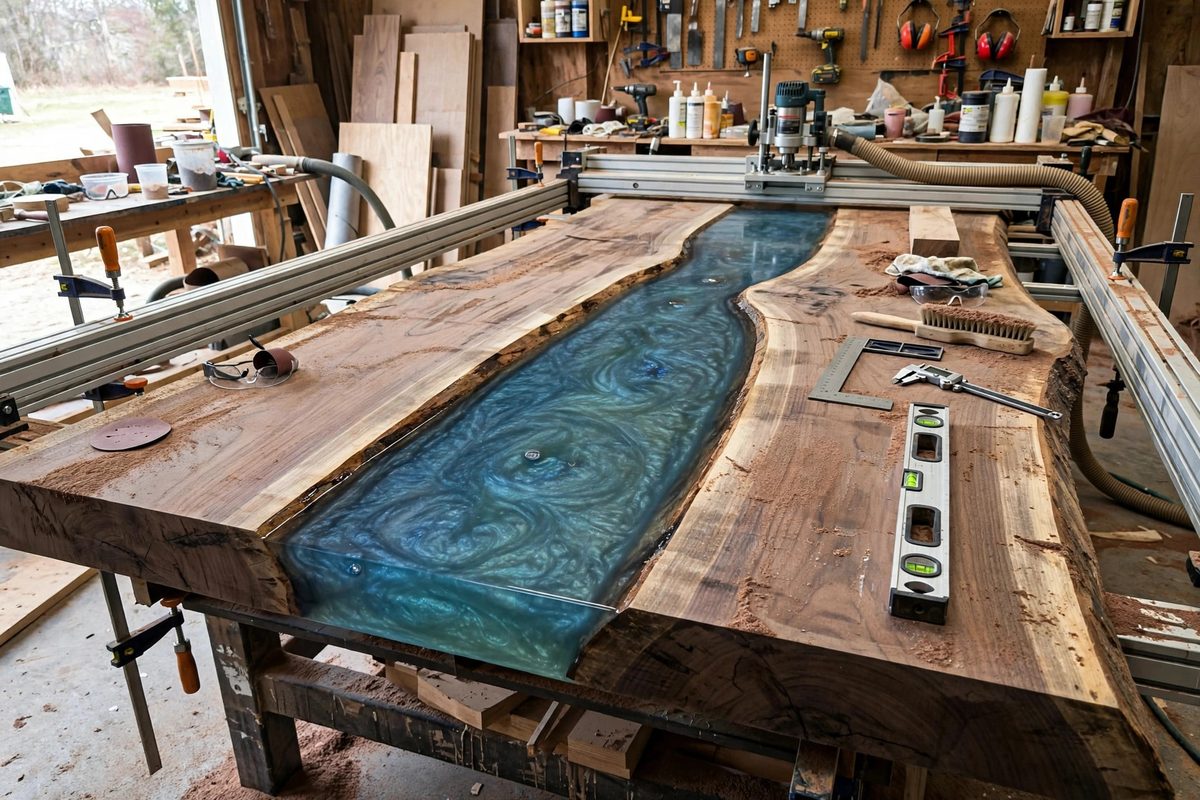
A river table is a large, heavy, unforgiving object: two wood slabs with a channel of epoxy between them, spanning several feet. Getting that top surface truly flat is the difference between a showpiece and an expensive mistake, because every ripple, dish, or high spot shows in raking light and telegraphs through the finish. The leveling challenge comes from tension: the wood moves, the epoxy shrinks slightly as it cures, and the sheer size of the piece amplifies every imperfection. Leveling a river table is a system, not a single step.
Why Large Surfaces Fight Flatness
Three forces conspire against a flat river table. First, wood is never perfectly stable: slabs cup, twist, and move with humidity, and a slab that was flat at glue-up may not be flat a week later. Second, epoxy shrinks as it cures, typically a small percentage, but across a wide river channel that shrinkage pulls the surrounding wood inward and can dish the surface. Third, gravity and support: a large top sags between supports under its own considerable weight, so a table that measures flat on sawhorses may not be flat on its final base. The leveling strategy has to address all three, because fixing only the pour while the wood moves, or flattening on supports that do not match the final installation, just relocates the problem.
Preparing Slabs Before the Pour
Flatness starts before any resin is mixed. Mill both slabs as flat as your equipment allows, and just as importantly, let them acclimate and stabilize: sticker the slabs in the shop for days or weeks until their moisture content stabilizes, because pouring between slabs that are still moving locks stress into the assembly. Seal the wood thoroughly, especially the live edges facing the river channel. Unsealed wood drinks resin, which causes the epoxy level to drop unevenly along the channel and can leave the wood starved and discolored. A seal coat also prevents air from escaping the wood into the curing epoxy, which is a major bubble source in river pours. Check slab flatness with a long straightedge, not a short level: a four-foot straightedge reveals the long, gentle waves that actually matter on a table.
Leveling the Mold and Pour
The pour can only be as level as the mold it cures in. Set the mold on a genuinely flat, rigid surface and verify level in both directions with a long level before mixing anything; shimming the mold, not the table later, is the time to fix tilt. An unlevel mold produces a river that is thicker on one side, which cures with uneven exotherm and uneven shrinkage, compounding the error. During the pour, fill to a consistent height along the entire channel: resin is self-leveling to a degree, but in a long channel with viscous deep-pour epoxy, it does not flow freely enough to correct a sloppy pour. Pour in stages along the length rather than dumping at one end. After the pour, resist touching it: every poke and prod leaves a mark in the curing surface.
Flattening After Cure
Even a careful pour needs mechanical flattening afterward; no pour cures perfectly flat at table scale. The standard sequence is a router sled or a wide drum sander to bring the whole surface to one plane, followed by progressive sanding. The router sled is the great equalizer: riding on rails set to a true plane, it cuts wood and epoxy together to a uniform height regardless of what happened during the cure. Take light passes; epoxy cuts cleanly but heats with aggressive cutting, and overheated epoxy gums the bit. After sledding, sand through the grits without skipping: the sled leaves tool marks that must be fully removed, because any remaining scratch shows dramatically under a gloss finish. This flattening step is also where you discover whether the pour had hidden issues, like soft spots from exotherm or voids, while there is still time to address them.
Managing Wood Movement After Flattening
A freshly flattened table is not a stable table until the wood stops moving. Finish both faces, top and bottom, with equal attention: finishing only the top invites the bottom to absorb and release moisture at a different rate, which cups the top. This is one of the most common causes of a table that was flat in the shop and dished six months later. Attach the base in a way that allows for wood movement: elongated holes, figure-eight fasteners, or sliding brackets, rather than rigid screws that fight the slab's seasonal expansion. And set expectations honestly: solid wood moves, and a river table in a climate with real seasons will shift slightly through the year. A well-built table moves as a unit and stays functionally flat; a poorly built one twists and cracks the river.
Flat river tables come from a chain of decisions: stable slabs, a level mold, a controlled pour, mechanical flattening, and movement-aware finishing. Skip any link and the surface tells on you. Respect every link and the table stays true.
Related Guides
- Leveling Large Live Edge Slabs Inside Resin Troughs: River tables and live edge resin tabletops start with a slab suspended in a trough, resin poured around it, and a prayer that everything ends up
- Flattening Sled Track Alignment for Level River Pours: A river table pour is only as level as the slab was before the resin went in, and the slab is only as level as the flattening sled's tracks. The
- Routing Structural C-Channel Slots in Live Edge Wood: Live edge slabs make stunning river tables and tabletops, but wide slabs move, cup, and crack with seasonal humidity changes. Steel C-channel