
Vector linework is built from nodes, the anchor points that define a path's curves, and node density, how many anchors describe a given length of line, quietly determines the quality of the drawing. Too many nodes and the path becomes lumpy, hard to edit, and bloated in file size; every tiny wobble of the hand gets preserved as a kink. Too few and the curve loses its character, flattening into generic arcs. Managing density is the technical craft underneath clean vector inking.
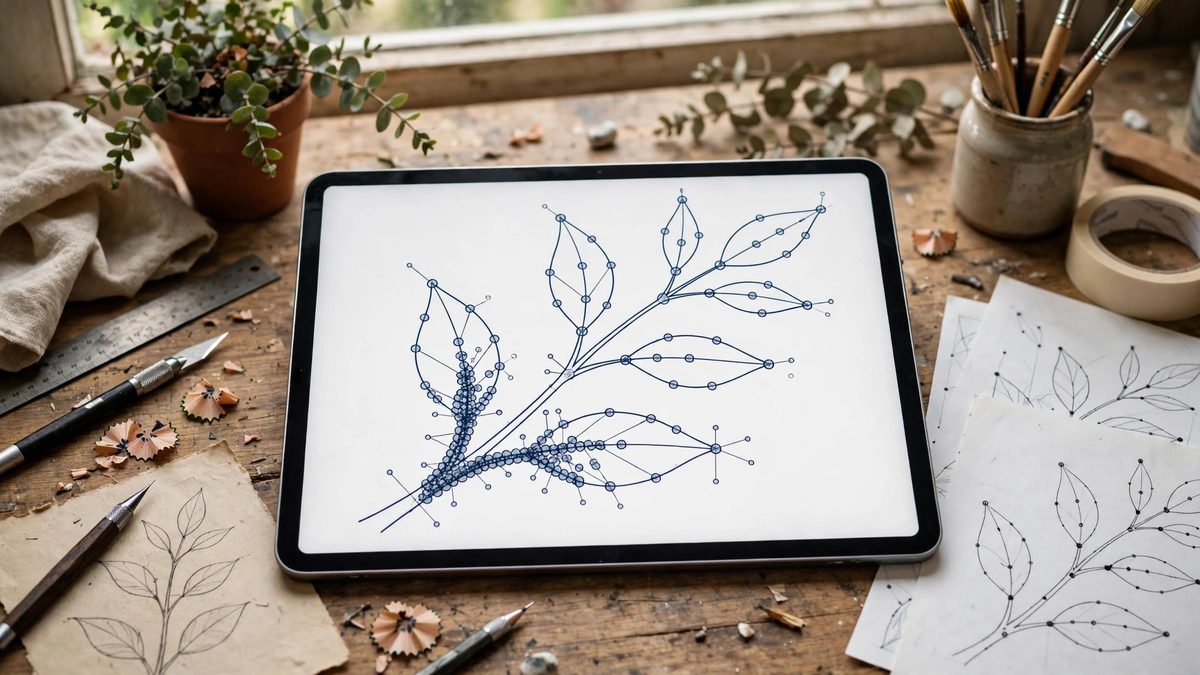
What Nodes Do to a Curve
Each node is a decision point where the path can change direction, and the segments between nodes interpolate the curve. With well-placed nodes at the natural extremes of a curve (the points of maximum curvature, the transitions between curve and straight), a handful of anchors describes a beautiful line. With nodes scattered randomly along the path, the interpolation fights itself: each unnecessary node is an opportunity for a bump, a flat spot, or a direction wobble.
This is why auto-traced or freehand-captured paths often look bad. The software places nodes wherever the input wobbled, preserving every tremor as geometry. The result is a path with hundreds of nodes describing what four well-placed anchors could have said cleanly. Density without intention is just noise.
The Right Density for Linework
As a working principle, a smooth curve needs nodes only where the curvature changes significantly: at the apex of a bend, at inflection points where the curve changes direction, and at transitions to straight segments. A simple sweeping curve might need three or four nodes; a complex S-curve might need six or eight. If you are placing dozens of nodes on a single flowing line, something is wrong with the approach, not the line.
Straight segments need exactly two nodes, one at each end. Any node in the middle of a straight is pure liability: it can drift off the line and introduce a kink invisible until the art is scaled up. When cleaning paths, deleting middle nodes on straights is the first and most satisfying pass.
Drawing With Density in Mind
When drawing with the pen tool, place fewer nodes and trust the bezier handles. Click-drag to create smooth points with handles at the curve extremes, and resist the urge to click along the curve adding anchors "for safety." Each handle pair you shape well replaces half a dozen guessed nodes. The pen tool rewards confidence: decisive, sparse nodes with well-shaped handles.
When drawing freehand with a brush tool, set the smoothing and simplification appropriately before drawing, not after. Drawing at high fidelity and simplifying later works, but it is a rescue operation; drawing with sensible smoothing from the start produces cleaner paths that need less surgery. Know your tool's simplification settings and use them.
- Zoom out periodically; node problems invisible at 400 percent scream at 100 percent.
- Use the simplify function judiciously; aggressive simplification rounds off intentional corners.
- Convert smooth points to corner points (and vice versa) where the path's character demands it, rather than adding nodes to fake the transition.
- Keep a copy of the original path before major node surgery; simplification is lossy.
Editing Dense Paths
When you inherit a dense path, the cleanup sequence is: simplify to remove redundant nodes, then manually refine what remains. Automatic simplification with a moderate threshold typically removes the majority of useless nodes while preserving the path's character. Then walk the path node by node, deleting strays and reshaping handles where the simplification was too aggressive.
Pay special attention to areas where dense nodes cluster: clusters usually mark a spot where the original drawing hesitated or corrected, and they hide kinks. A cluster of five nodes in a short span can almost always become one or two well-placed anchors with better handles.
Density and Output
Node density affects more than aesthetics. Dense paths bloat file sizes, slow rendering, and cause problems in downstream processes: laser cutters stutter on thousand-node paths, vinyl cutters choke, and font conversion punishes excess anchors. Clean, sparse paths are not just prettier; they are more functional across every output.
The discipline is simple: nodes at curvature extremes, nowhere else, and handles doing the expressive work. Vector linework with managed density edits easily, scales cleanly, and outputs reliably. The nodes you do not place are as important as the ones you do.
Place anchors where the curve changes, trust the handles everywhere else, and simplify inherited messes before refining. Node density is invisible when it is right and unmistakable when it is wrong; manage it deliberately and the linework takes care of itself.
Related Guides
- Managing Vector Anchor Point Weight for Clean Curves: Every smooth curve in a vector drawing is a negotiation between anchor points and their bezier handles, and the number of points on the curve decides
- Color Gamut Profile Matching in CMYK Linework: Digital linework destined for print lives in two color worlds: the glowing RGB of the screen and the ink-on-paper CMYK of the press. Colors that look
- Custom Brush Pressure Curves for Digital Inking: A pressure curve maps how hard you press on your stylus to how thick, opaque, or wide the digital brush stroke becomes. The default curve in most