
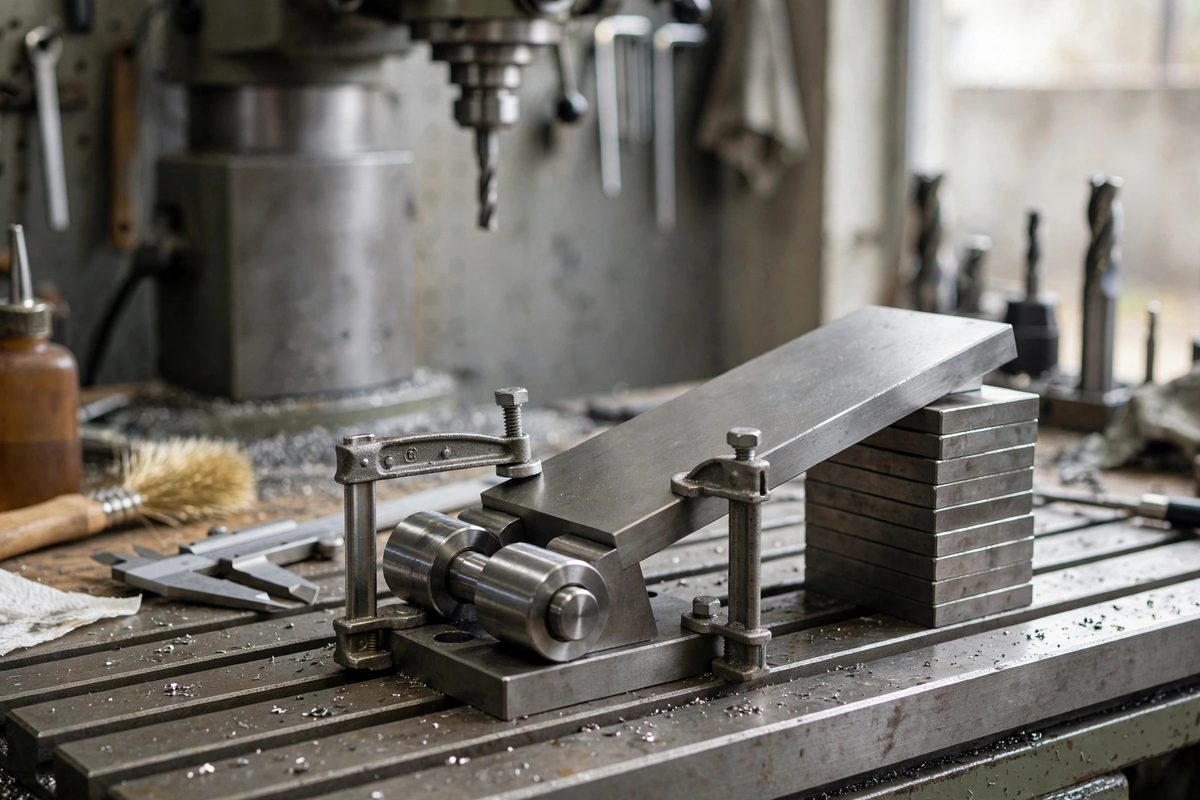
A sine plate is one of the most elegant tools in the shop: two precision cylinders a known distance apart, a hinged plate, and a stack of gauge blocks are all it takes to set an angle accurate to seconds of arc. Milling your own sine plate, or milling angled work using one, connects trigonometry directly to metal cutting in a way no textbook can. Whether you are building the plate or using it to set up lathe work, the math is the same and it is worth understanding deeply.
The Sine Principle
The geometry is a right triangle. The two cylinders (the sine bar's rollers) sit a fixed distance apart, center to center: commonly five or ten inches. Raising one end by a stack of gauge blocks of height H tilts the plate to an angle whose sine equals H divided by the roller spacing. Want 30 degrees on a five-inch sine bar? The sine of 30 degrees is 0.5, times five inches gives a 2.5-inch stack. The beauty is that gauge blocks give you the height to ten-thousandths, so the angle follows with corresponding precision. No protractor, no eyeballing: the angle is computed, not measured.
Milling the Plate Itself
If you are milling a sine plate from scratch, the critical features are the hinge, the roller seats, and the plate flatness. The rollers must be identical in diameter and their seats must place the roller centers exactly the nominal distance apart: any error in the spacing becomes a direct error in every angle you ever set. Mill the seats with the plate indicated flat, bore or mill them in a single setup so the spacing inherits the machine's accuracy rather than your layout, and use ground dowel pins or precision rollers for the cylinders themselves. The top surface of the plate must be flat and parallel to the roller-center line when the plate rests on both rollers at zero, because that surface is the reference every future setup trusts. Take light finishing passes and check with an indicator; this is a tool you are making, and its accuracy compounds into everything it touches.
Setting Angles for Lathe Work
On the lathe, the sine plate (or a sine bar) typically sets the angle of a taper attachment, a compound rest, or a workpiece held in a fixture. Compute the gauge block stack for the desired angle, wring the blocks, set them under the raised roller, and verify the plate angle with an indicator sweep across the top surface: the indicator should read constant as you traverse, confirming the plate is truly at the computed angle and not rocking on a poorly seated stack. Then indicate your workpiece or tooling from the plate surface. The common mistake is trusting the stack math without verifying the setup: a chip under one roller, a poorly wrung block, or a plate that is not sitting on both rollers will give you a precise stack under an inaccurate angle.
Gauge Block Stacks Done Right
The stack is the weak link in the chain, so build it carefully. Use the minimum number of blocks to reach the height: each interface is a potential error. Wring the blocks properly, sliding them together until they grip, and verify the stack height with a micrometer if the angle is critical. Keep the blocks clean and at the same temperature as the shop: a warm hand on a gauge block changes its length measurably, and stacking blocks fresh from a warm pocket under a cold sine bar is a classic source of mysterious angle error. For angles requiring tall stacks, consider a sine plate with longer roller spacing, since the same angular precision needs proportionally less stack height precision on a longer bar.
Compound Angles and Practical Limits
Single-axis sine plates handle one angle; compound angles need stacking two sine devices or a sine table, and the setup complexity grows quickly. In practice, most lathe work needs only single angles: tapers, chamfers, and angled faces. Know the limits of your setup: sine plates are superb for small to moderate angles but become awkward past about 45 degrees, where the stack gets tall and the plate unstable. For steep angles, other methods (a precision angle block, or indicating directly from a known reference) are often more practical. Use the sine plate where it shines and do not force it where it does not.
Safety and Handling
Sine plates are heavy, precision-ground, and have no handles: lift with care, keep fingers clear when lowering the plate onto the stack, and never slide the plate across the blocks, which scratches both. Store the plate oiled and protected, because a dinged roller or a rusted top surface degrades every future setup. Treat it like the precision instrument it is.
The sine plate turns trigonometry into a physical setup: stack the blocks, set the angle, verify with the indicator, and cut. Mill it carefully if you are making one, set it carefully every time you use it, and it will give you angles you can trust to the arc-second.
Related Guides
- Machining Precision Sine Bars for Shop Angle Checks: A sine bar is one of the most elegant measuring tools in the shop: a simple bar with two precision cylinders that turns angle measurement into height
- Graduating Precision Vernier Scales on Milling Dials: A vernier scale lets a machinist read a dial to a fraction of its smallest division, turning a coarse graduation into a precise measurement with no
- Laser Cut Slide Rules for Logarithmic Math Kits: Before calculators, engineers multiplied with slide rules: logarithmic scales that turn multiplication into addition of lengths. A laser-cut slide
- Standardizing Vernier Caliper Calibration Plates: A vernier caliper is only as trustworthy as its last calibration check, and the check needs a reference: a calibration plate, a piece of known