
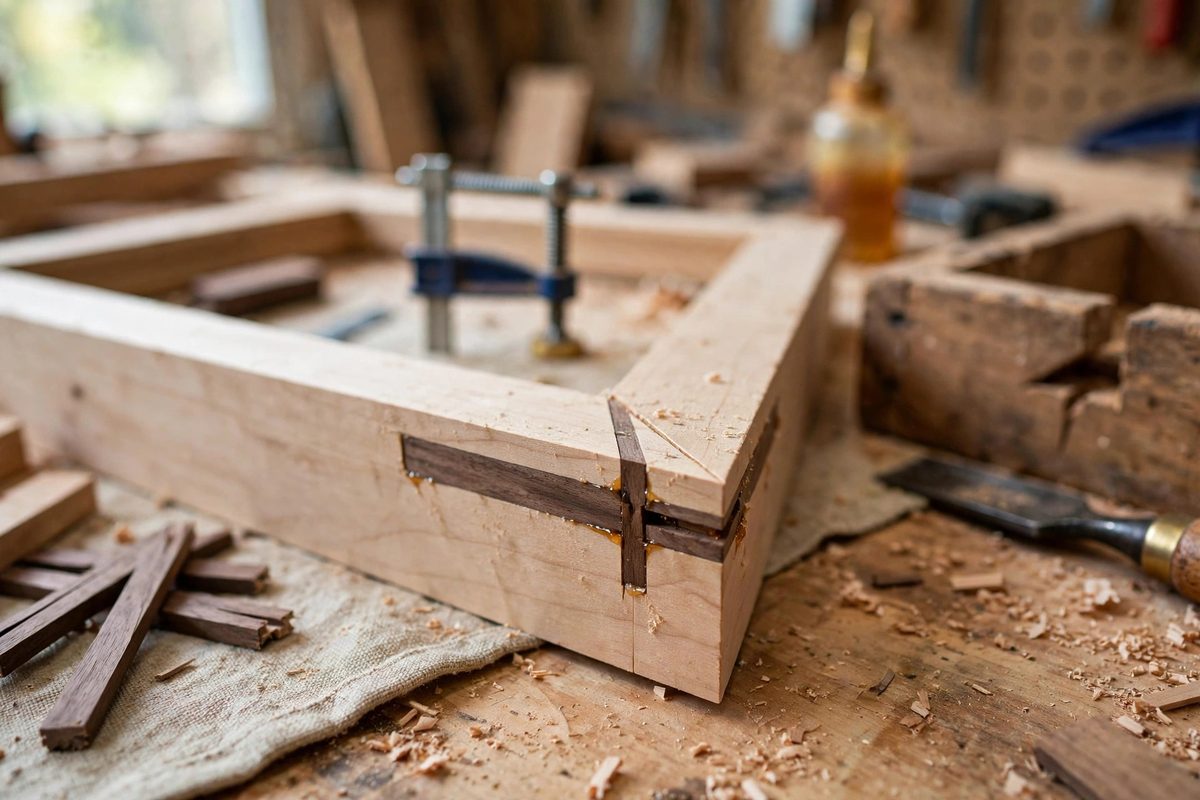
A picture frame miter joint is a structural weak point wearing a pretty face: two 45-degree cuts glued end-grain to end-grain, which is the weakest glue joint in woodworking. Frames hang on walls for decades, enduring handling, humidity cycles, and the occasional knock, and unreinforced miters eventually open at the outside corner. Splines, thin keys of wood set into slots cut across the miter, transform the joint by adding long-grain glue surfaces. A splined miter is a genuinely strong joint that also looks intentional and crafted.
Why miters need help
Wood glue bonds long grain to long grain superbly; the adhesive penetrates the open fibers and creates a joint often stronger than the wood itself. End grain, the cut ends of the fibers, absorbs glue like a straw and bonds poorly; a miter joint is end grain meeting end grain, the worst case. The joint holds initially, especially with modern glues, but it has little mechanical strength and no resistance to the racking forces a frame experiences. Seasonal wood movement works the joint continuously, and each cycle loosens it slightly. Splines fix this by introducing long-grain glue surfaces: the spline's faces glue to the long grain exposed inside the slot walls, creating the strong bond the miter itself lacks. The spline also acts as a mechanical key, physically preventing the joint from opening even if the glue were to fail.
Cutting spline slots
The classic method cuts the slots on the table saw with the frame held in a jig. Assemble and glue the frame first, or at least dry-fit it tightly, then run each corner across the saw blade with the frame riding in a cradle jig that holds it at 45 degrees, so the blade cuts a slot perpendicular to the miter face. The slot depth should reach well into the joint without breaking through the frame's inside edge; roughly two-thirds of the frame's width is a good target. Slot width matches your spline stock thickness, commonly an eighth of an inch, and the fit should be snug but not forced. Cut slots in all four corners at consistent positions for a professional look; evenly spaced multiple splines per corner add both strength and a handsome decorative rhythm. Keep fingers well clear of the blade path and use the jig's handles, never hand-hold a frame corner near a spinning blade.
Making and fitting splines
Splines are simple: thin strips of wood cut to fit the slots, with their grain running across the joint (perpendicular to the miter face) for maximum strength. Contrasting wood makes the splines a decorative feature: walnut splines in maple frames, maple in walnut, are classic combinations that turn reinforcement into ornament. Cut spline stock slightly oversized in length so the ends protrude from the frame after glue-up; they get trimmed flush later. Test-fit each spline dry; it should slide in with light friction, not rattle and not require pounding. Apply glue to the slot walls and the spline, tap it home gently, and let the squeeze-out tell you the joint is filled. Wipe or scrape the excess before it hardens fully, but do not obsess; the protruding ends get cut off and the faces get planed or sanded flush.
Flush trimming and finishing
After the glue cures, trim the protruding spline ends flush with the frame's outer faces: a flush-cut saw followed by a plane or sanding block works cleanly. Take care not to scratch the surrounding frame during trimming; a little masking tape around each spline protects the finish surface. Sand the trimmed splines flush and smooth, working through the grits, and the spline ends become part of the frame's surface, visible as neat inlaid keys. Finish as planned; splines of contrasting wood take finish beautifully and become a design feature that advertises the joint's strength. Inspect each corner: the spline should be fully seated with no gaps at its edges, and the miter line should be tight. A well-splined corner is both the strongest and the best-looking part of the frame.
Table saw safety for the jig work
The spline jig puts the operator's hands near the blade by design, so the jig must control the work completely. Build the cradle so the frame is fully supported and your hands grip the jig's handles well clear of the blade. Use a sharp blade appropriate to the cut; a dull blade burns and wanders. Keep the blade height minimal, just enough to cut the slot depth, which reduces exposure. Make the cut in one smooth pass without stopping mid-cut, and let the blade stop before removing the work. These are standard table saw disciplines applied to a specific jig; observe them and the spline slots get cut safely and accurately.
Cut the slots across the miter, fit contrasting splines with grain across the joint, glue them home, and trim flush. The splined miter turns the frame's weakest joint into its strongest feature, structurally and visually.
Related Guides
- Hand-Cut Through Mortise Pin Wedging Angles: A through mortise with a wedged tenon is joinery at its most honest: the tenon passes all the way through, wedges driven into its end flare it like a
- Trueing Wooden Jack Plane Soles With Scraper Blades: A wooden jack plane only works as well as its sole is true. A sole with hollows and high spots rocks on the work, takes uneven shavings, and makes
- Scribing Compound Shoulders on Sloped Timber Tenons: A tenon entering a mortise at an angle, the classic sloped timber joint of braces and rafters, needs shoulders that meet the mating timber's face