
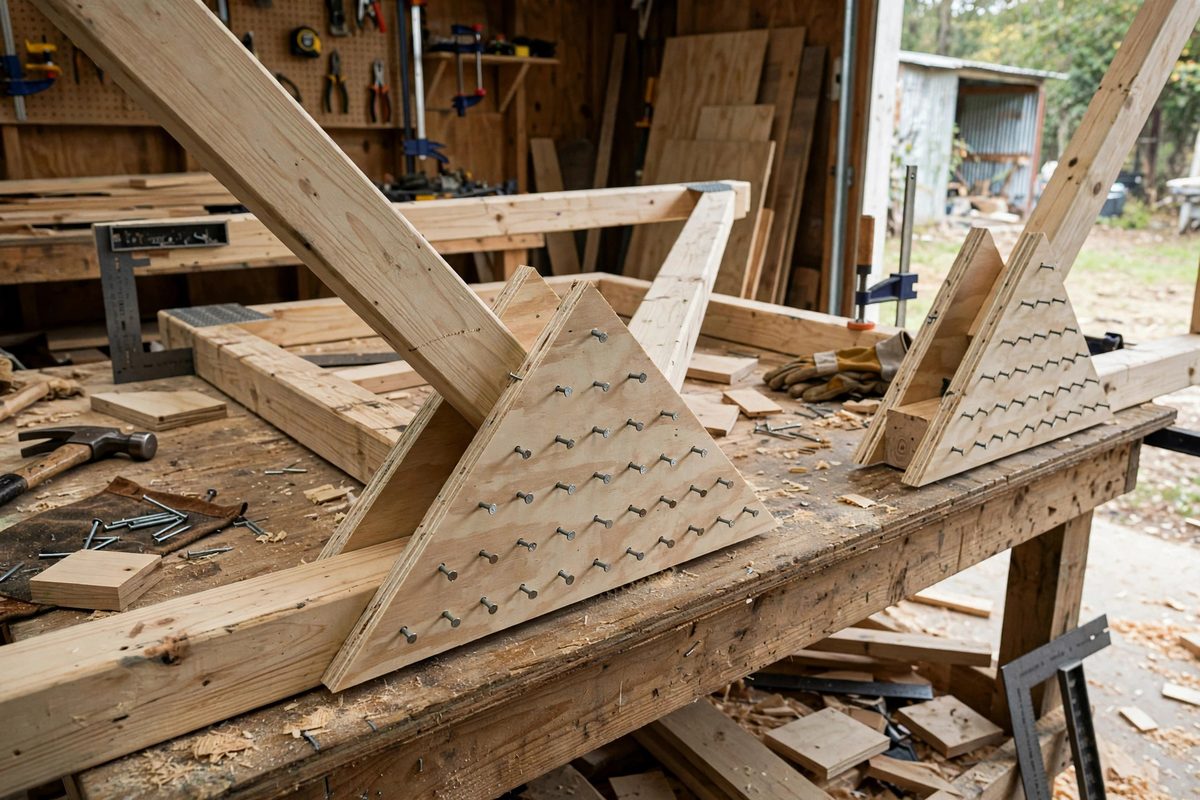
Site-built trusses for sheds and small outbuildings join their members with plywood gusset plates nailed across each joint. The gusset is the truss's strength: it transfers all the tension, compression, and shear between members, and the nails are what make the transfer happen. The nailing pattern, how many nails, where they land, and how they are spaced, determines whether the joint develops the gusset's full capacity or fails prematurely. This is structural nailing, and the pattern follows engineering logic even when no engineer is present.
How Gusset Joints Carry Load
At each truss joint, member forces must cross from wood into the gusset plate and back into the next member, entirely through the nails. Each nail carries a share of that force in shear, and the joint's capacity is roughly the sum of the individual nail capacities, modified by spacing rules. The critical insight is that the load transfer needs nails on both sides of every member junction: nails through the gusset into each member, with enough nails in each member to carry that member's force. A heel joint where the bottom chord meets the rafter needs the full nail count in the chord and the full count in the rafter; nails clustered on one member do not help the other. The gusset plate itself must be sized so the nails have room: a plate too small forces nails too close together, and closely spaced nails split the wood and the plate, destroying the capacity the nail count promised.
Nail Spacing Rules
Spacing rules exist to prevent splitting and to ensure each nail develops its full capacity. The key dimensions are edge distance, end distance, and spacing between nails, all measured in multiples of the nail diameter. Nails too close to the edge of the gusset or the member tear out under load instead of holding; nails too close together split the wood along the grain, especially in the tension members where the wood is already being pulled apart. Stagger the nails rather than lining them in straight rows along the grain: a straight row of nails acts like a perforation, inviting the wood to split along the line. A staggered or diamond pattern distributes the stress and resists splitting. Keep nails back from the ends of members where the cross-section is already reduced by the joint geometry. These rules feel fussy until you see a joint split along a neat row of nails, the signature of ignored spacing.
Nail Size and Type
Structural gusset nailing uses proper framing nails, not box nails or finish nails: the shank diameter determines the shear capacity per nail, and undersized nails waste the gusset. Common choices are 8d or 10d common nails, with the length sufficient to penetrate the gusset and well into the member, at least an inch and a half of penetration into the holding member for full capacity. Ring-shank or screw-shank nails offer substantially higher withdrawal resistance than smooth shank, which matters at joints where the forces have a withdrawal component, though most truss joint forces are primarily shear. Galvanized or coated nails where the truss will see moisture: a shed truss lives in a humid environment, and corroded nails lose capacity silently. Drive nails straight and fully: an angled or proud nail does not develop its rated capacity, and poorly driven nails are weaker than fewer well-driven ones.
Pattern Layout per Joint Type
Different joints need different patterns because they carry different forces. The heel joint, where the rafter meets the bottom chord at the eave, carries the highest forces in the truss: the bottom chord's tension and the rafter's compression meet here, so this joint gets the most nails and the largest gusset. The peak joint, where the two rafters meet, carries compression primarily and needs a solid pattern but fewer nails than the heel. Interior web joints carry lighter forces and can use smaller gussets with fewer nails, but still need proper spacing and nails in every member. Draw the nail pattern on the gusset before nailing: mark each location with spacing rules applied, verify every member has its share, then nail to the marks. This prevents the common failure of "enough nails total, but all on one member."
Gusset Plate Sizing and Placement
The gusset must extend far enough onto each member to accommodate the required nail pattern with proper spacing: the plate size follows from the nailing, not the other way around. Use exterior-grade plywood for the gussets, at least half-inch, because the plate carries real structural loads and must resist moisture. Place gussets on both faces of the joint for important trusses; single-sided gussets are acceptable for light sheds but introduce eccentricity, loading the joint asymmetrically. Align the gusset's face grain to suit the primary load direction where possible. And build the trusses identically: make one master truss, verify its geometry and nailing, then use it as the pattern for the rest. A roof framed with trusses that vary is a roof with unpredictable load paths.
Site-built truss gussets work when the nailing is treated as structural: enough nails in every member, spaced to avoid splitting, staggered against the grain, driven straight and fully, on gussets sized to hold the pattern. The truss is only as strong as its joints, and the joints are only as strong as their nails.
Fasteners and Screws for the Build
The gusset joints themselves get common nails, driven to the patterns above. The rest of the fastening around a truss build is screws: holding the master truss together while you copy it, jig and template work, and the shed framing that follows. This is the box I keep stocked on my bench for that work:
Heads up: the link below is an affiliate link. If you buy through it, I earn a commission at no extra cost to you.
Hillman #8 x 1-1/4 in Wood Screws, 100-Count
$6.98
Shop NowRelated Guides
- Load Bearing Header Sizing for Wall Spans: Open up a wall and the studs you remove were carrying weight, from the floor above, the roof, or both. A header is the beam that picks up that load
- Truss Collar Tie Sizing for Snow Load Spans: A shed roof that must carry snow is a small structure with a serious load problem: snow is heavy, it arrives all at once, and it stays. Collar ties
- Overhang Eave Venting Math to Prevent Roof Decay: Shed roofs rot from the inside out more often than the outside in. Warm moist air rises into the roof cavity, condenses on the cold underside of the
- Sizing Hurricane Ties for Shed Rafter Tie Downs: A shed roof fails in high wind the same way every time: the wind gets under the eave, the roof acts like a wing, and the rafters lift off the top
- Rafter Seat Cut Dimensions on Shed Wall Top Plates: The birdsmouth, where a rafter sits on the wall top plate, is the most important joint in a shed roof. Get the seat cut right and the rafter bears