
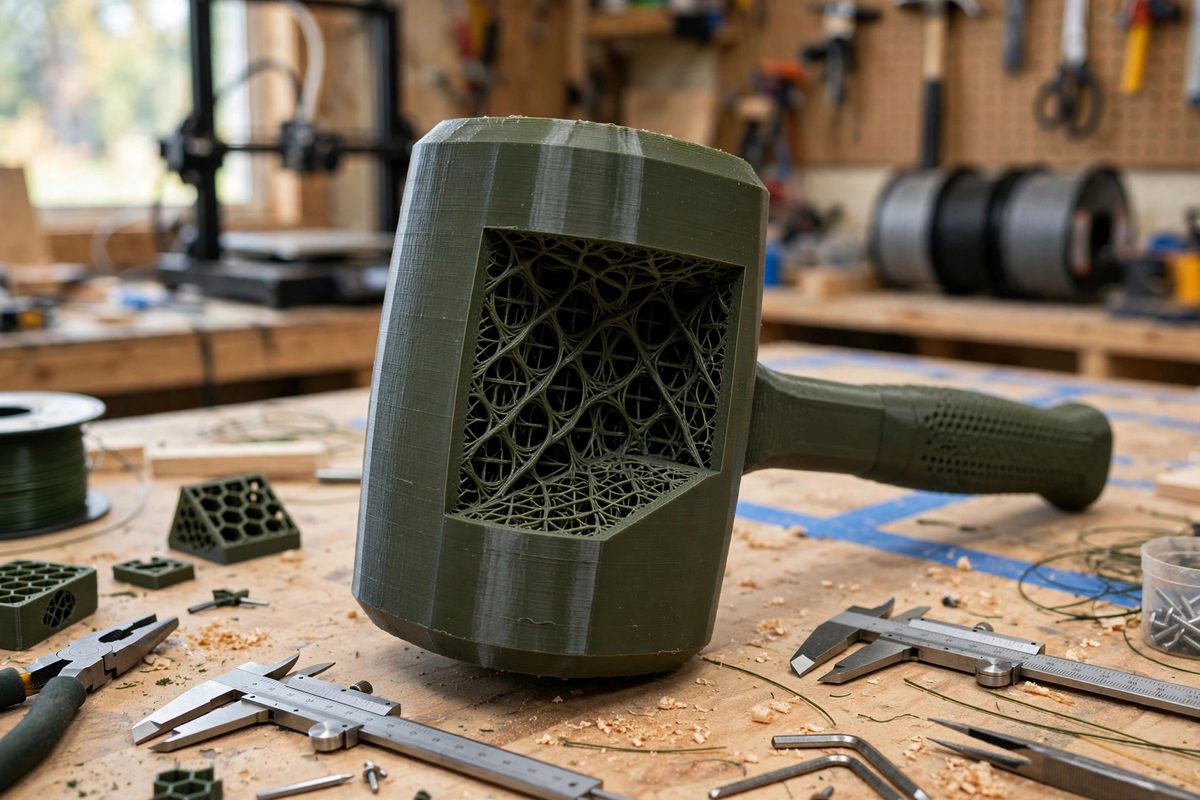
A 3D-printed mallet is a real tool if it is built like one. The head must absorb repeated impacts without delaminating, cracking, or shattering, and the infill geometry inside the head determines whether it survives the first month or the first blow. Infill is not just filler; in an impact tool it is the structure. Here is how to choose geometry that takes a beating.
How impact loads travel through a print
When the mallet face strikes, a shock wave travels through the head toward the handle. The infill's job is to distribute that shock across the whole head rather than letting it concentrate at the impact point. Infill patterns that form continuous load paths in the direction of impact perform best; patterns that are mostly void in that direction let the face flex inward and crack. Layer orientation matters too: the impact should compress layers together, not shear them apart, so orient the head so the striking face is perpendicular to the layer stacking direction.
Infill patterns that take impact
Grid and triangular infills create strong two-dimensional structures but leave the third dimension relatively weak; under impact they can crush progressively. Gyroid infill distributes loads in all directions through its continuous curved walls and resists the buckling that kills rectilinear patterns under shock. Cubic and cubic-subdivision patterns also perform well, offering three-dimensional bracing. For a mallet head, gyroid or cubic at 40 to 60 percent density gives a tough, damage-tolerant core. Avoid lightning and other sparse experimental patterns; they are designed to save material, not to survive impact.
Density, walls, and the face
Infill density for an impact tool should be high by decorative-print standards: 40 percent is a reasonable minimum for the head, with 50 to 60 percent better for heavy use. But density alone is not enough; the perimeter walls carry much of the load. Use at least four to six perimeters on the head, so the striking face is backed by solid material several millimeters deep before the infill even begins. Consider making the striking face itself a separate, replaceable insert printed solid; faces wear and mushroom, and a replaceable face turns maintenance into a two-minute swap instead of a reprint.
Handle junction: where mallets die
The transition from head to handle concentrates every impact's bending stress, and it is where printed mallets most often fail. Reinforce it deliberately: continue the head's high-density infill into the handle for at least an inch, use generous fillets instead of sharp corners at the junction, and orient the print so the junction's layers are not in the peel-apart direction under load. Some designs run a through-bolt or a wooden dowel through the head into the handle; a hybrid like this combines the print's shape with a traditional mechanical joint and dramatically extends life.
Material choice
PETG is the practical minimum for a working mallet: tough, layer-bonds well, and resists the oils and knocks of shop life. ABS and ASA add impact resistance and heat tolerance. Nylon is superb for impact but demanding to print. PLA is the wrong choice; it is stiff but brittle, and a PLA mallet head can shatter on a hard strike, sending fragments flying. Whatever the material, wear eye protection when testing a new printed striking tool, and inspect the head regularly for cracks starting at the face or the handle junction.
Gyroid or cubic infill at high density, thick walls, a reinforced junction, and a tough material. Build the mallet like the tool it is, and it will strike like one.
Related Guides
- Perimeter Wall Infill Ratios for Tough Mallet Heads: A 3D-printed mallet head takes impacts for a living, and impact is the cruelest load you can ask of a layered plastic part. The difference between a
- Shell Thickness Optimization for Tough Impact Wrenches: An impact wrench housing printed in PLA that cracks after twenty bolts is not a failed design, it is a failed thickness decision. The shell of a
- Print Orientation for Shear Strength on Shop Wrenches: A 3D-printed wrench is a study in compromise: enormously useful for odd sizes, custom clearances, and non-marring work, but built from a material
- Print the NASA Ratcheting Wrench from Space: The First Tool "Emailed" to Space! In 2014, NASA made history by transmitting a 3D model file from Earth to the International Space Station, where
- Optimizing Perimeter Wall Thickness for Tough Tool Racks: A printed tool rack holds real weight: chisels, wrenches, and drivers hanging off hooks and slots, loaded and unloaded daily. The perimeter walls