
Large format tile over an uncoupling membrane is one of the most reliable tile assemblies you can build, but only if the thin-set coverage is right. The membrane's job is to let the tile layer and the subfloor move independently, absorbing the shear and stress that would otherwise crack tile or grout. That only works if the tile is fully supported by mortar: voids under a large tile are unsupported spans, and a large tile over a void is a tile waiting to crack under a heel, a dropped pan, or a piece of furniture.
What the Membrane Does (and Does Not Do)
An uncoupling membrane is a dimpled or fabric-faced sheet bonded to the subfloor with thin-set, and the tile is then bonded to the top of the membrane. The membrane absorbs lateral movement between the subfloor and the tile layer, which is why it is the go-to choice over plywood, young concrete, and radiant heat slabs that expand and contract. What the membrane does not do is span gaps or forgive poor mortar coverage. It is not a structural layer: a void under the tile is still a void, membrane or not. Coverage requirements for large tiles are stricter precisely because a big tile bridges bigger voids and concentrates more force on whatever small area of mortar it does touch.
Coverage Targets for Large Tiles
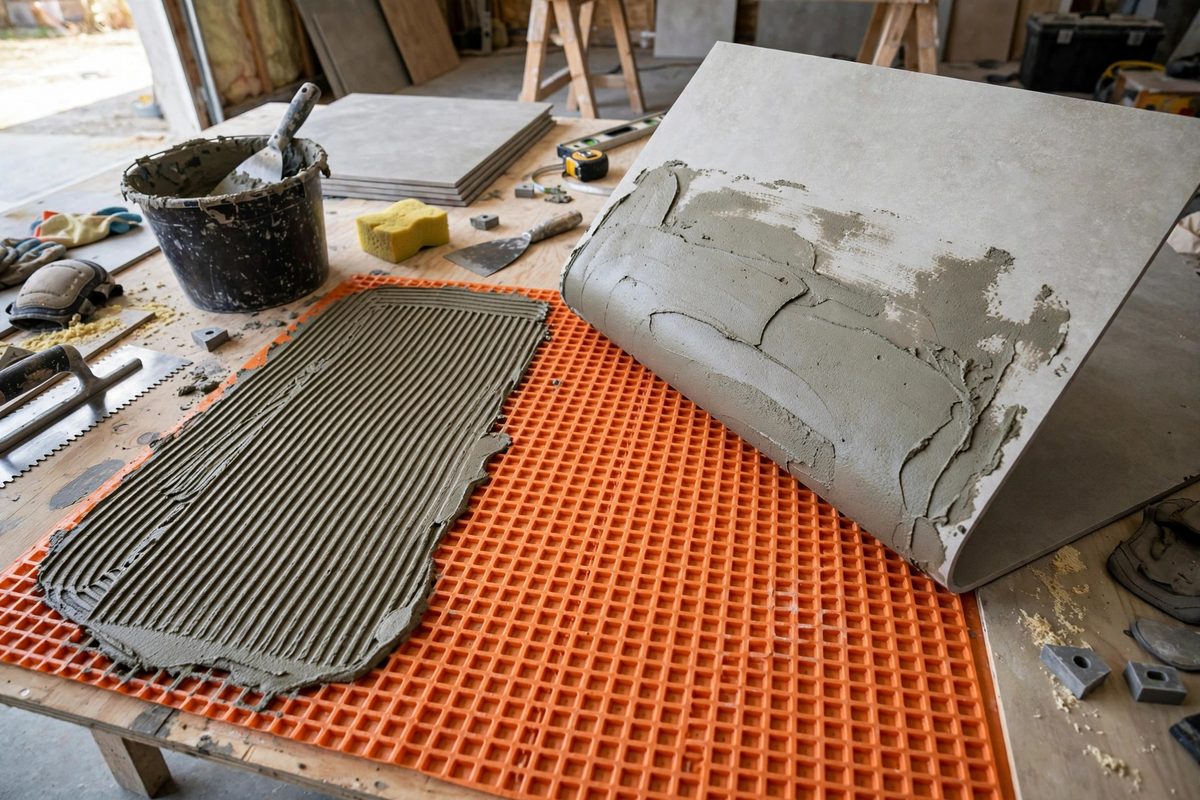
The industry baseline is high coverage, especially for large tiles and wet areas: the mortar should contact nearly the entire back of the tile, with full contact in showers and exterior work. Large tiles are defined by face area, and as tile size grows, achieving that coverage gets harder because the tiles are rarely perfectly flat. Slight warpage in a big tile means the center may ride high while the edges touch, leaving the middle unsupported. Back-buttering, spreading a skim coat of thin-set on the tile back with the flat side of the trowel, is the standard answer: it fills the low spots in the tile and pairs with the troweled mortar bed on the membrane to close the gap.
Trowel Selection and Technique
Large tiles need large trowel notches: a small notch simply cannot deposit enough mortar to fill the space. Use a square-notch or U-notch trowel sized to the tile, and trowel in straight, parallel lines in one direction on the membrane. The direction matters: when you set the tile, press and shift it slightly perpendicular to the trowel lines so the ridges collapse into each other and the air escapes. Straight lines collapse cleanly; swirls and curves trap air pockets that become voids. Comb the mortar, set the tile, and give it a firm press with a slight wiggle, then lift a tile periodically to check the coverage pattern on the back. If you see bare spots or uncollapsed ridges, adjust your technique before laying the next one.
The Right Thin-Set for the Membrane
Use a polymer-modified thin-set rated for the membrane and the tile, and mix it to the right consistency: too dry and the ridges will not collapse; too wet and the tile will sink and slide. Unmodified thin-set has its place in some assemblies, but large tile over membrane generally wants the extra bond strength and flexibility of a modified mortar. Mix only what you can use within the working time, because mortar that has started to skin over will not bond properly even if it looks fine. A skinned-over trowel line is one of the most common causes of hollow-sounding tile.
Checking Your Work as You Go
The lift-and-check habit is the difference between hoping for coverage and knowing you have it. Early in the job, and again whenever conditions change (new batch of mortar, temperature shift, different tile box), pull a set tile and look at the back. You want collapsed ridges merged into a continuous bed with minimal voids, plus the back-butter filling the tile's own texture. Tap set tiles lightly with a rubber mallet or your knuckle and listen: a solid thunk means contact, a hollow ring means a void. Mark hollow tiles and reset them while the mortar is fresh, because a hollow tile found after grouting is a tile you live with or tear out.
Movement Joints Still Matter
Even with a perfect membrane bed, large tile fields need movement joints: soft joints filled with sealant at perimeters, over control joints in the slab, and at intervals across big open floors. The membrane handles micro-movement between tile and substrate, but the tile field itself expands as a unit and needs somewhere to go. Skipping movement joints on a large installation is asking the grout, or the tile, to absorb forces it was never designed for.
Membrane, mortar, and technique are a system. Bond the membrane correctly, use enough of the right mortar, back-butter every large tile, check coverage by lifting tiles, and honor movement joints. Do that and the assembly delivers exactly what the membrane promises: a tile floor that moves with the house instead of cracking against it.
Related Guides
- Subfloor Deflection Limits for Stone Tile: Stone tile is beautiful, heavy, and utterly unforgiving of a bouncy floor. Unlike ceramic, natural stone has little flexural strength and variable
- Self-Leveling Underlayment Slump Test Viscosity Ratios: Self-leveling underlayment promises a flat floor from a poured liquid, but the promise depends entirely on the mix viscosity: too thick and it does
- Expansion Gap Requirements for Solid Oak Planks: Solid oak flooring moves with the seasons, and it does not ask permission. Planks installed tight to the walls will push against the framing when
- Vapor Retarder Permeability Ratings Under Hardwood: Hardwood floors fail from below more often than from above. Cupping boards, crowning, and gaps that open and close with the seasons almost always