
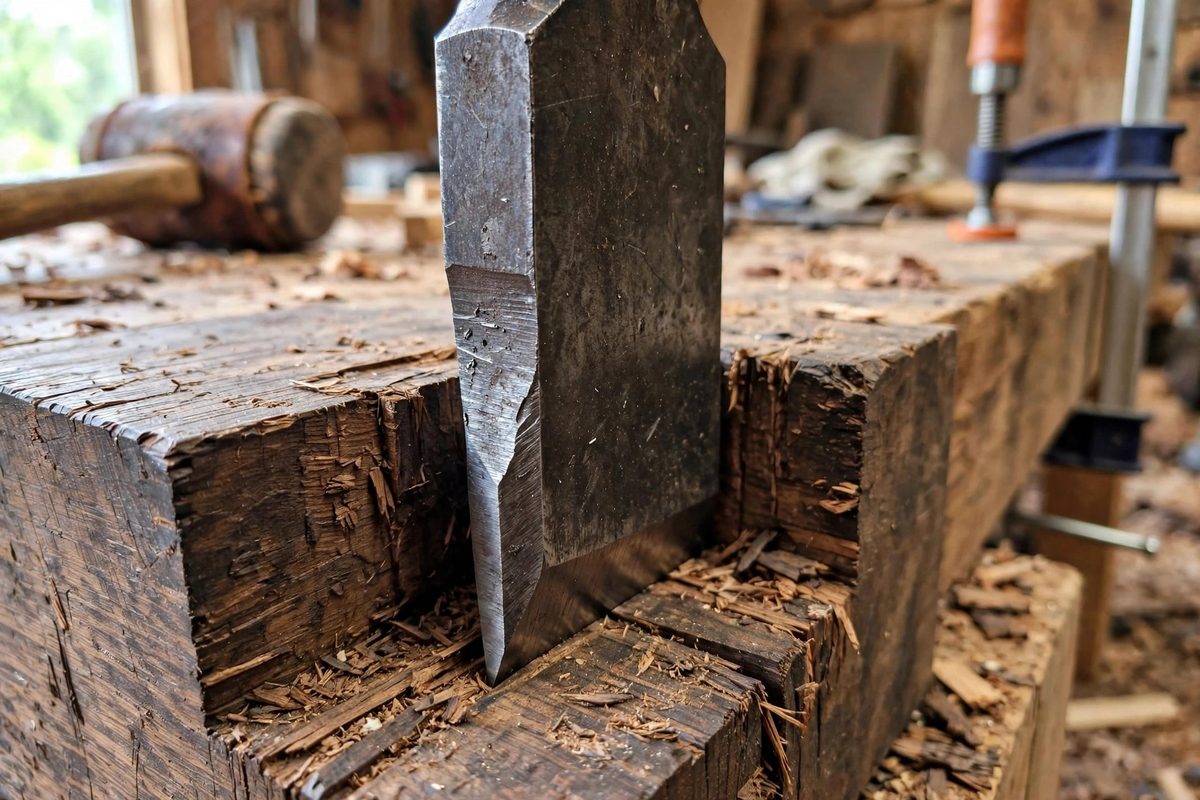
A mortise chisel driven deep into hardwood lives a hard life: every mallet blow wedges it into the cut, and the chisel's own sides rub the walls of the mortise on the way in and out. The clearance relief angles, the slight tapers ground into the chisel's sides and back that keep only the cutting edge in contact with the wood, decide whether the tool glides or binds. Too little relief and the chisel seizes in deep cuts, requiring dangerous levering to extract. Too much relief and the edge loses support, chipping under the mallet. Getting the relief right is the difference between a chisel that works deep and one that only works shallow.
Why relief matters more as mortises deepen
In a shallow cut, the chisel's sides barely engage the wood, so relief is a minor concern. As the mortise deepens, the contact area between the chisel's sides and the mortise walls grows with every blow, and friction grows with it. Without relief, the chisel becomes a wedge driven into a matching wedge-shaped hole: each blow seats it tighter, and extraction requires levering against the mortise walls, which crushes the very surfaces you are trying to keep crisp. Relief angles break this wedge action by ensuring that only the cutting edge and a short land behind it touch the wood; the rest of the blade stands clear of the walls. The deeper the intended mortise, the more critical this clearance becomes, which is why dedicated mortise chisels carry more relief than bench chisels ever need.
The geometry: bevel, edge, and side relief
Three angles define the cutting end. The bevel angle, typically around thirty degrees for mortise work, sets the edge's wedge shape and its durability under mallet blows; steeper bevels survive pounding but cut less keenly. Behind the edge, the blade's faces carry the relief: the back of the chisel tapers slightly so the edge leads, and the sides taper from the cutting edge toward the handle, often by a degree or two per side. This side taper is the signature of a true mortise chisel, visibly narrower at the top than at the edge, and it is what lets the tool enter a deep mortise without binding along its full length. The lands, the narrow unrelieved bands right behind the edge, provide the edge with support; they should be short, just enough to stabilize the cut, because every millimeter of land is a millimeter of friction.
Grinding relief without ruining the chisel
Relief is ground, not filed, and the grinding must respect the steel's temper. Work on a slow, cool grinder or with frequent water quenching; overheating the edge draws the temper and softens the steel exactly where hardness matters most, and the damage is invisible until the edge folds in use. Grind the side relief evenly on both sides, checking with calipers that the taper is symmetric; an asymmetric chisel cuts a mortise that drifts sideways. Keep the bevel flat and at the chosen angle, and hone the edge after grinding to remove the burr and the weakened surface left by the wheel. The test of the grinding is in the cutting: the chisel should enter end grain with firm mallet blows and withdraw with a straight pull, no levering, no twisting.
Matching relief to the work
Different mortising tasks want different relief. Deep mortises in dense hardwoods want generous side relief and a sturdy bevel, prioritizing extraction and edge survival over ultimate keenness. Shallow mortises and softwoods tolerate, and reward, less relief and a keener edge, since friction is low and cut quality matters more. Through-mortises, where the chisel exits the far side, need the relief to prevent blowout-inducing binding near the exit; the classic technique of working from both faces toward the middle pairs naturally with a well-relieved chisel. Consider the chisel's cross-section too: the thick, nearly square section of a true mortise chisel provides the stiffness that lets relief do its job without the blade flexing, which is why thin bench chisels, however sharp, are poor substitutes for deep mortising.
Maintenance and inspection
Relief angles are not permanent; they change with every sharpening. Honing the bevel eventually thickens the edge and effectively reduces the clearance, and the sides wear and polish with use. Periodically check the side taper with calipers and restore it on the grinder when it has diminished. Inspect the edge under magnification for the tiny chips that signal the bevel is too acute for the work or the steel is compromised; adjust the bevel angle rather than accepting chronic chipping. A mortise chisel is a consumable in the slowest sense: it gives up microns of steel over years, and attentive maintenance keeps the geometry honest across its whole life.
Safety in heavy chisel work
Deep mortising with a mallet is high-energy work. Secure the workpiece so it cannot shift under blows; a moving workpiece redirects the chisel unpredictably. Keep hands behind the cutting edge, never in front of it, and never lever a bound chisel with your hand in the path of a slip. Wear eye protection, because chips fly and edges occasionally fail. And respect fatigue: tired arms deliver glancing blows, and glancing blows are how chisels end up somewhere other than the mortise. Sharp, well-relieved chisels need less force, which is itself a safety feature.
Relief angles are what let a mortise chisel work deep: slight tapers on the sides and back that keep only the edge engaged, ground cool and symmetric, matched to the depth and the wood. Maintain them through the chisel's life, and the tool will enter and leave the mortise the way it should, under control, every blow.
Related Guides
- Secondary Micro-Bevel Angles on Heavy Framing Chisels: Heavy framing chisels live a rough life: chopping mortises, paring tenons, and occasionally doing things the manufacturer never intended. The edge
- Clearance Relief Chamfers on Heavy Timber Mortisers: A mortiser cutting heavy timber works harder than one cutting furniture stock: deeper mortises, denser wood, longer cutting time, and far more heat
- Relief Angle Geometry on Scraper Cutting Edges: A card scraper cuts with a tiny hooked burr, not with a beveled edge like a chisel, and the geometry of that hook, its relief angle, determines
- Primary Bevel Rake Angle Formulas for Spindle Gouges: A spindle gouge's cutting behavior is set by its bevel geometry: the primary bevel angle determines the rake, the angle at which the edge meets the