
Tapestry weaving builds images from discontinuous wefts: each color area is woven separately, and where two colors meet along a vertical boundary, the wefts must join without leaving a slit. The dovetail interlock is one of the classic solutions: the two wefts hook around each other at the boundary, locking together in a join that is strong, slit-free, and nearly invisible from the front. On dense warps, where the sett is fine and the threads are close, the dovetail demands precision: there is no room for sloppy joins.
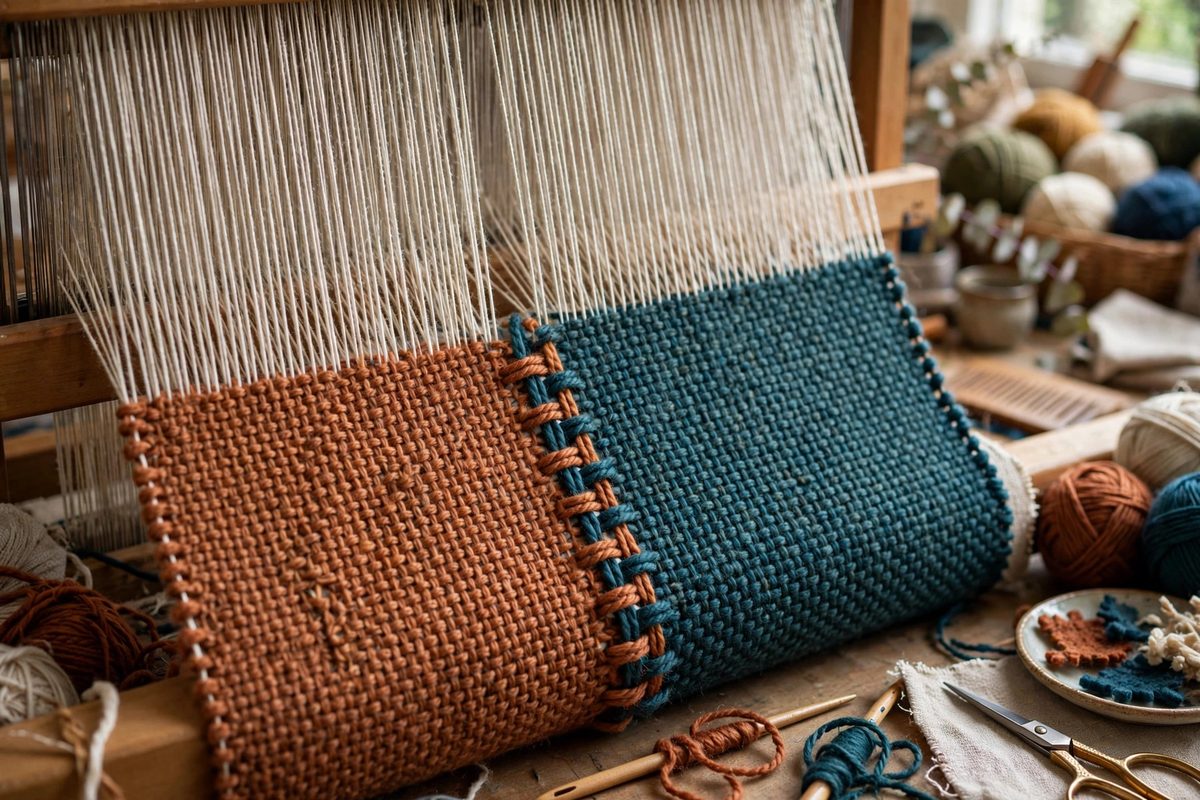
How the Dovetail Join Works
At the color boundary, the two wefts approach from opposite sides and interlock around a shared warp thread (or pair of warps): each weft passes around the boundary warp and back into its own color area, hooking through the loop of the other weft. The result is a mutual embrace: neither weft can pull away without the other holding it. Unlike a simple abutting join, where the wefts merely meet, the dovetail creates a mechanical connection that resists the lateral stresses of the finished tapestry: hanging, tensioning, and handling all pull at color boundaries, and the dovetail holds. The join sits within the weft-faced surface, invisible from the front when worked neatly, with only a slight texture change visible on close inspection.
Why Dense Warps Are Demanding
On an open, coarse warp, a dovetail join has room: the wefts maneuver easily around the boundary warps, and minor irregularities disappear into the texture. On a dense warp, every thread is packed tight, and the join must happen in a confined space without distorting the neighboring warps. The wefts themselves are typically finer on dense warps, which makes them harder to manipulate and easier to tangle. And the visual standard is higher: dense tapestry reads as a smooth, almost painted surface, so any lump, gap, or irregularity at the join stands out. The technique is the same as on open warps, but the tolerance for error shrinks dramatically.
Working the Join Step by Step
Weave each color up to the boundary warp, leaving the wefts positioned to interlock. Bring the first weft around the shared boundary warp (or between the designated pair), then bring the second weft through the loop thus formed, each weft returning to its own side. The key details: keep the tension of both wefts consistent with the surrounding weaving, neither tighter (which puckers the boundary) nor looser (which leaves a visible soft spot). Seat the join firmly with the beater or your fingers, but do not over-beat: compressed joins on dense warps create hard lines. Work the joins at the same pick rhythm as the rest of the row: a join worked as an afterthought, with different tension or beating, will always look like an afterthought.
Tension: The Make-or-Break Variable
Join tension errors are the most common dovetail failures. Too tight, and the boundary warps get pulled together, creating a visible pinch line and potentially distorting the vertical alignment of the design: on dense warps, even slight pinching shows. Too loose, and the join gapes, leaving a soft vertical channel that catches light and looks like a flaw. The correct tension matches the surrounding fabric exactly: the join should be indistinguishable in density from the adjacent weaving. Develop the feel by practicing on a sample warp at the same sett: join tension is a motor skill, and the sample is where you calibrate it, not the real tapestry.
Planning Joins in the Design
Not every color boundary needs a dovetail: where colors meet along horizontal boundaries, the wefts naturally overlap in successive picks and no join is needed. Reserve dovetails for vertical or diagonal boundaries between color areas. When a design has many adjacent vertical boundaries, consider whether the visual effect wants crisp joins (dovetail each boundary) or soft transitions (use hatching or blending techniques instead): the join method is a design choice, not just a technical necessity. Also plan the join locations relative to the cartoon: boundaries that fall on warp threads join more cleanly than boundaries that fall between warps, so align the design's vertical edges with the warp grid where possible.
Finishing and the Back of the Work
The back of a dovetail-joined tapestry shows the interlocks as small, neat knots of weft around the boundary warps: this is normal and correct. Do not trim weft ends too close at the joins: the interlock needs its full length to hold. When the tapestry comes off the loom, the joins should survive handling without loosening: test by gently tugging the color areas apart at a join. A well-made dovetail holds firm; a loose one needs reworking before the piece is finished. The front should show clean color transitions with no slits, no puckering, and no visible join texture: that is the standard the technique exists to achieve.
The dovetail interlock is tapestry's answer to the vertical color boundary: two wefts embracing around a shared warp, strong without slits, invisible when tensioned correctly. Practice the tension on samples, plan the joins with the design, and work each one with the same care as the weaving around it. On dense warps, precision is not optional, and the dovetail rewards it with joins that disappear into the image.
Related Guides
- Dovetail Interlock Tension on Heavy Wool Tapestry: Where two colors meet in tapestry, the weaver must join them without a slit weakening the cloth. The dovetail interlock, where each color's weft
- Slit Weaving Interlock Joins on High Sett Linen Warps: In tapestry, each color block is woven with its own weft, and where two colors meet along a vertical boundary, the wefts turn back on themselves
- Managing Interlock Slit Overlaps on Fine Tapestry: Tapestry's defining technique, discontinuous weft that turns back at color boundaries, creates slits: vertical gaps where two color areas meet but
- Limiting Slit Gaps in Structural Heavy Weft Tapestry: Tapestry's color changes create slits: vertical gaps where one weft color ends and another begins, with no interlacing between them. In pictorial