
Tapestry's defining technique, discontinuous weft that turns back at color boundaries, creates slits: vertical gaps where two color areas meet but their wefts do not interlock. How those slits are managed, left open, sewn shut, or interlocked during weaving, determines both the tapestry's structural integrity and its visual character. On fine tapestry, with high sett and delicate color transitions, slit management becomes exacting work: the overlaps must be structurally sound, visually clean, and consistent across the piece. This guide covers the options and the decision logic.
Why slits form and why they matter
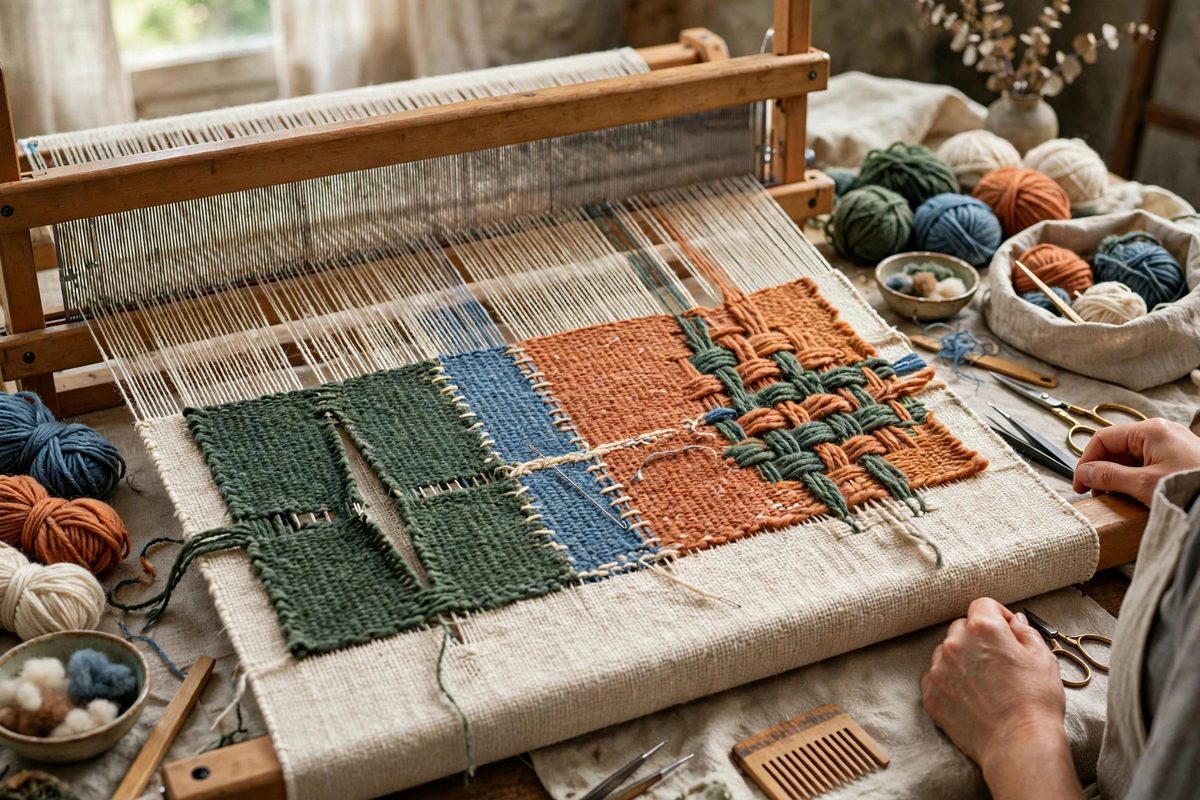
In tapestry, each color area is woven with its own weft, which travels only as far as that color extends before turning back around the edge warp. Where two colors meet vertically, the two wefts turn around adjacent warps without connecting, leaving a slit between them. Unmanaged slits are structural weaknesses: the tapestry can separate along them under its own weight or during handling, and long open slits visibly gap. The traditional responses are to sew the slits closed after weaving, to interlock the wefts during weaving, or to design around them with techniques that avoid long vertical boundaries. Each approach has structural and aesthetic consequences, and the choice shapes the finished piece.
Sewn slits: the traditional finish
The classic method leaves the slits open during weaving and sews them closed afterward with a fine thread matched to the surrounding colors. Sewing after weaving allows the weaver to work freely without managing joins at the loom, and the sewn closure is nearly invisible when done well. The technique: use a sharp needle and a thread weight appropriate to the sett, whip the slit's edges together with small, even stitches that disappear into the weft, working from the back. Sew with the tapestry off the loom and lightly tensioned; sewing under distortion locks the distortion in. The limitation is structural: sewn slits rely on the sewing thread, and very long slits sewn shut can still be weak points. For fine tapestry with many short slits, sewing is often the cleanest solution.
Interlocking during weaving
Interlocking joins the wefts at the color boundary as the weaving progresses: the two wefts hook around each other at the shared warp before turning back. This creates a continuous connection with no slit to sew later, and the join is as strong as the weaving itself. The visual cost is a slight blurring of the color boundary; the interlocked wefts mix minutely at the join, softening what would otherwise be a crisp line. On fine tapestry this softening is often desirable, producing the painterly transitions the medium is prized for. The technique demands care at the moment of interlocking: the wefts must engage fully without distorting the edge warps, and the tension of both colors must stay even through the join. Practice the interlock on a sample until the motion is automatic, since fumbling it mid-tapestry shows.
Dovetailing and other joinery
Dovetailing alternates the wefts around a shared warp or warps, creating a toothed join that is stronger than a sewn slit and crisper than a full interlock. The colors interpenetrate in a small zigzag, which reads as a deliberate textural detail in many designs. Other traditional joineries include the single and double interlock variants and the slit-with-lashing techniques of specific weaving cultures. Each has its characteristic look, and the choice among them is partly aesthetic: the joinery becomes part of the tapestry's visual language. Sample each candidate joinery at the project's sett before committing; a join that looks right in a coarse sample may read differently at fine scale, and the sampling also trains the hands for the production work.
Designing to minimize problem slits
The most elegant slit management happens at the design stage. Avoid long vertical color boundaries where possible, breaking them with stepped or diagonal transitions that distribute the join across multiple warps. Where vertical boundaries are essential to the design, plan the joinery in advance rather than improvising at the loom. Consider the tapestry's eventual hanging: slits near the top bear less weight stress than those near the bottom, though all slits deserve proper treatment. And remember that the back of the tapestry shows the management honestly; a well-managed piece is tidy on both faces, which matters for work that may be viewed from either side or photographed for documentation.
Finishing and longevity
After weaving, inspect every slit and join before finishing: tug gently at the boundaries to test their integrity, and reinforce any that feel weak. Sew open slits with the tapestry blocked square so the closures do not distort the piece. Finish the edges and mount or hang the tapestry so its weight distributes evenly; even perfectly managed slits suffer if the piece hangs crookedly and loads one side. With proper joinery and finishing, tapestry slits become what they should be: invisible structure, present in the technique's history and absent from the viewer's experience, holding the colors together as firmly as the design demands.
Manage tapestry slits deliberately: sew the short ones closed with invisible stitching, interlock or dovetail where strength or softness is wanted, design away from problematic long verticals, and test every join. The wefts turn back at every color boundary; what happens at that turning defines the tapestry's integrity.
Related Guides
- Dovetail Interlock Tension on Heavy Wool Tapestry: Where two colors meet in tapestry, the weaver must join them without a slit weakening the cloth. The dovetail interlock, where each color's weft
- Limiting Slit Gaps in Structural Heavy Weft Tapestry: Tapestry's color changes create slits: vertical gaps where one weft color ends and another begins, with no interlacing between them. In pictorial
- Dovetail Interlock Joins on Dense Tapestry Warps: Tapestry weaving builds images from discontinuous wefts: each color area is woven separately, and where two colors meet along a vertical boundary
- Slit Weaving Interlock Joins on High Sett Linen Warps: In tapestry, each color block is woven with its own weft, and where two colors meet along a vertical boundary, the wefts turn back on themselves