
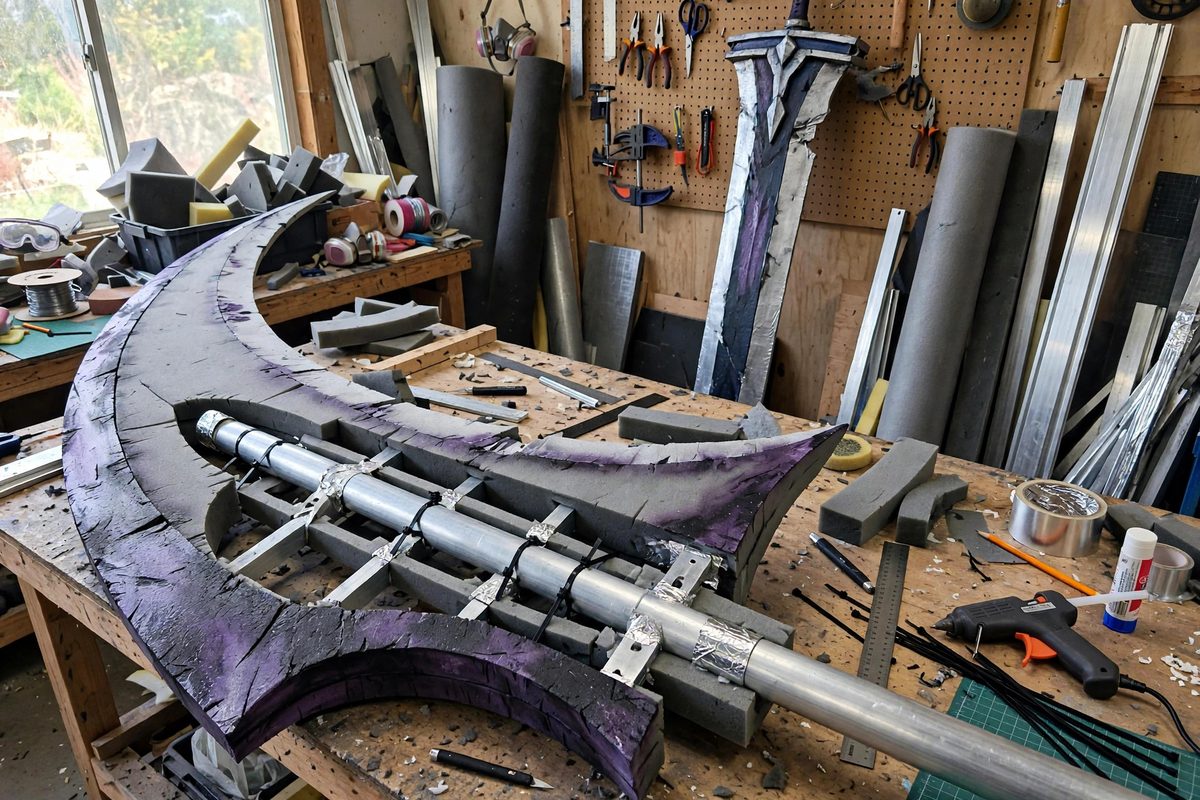
A giant anime prop, a sword taller than its wielder, a scythe with a blade like a sail, looks like foam and paint on the outside. Inside, it needs a spine. Aluminum tube or bar stock running through the prop carries the weight, resists bending, and gives you something solid to grip. Without it, a big prop sags, wobbles, and eventually snaps at the worst moment of the day.
Why Aluminum
Aluminum hits the sweet spot for prop spines: strong enough to support several feet of foam and filler, light enough to carry all day, and workable with basic hand tools. Steel is stronger but heavy enough to make a big prop exhausting; wood dowels are light but snap without warning under shock loads; PVC flexes too much at long lengths. Aluminum bends rather than shattering when overloaded, which means a prop that gets knocked over dents its spine instead of exploding into pieces. For the longest props, aluminum's stiffness per weight is the property that matters most.
Sizing the Spine
Size the spine to the prop's length and weight. A hand-and-a-half sword wants a spine running the full length of the blade and into the handle, roughly three-quarter to one inch tube for typical builds. Longer props, staffs and polearms, benefit from larger diameter tube or from a spine that tapers: thicker at the grip where bending moment is highest, thinner toward the tip where loads are small. The spine should extend into the handle or grip section far enough that your hand wraps the reinforced part, because the grip is where all the leverage concentrates. A spine that stops short of the handle leaves a weak joint right where you hold it.
Joining Spine Segments
Props longer than your aluminum stock need joints, and the joint is the critical engineering detail. Overlap tube segments with an inner sleeve that fits snugly inside both, bonded with epoxy and pinned or bolted through. A butt joint wrapped in tape is not a joint; it is a future break. For takedown props that travel, design the joint as a proper coupling: threaded inserts, or a snug sleeve with a locking pin, so the prop assembles rigidly and disassembles for the car. Test the joint by flexing the assembled prop firmly; any wobble at the joint will only get worse with a day of handling.
Attaching Foam and Detail to the Spine
The foam shell must be bonded to the spine along its length, not just at the ends. Wrap the spine in foam or carve a channel so the aluminum sits embedded in the prop body, bonded with contact cement or epoxy. This distributes loads from the shell into the spine instead of letting the foam flex independently and tear. At stress points, the guard, the pommel, the widest part of a blade, add mechanical attachment: a bolt through the spine into a reinforced block, or wire ties through drilled holes. Glue alone at a stress point is a repair waiting to happen.
Balance and Handling
A giant prop handles well when its balance point sits near the grip. If the blade end is heavy, counterweight the pommel with dense material so the prop does not constantly try to tip forward. Walk around with the finished prop before the event, making turns and raising it, to find balance and clearance problems while there is still time to fix them. Convention halls have low ceilings, crowds, and door frames; a prop that is technically strong but unwieldy is still a liability. Build for the venue as well as the photo.
The spine is the prop's skeleton: aluminum sized to the length, joined with real couplings, bonded to the shell along its length, and balanced at the grip. Build the inside right and the outside gets to be spectacular without falling apart.
Related Guides
- Aluminum Spine Bracing for Massive Anime Prop Swords: Anime swords are drawn without regard for physics: six feet long, a foot wide, wielded one-handed by characters who never visit the gym. Building one
- Make a Safe EVA Foam Cosplay Sword: Craft Convention-Safe Props! EVA foam swords are the standard for cosplay and LARPing because they're lightweight, safe, durable, and look amazing
- Rigid Polyurethane Foam Core Carving for Cosplay: Some cosplay props are too large, too sculptural, or too organically shaped for EVA foam sheets: oversized weapons, creature heads, architectural set
- Balancing Counterweights in Large Foam Swords: A great foam sword feels alive in the hand: it swings fast, stops where you aim it, and does not tire your wrist during a long convention day. That
- Fiberglass Core Tension in Oversized Fantasy Glaives: An oversized fantasy glaive, with a long haft and a broad blade head, puts serious leverage on its core. Fiberglass rods and tubes are the standard