
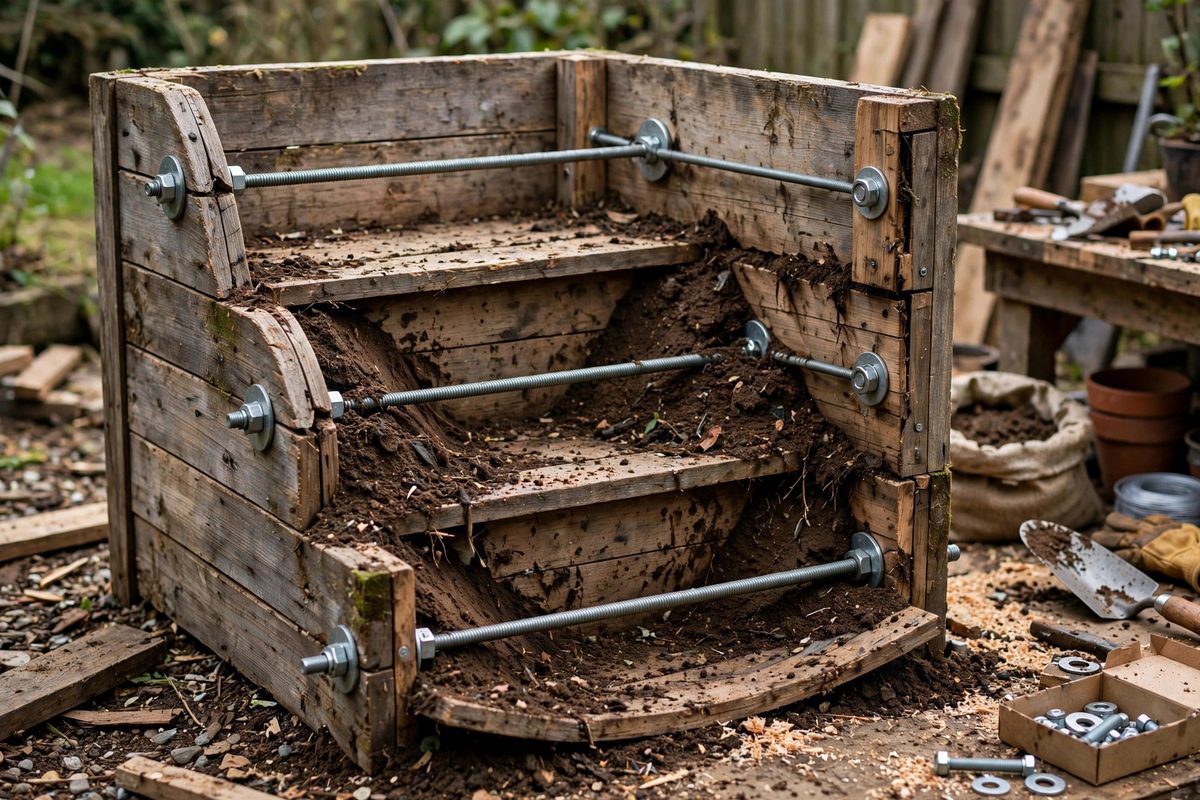
Soil pushes outward. Every raised bed, and especially every tier stacked on another, carries lateral pressure that wants to bow the walls outward and push the structure apart. Internal tie rods connect opposing walls so the soil pushes against the rods instead of against your corners. Size the rods and anchors for the real load and the bed stays square for years; guess wrong and the walls slowly belly out until the whole thing leans like a tired fence.
Understanding the Load on Each Tier
Lateral soil pressure grows with depth, so the bottom tier of a multi-tier bed carries the pressure of all the soil above it while the top tier carries only its own. This means the lowest tier needs the strongest tie rods and the most frequent anchors. Wet soil pushes harder than dry soil, and clay pushes harder than sandy loam, so design for saturated conditions after a heavy rain, not for the loose dry fill you shovel in on a sunny afternoon. Each tier also adds weight pressing down, which the lower tiers' walls must carry without buckling, so tie rods help there too by keeping the walls from spreading under the vertical load.
Sizing the Rods
For typical backyard beds up to about three feet tall, half-inch threaded rod is a solid default that resists both tension and the bending that happens when soil loads are uneven. Longer spans between walls may want five-eighths rod to keep deflection down, since a rod that stretches or bows under load lets the walls drift. Stainless or hot-dip galvanized rod survives buried, damp, acidic soil conditions that would eat plain steel in a couple of seasons. Cut rods slightly long so the nuts engage fully on both ends; a nut hanging on two threads is a failure waiting for the first hard rain.
Anchoring Through the Walls
The anchor is the whole point, because a tie rod is only as strong as what it pulls against. Large fender washers spread the load across the wall boards and prevent the nut from crushing through soft wood. On lumber walls, back the washers with a steel plate or a second short board on the outside face so the force distributes over a wide area. On masonry or timber-frame style tiers, the rod should bear against something substantial: a steel plate let into the wall, or a through-bolted timber cleat, not a single brick or a screw. The anchor detail is where multi-tier beds fail first, so overbuild it without apology.
Spacing Rods Along the Bed
Space tie rods every two to three feet along the length of each tier, closer together on the lower tiers where pressure is highest. Stagger the rod positions between tiers so anchors do not all land on the same wall section. For tiers taller than about eighteen inches, run two rods stacked vertically, one near the top of the tier and one near the bottom, because a single mid-height rod lets the top and bottom of the wall belly between anchors. Short beds under four feet long may get by with rods at each end only, but check the wall for bowing after the first season.
Adjusting Over Time
Wood shrinks, soil settles, and beds built tight in spring sit a little loose by fall. The beauty of threaded tie rods is that they are adjustable: a quarter turn on the nuts pulls the walls back to square. Check the beds each spring and snug the rods as needed, replacing any washers that have crushed into the wood. A bed with tie rods is a structure you can maintain, which is why it outlasts a bed that relies on nails and hope.
Tie the walls together with rods sized for wet-soil pressure, anchor them against real bearing surface, space them tighter at the bottom, and check them yearly. The beds will stand square through every storm the seasons throw at them.
Related Guides
- Threaded Tension Rod Spacing for Multi-Tier Planters: A multi-tier planter is a stack of growing beds held apart by structure, and wet soil is heavy: a single tier of damp growing medium can weigh
- Cross-Tie Tension Rod Spacing for Tall Timber Planters: A tall timber planter is a box full of wet soil, and wet soil pushes outward with surprising force. The long sides bow, the corners strain, and
- Corrugated Galvanized Wall Bracing for Raised Beds: Corrugated galvanized steel makes beautiful raised beds: crisp lines, excellent longevity, and a modern look that wood cannot match. But a tall bed
- Corner Post Cable Tension in Long Timber Garden Beds: A long raised bed built from timbers looks indestructible on day one, but soil is heavy and patient: a cubic yard of wet garden soil weighs over a
- Build a 4x8 Raised Garden Bed: Start Growing Your Own Food! A raised garden bed is one of the best weekend projects you can tackle. It gives you better soil drainage, easier weed