
Complex lace knitting involves hundreds of stitches per row, yarnovers and decreases in precise relationships, where one missed operation several rows back can be unfixable by ordinary tinkering. A lifeline, a thin thread run through all the live stitches of a known-good row, is the safety net: if disaster strikes, you rip back to the lifeline and every stitch is caught, oriented, and ready to resume. Placing lifelines well is the difference between lace knitting with confidence and lace knitting with dread.
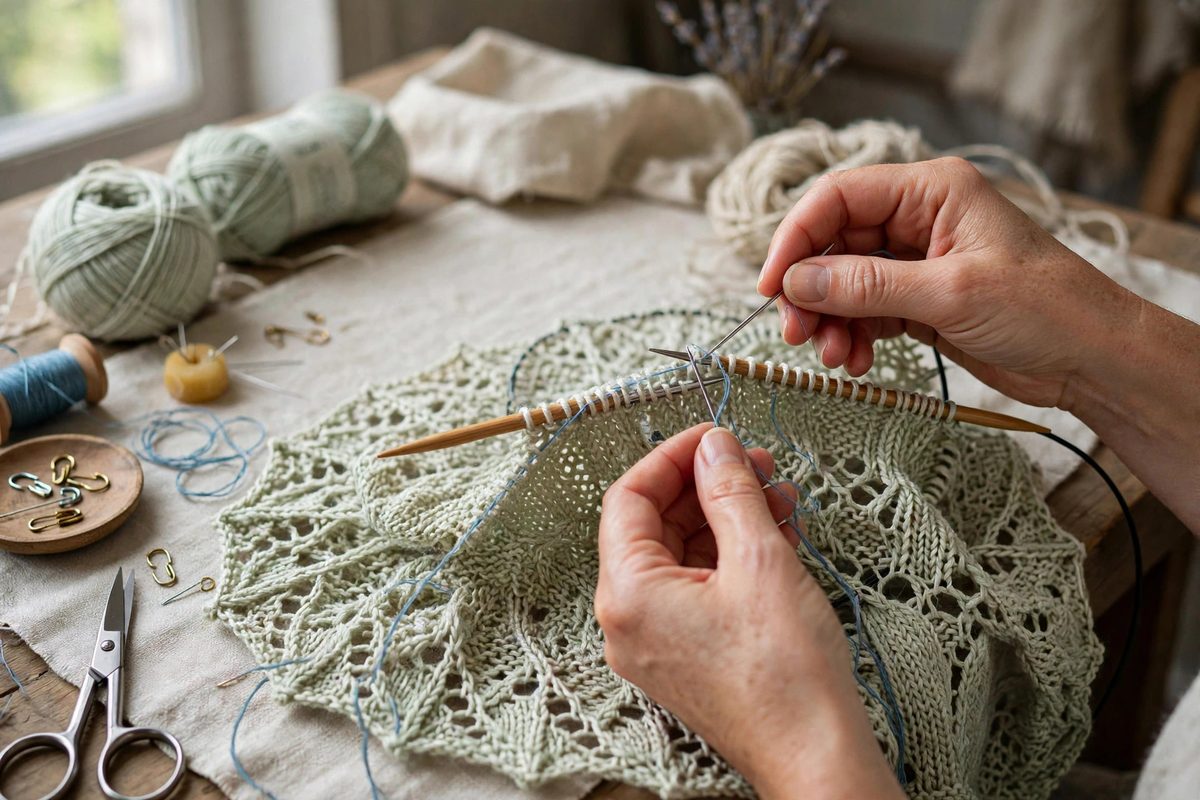
What a lifeline does
The lifeline threads through every stitch on the needle at a completed row, independent of the working needle. If you must rip back, the knitting unravels only to the lifeline, which holds each stitch like a spare needle. You then slip the stitches back onto a needle from the lifeline and continue. Without it, ripping back lace means dropped yarnovers vanishing, stitch orientation scrambling, and a rescue operation that often fails.
The lifeline costs a minute to place and can save hours of work. In complex lace, where a single pattern repeat may represent an evening's knitting, that trade is overwhelmingly favorable. Experienced lace knitters place lifelines as routine, not as pessimism.
When to place lifelines
Place a lifeline after every pattern repeat, or after every few repeats in very long repeats, and always before starting a section you have not knit before. The rhythm is: complete a repeat, verify it is correct by reading the knitting, place the lifeline, proceed. The verification step matters; a lifeline through a row containing an error preserves the error, which defeats the purpose.
Also place one before any risky operation: a complex bind-off, a graft, a section where you will be trying something new. Lifelines are cheap; the situations that need them are exactly the ones where you will wish you had placed one.
Thread choice and placement technique
Use a smooth, thin, strong thread in a contrasting color: unwaxed dental floss is the classic, though smooth crochet cotton or embroidery floss works. Avoid fuzzy or textured threads that grip the yarn and resist removal, and avoid anything that could felt to wool. The contrasting color matters: you must be able to see the lifeline clearly when ripping back to it.
Thread the lifeline through a tapestry needle and run it through every live stitch on the needle, following the needle's path exactly. Some interchangeable needle sets have a lifeline hole in the cable join; threading through it places the lifeline automatically as you knit the row, which is the most foolproof method. Either way, verify every stitch is caught before moving on; a missed stitch at lifeline placement becomes a dropped stitch at rescue time.
Ripping back to a lifeline
When disaster is confirmed, remove the working needle and pull the working yarn firmly: the knitting unravels down to the lifeline and stops, each stitch held. Slip a needle through the held stitches, choosing a size at or slightly below the working size for easy pickup, and remove the lifeline thread. Check stitch orientation as you pick up; the lifeline holds stitches but does not guarantee their mount, so correct any twisted stitches before resuming.
Work calmly. Ripping back lace feels catastrophic but the lifeline makes it mechanical: unravel, pick up, verify, resume. The panic is the enemy, not the rip. Many knitters find that the first successful lifeline rescue converts them permanently; the fear of lace evaporates once the safety net has been tested.
Lifelines as documentation
Leave old lifelines in place until the section above them is verified correct; they cost nothing to keep and provide multiple fallback points. Some knitters leave them until blocking, as a record of the knitting's history. When removing, pull gently from one end; a smooth thread slides out without disturbing the fabric.
Note in your pattern where lifelines sit, especially if you set the project aside. Returning to a lace project weeks later with lifelines marked is vastly easier than reconstructing your place from the knitting alone. The lifeline is both safety net and bookmark.
Lifelines are lace knitting's insurance policy: contrasting smooth thread through every stitch of each verified repeat, placed before the unknown, ready to catch the rip. Place them routinely, verify before placing, and knit the complex patterns with the confidence that the worst case is a minor setback, not a catastrophe.
Related Guides
- Central Double Decrease Geometry in Mirrored Lace Rows: In mirrored lace, the same motif reflects across a center line: decreases lean toward the spine on one side and away on the other, keeping the fabric
- Managing Wrap and Turn Gaps in Complex Shetland Shawls: Shetland shawls are lace knitting at its most demanding: fine yarn, complex patterns, and shaping that relies on short rows. The wrap and turn is the
- Centering Double Slip Decreases in Openwork Stitches: Lace knitting is architecture in yarn: every decrease shapes the fabric, and every yarn-over opens a window. The centered double decrease, which
- Centering Double Decreases in Openwork Knit Stitches: In lace knitting, yarn overs create the holes and decreases shape the fabric, and the two must balance: every yarn over needs a matching decrease or