
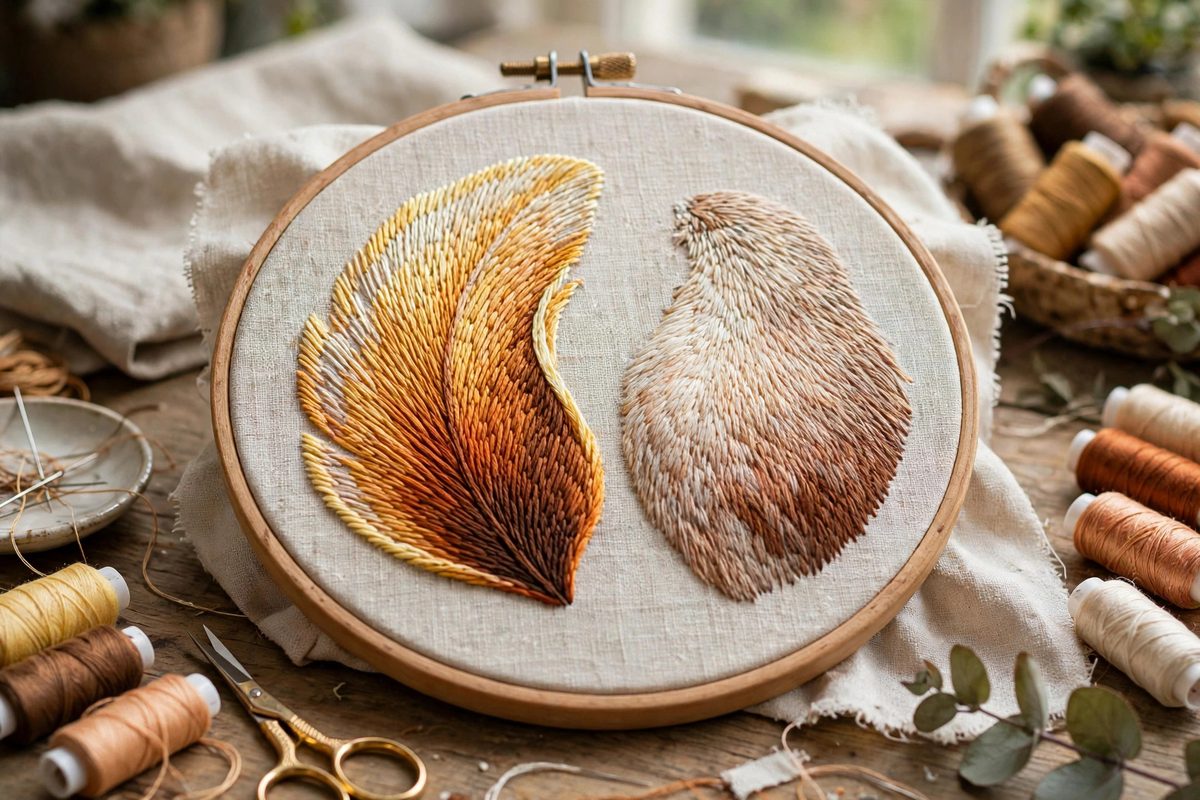
Realistic shading in hand embroidery, the petal that glows at its edge and deepens toward its heart, the bird's breast with its soft color transitions, comes from one technique above all: long and short stitch. Rows of alternating long and short straight stitches interlock like shingles, and by changing thread color gradually across the rows, the embroiderer blends hues the way a painter blends oils. It is the foundational stitch of thread painting, and its mastery separates pictorial embroidery from flat decoration. The technique is simple to describe and demanding to do well, which is exactly why it rewards study.
How the stitch builds shading
Each row of long and short stitch consists of straight stitches of two lengths, alternating irregularly, all worked in the same direction. The next row splits the previous row's stitches, its needle coming up through the fabric between the existing stitches and going down past them, so the rows interlock. This interlocking is what makes the blending work: where one row ends and the next begins, the colors overlap in a staggered boundary rather than a hard line, and the eye reads the transition as a gradient. By working successive rows in gradually shifting shades, from light to dark or through a hue progression, the embroiderer builds shading with a smoothness that no single thread color could achieve. The irregular alternation of long and short is essential; perfectly regular rows produce a visible striped pattern instead of a blend.
Planning the shading map
Successful thread painting starts before the first stitch, with a shading map: a plan of which colors go where and how they transition. Study the subject under good light and identify the value structure, the arrangement of lights and darks, independent of hue; most shading failures are value failures, not color failures. Choose a palette of three to seven shades spanning the value range, more shades for smoother blends, fewer for a more graphic effect. Mark the design with the color regions, either on the fabric with light guidelines or on a reference sketch. Plan the stitch direction too, since long and short stitches must follow the form: petal stitches radiate from base to edge, fur stitches follow the growth direction. Direction is part of the realism; stitches that ignore the form look wrong no matter how smooth the shading.
Working the rows
Begin at the outer edge or the lightest area, depending on the design, and work the first row in the starting shade with genuinely irregular long and short stitches. Keep the stitches snug against each other with no fabric showing between them; gaps in the first row become permanent holes in the shading. Bring the needle up through the previous row's stitches for the interlock, splitting them rather than piercing the threads, which keeps the surface smooth. Maintain consistent tension: stitches should lie flat and even, neither puckering the fabric nor looping loose. Work methodically across the region, completing each color band before moving to the next, and step back frequently to check the blend from a normal viewing distance. Embroidery is viewed from feet away, not inches; judge it accordingly.
Color transitions that convince
The smoothness of a transition depends on the value steps between adjacent shades: smaller steps blend invisibly, larger steps read as bands. When the available thread palette jumps too far between shades, bridge the gap by mixing: work the transition rows with one strand of each flanking color in the needle, creating an intermediate tone that exists in no single thread. This stranded blending is the thread painter's secret weapon for palettes with limited shades. Also consider the direction of the transition: natural shading usually moves through three or more steps, and skipping the middle step produces the posterized look of too few colors. When in doubt, add the intermediate row; the extra work is invisible in the result, which is the point.
Common problems and fixes
Several faults recur in learning work. Gapping, where fabric shows between stitches, comes from stitches spaced too far apart or tension too loose; the fix is denser stitching, not tighter pulling. Puckering comes from tension too tight or stitches too long for the fabric; shorten the stitches and ease the tension. Visible banding between colors means the value steps are too large; add intermediate shades or stranded blends. A lumpy surface usually means the interlocking is piercing threads instead of splitting between them, building bulk; adjust the needle placement. And muddy color, where the blend looks dirty rather than smooth, often comes from transitioning through incompatible hues; check the shading map and ensure the hue path between colors passes through sensible intermediates.
Finishing and presentation
Long and short stitch work is dense and deserves proper finishing. Keep the fabric taut in the hoop or frame throughout; removing and re-hooping mid-project distorts the stitching. When complete, press gently from the back over padding to avoid crushing the stitches' texture. Frame behind glass for display pieces, since the dense stitching collects dust and the silk threads of fine work fade in direct sun. Sign and date the back; thread paintings are artworks, and their makers deserve the credit. The hours in the stitching show in the result, which is why the technique has anchored pictorial embroidery for centuries.
Long and short stitch shades by interlocking rows of irregular stitches in graduated colors. Map the values first, stitch densely with the form, bridge color gaps with stranded blends, and judge from viewing distance. Patience in the rows becomes realism in the piece.
Related Guides
- Split Stitch Directional Shading in Crewel Wool Work: Split stitch is one of the oldest stitches in embroidery, and in crewel wool work it does something remarkable: it sculpts light. Because each stitch
- Directional Grain Tracking in Hard Silk Satin Stitch: Satin stitch on silk is unforgiving. Every stitch lies on the surface, fully visible, and the fabric's sheen amplifies any irregularity. Directional
- Tensioning French Knots for Uniform Texture Relief: The French knot is embroidery's perfect little bump, a coiled knot that stands proud of the fabric, and a field of them creates a texture no other
- Directional Grain Stitching in Silk Needle Painting: Needle painting, the embroidery technique that renders images in thread the way a painter renders them in oils, depends on one thing above all: the