
Split stitch is one of the oldest stitches in embroidery, and in crewel wool work it does something remarkable: it sculpts light. Because each stitch pierces through the previous one, the wool lies in a dense, slightly raised rope that catches light along its length. By controlling the direction of that rope, stitch by stitch, you can shade a petal, a leaf, or an animal's flank with nothing but thread angle. This is directional shading, and it is the difference between flat filling and living surface.
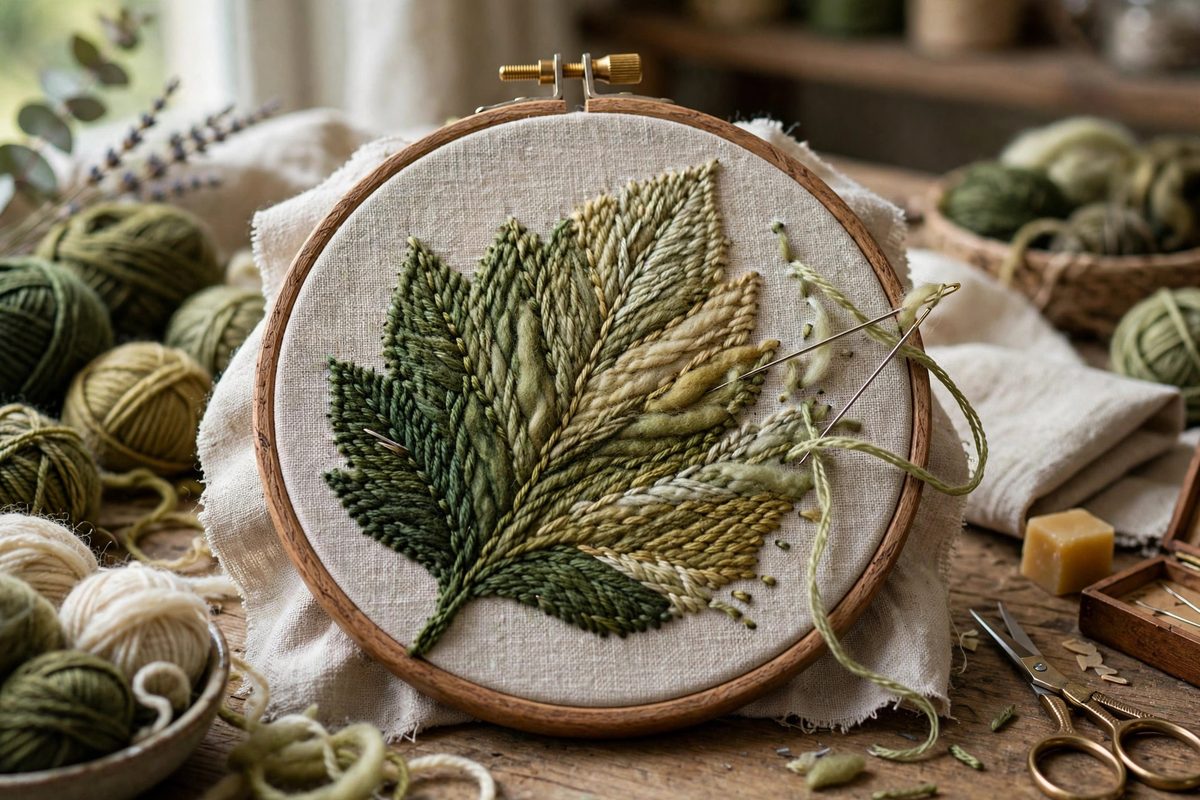
How split stitch lays its rope
In split stitch, the needle comes up through the fabric and then dives back down through the middle of the previous stitch, splitting its fibers. Each new stitch therefore emerges from inside the last one, creating a continuous corded line with a braided texture. Crewel wool, being a two-ply woolen yarn, splits beautifully; the plies open around the needle and then close, hiding the pierce point. The resulting line has a distinct direction, and that direction is visible: light slides along parallel stitches and scatters across stitches that turn. This light behavior is your shading tool.
Mapping direction before you stitch
Serious crewel workers sketch direction lines onto the design before picking up a needle. For a leaf, the lines run from the central vein outward toward the edges, following the way a real leaf's fibers run. For a petal, they run from the base outward to the rim. For an animal body, they follow the lay of the fur. These direction lines become your row plan: each row of split stitch follows the map. When rows converge or fan out, the light shifts with them, and the eye reads that shift as form, as curve, as volume.
Shading with tone changes along the direction
Direction alone gives you form; adding tonal change gives you depth. Crewel palettes typically offer several shades of each color, and the standard approach is to work from the darkest shade at the shadowed base through mid tones to the lightest at the highlight, with the direction lines guiding where each tone sits. The transition happens row by row: finish the dark rows, then begin the next shade in the following row, letting the wool's natural fuzz blur the boundary. Because split stitch rows pack tightly, the gradient reads as smooth from a few feet away while staying visibly hand-stitched up close.
Turning corners and handling curves
Direction changes are where the craft shows. On a curve, shorten your stitches slightly and let each stitch pivot a few degrees, so the rope bends smoothly instead of kinking. On a sharp turn, such as the tip of a leaf, work to the very point with one row and let the next row begin there, reversing direction cleanly. Avoid crossing rows over each other; overlapped split stitch creates a lumpy ridge that catches light wrong and reads as a mistake. When the direction map demands rows that converge, let them merge into each other by stitching the converging rows into the same pierce points.
Wool behavior and stitch length
Crewel wool has a halo, a slight surface fuzz, that softens everything. Use that: a stitch length of roughly a quarter inch lets the halo blend rows together, while much longer stitches expose the cord structure and look ropey. Keep your tension even and slightly relaxed; wool that is pulled tight loses its loft and the shading flattens. If a row looks too stark against its neighbor, one pass of the needle tip gently teasing the wool fibers across the boundary will blend the tones without adding stitches.
Directional shading is slow work, and that is the point. The stitches you lay are the surface itself. Plan the light, follow the form, and let the wool do the rest.
Related Guides
- Long and Short Stitch Feathering for Realistic Shading: Realistic shading in hand embroidery, the petal that glows at its edge and deepens toward its heart, the bird's breast with its soft color
- Directional Grain Tracking in Hard Silk Satin Stitch: Satin stitch on silk is unforgiving. Every stitch lies on the surface, fully visible, and the fabric's sheen amplifies any irregularity. Directional
- Directional Grain Stitching in Silk Needle Painting: Needle painting, the embroidery technique that renders images in thread the way a painter renders them in oils, depends on one thing above all: the
- Tensioning French Knots for Uniform Texture Relief: The French knot is embroidery's perfect little bump, a coiled knot that stands proud of the fabric, and a field of them creates a texture no other