
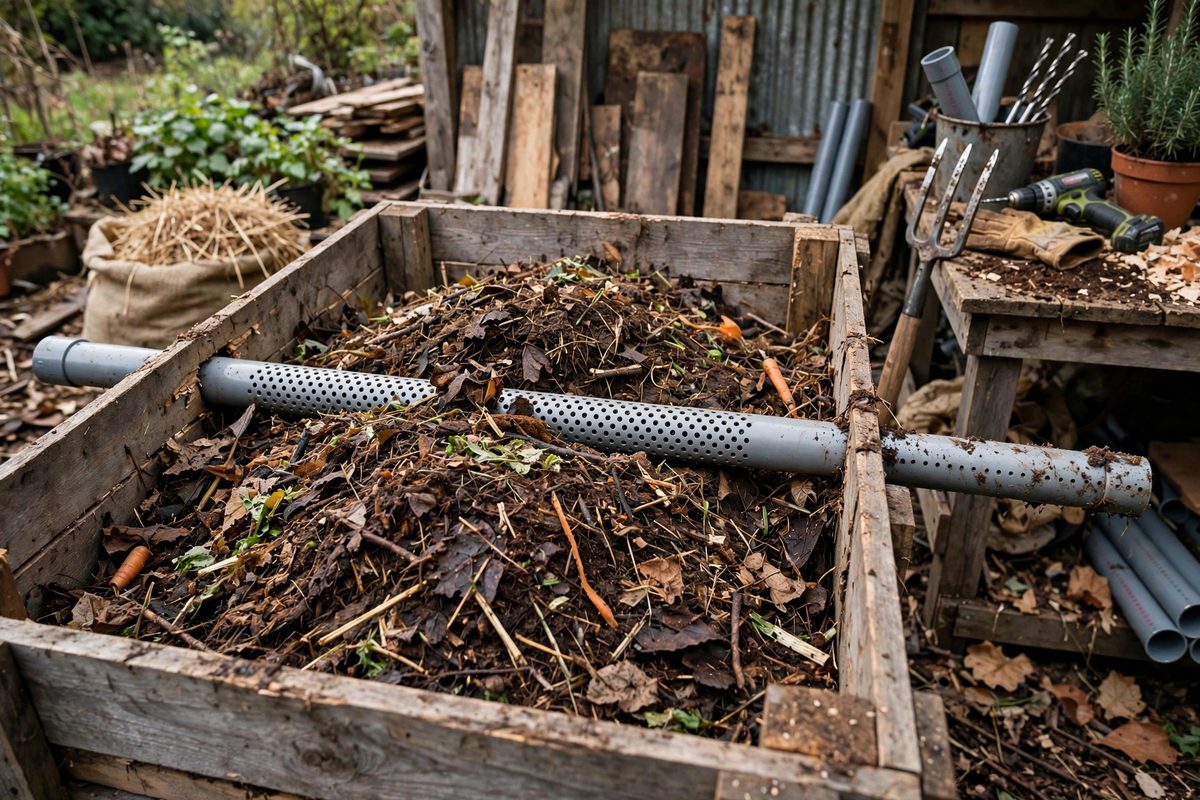
Static compost bins fail for one reason: the middle of the pile goes anaerobic, and an anaerobic middle smells, stalls, and composts at a crawl. Perforated aeration tubes laid through the bin feed air to the core without any turning. The spacing of those tubes is the design decision that determines whether every part of the pile breathes or only the parts near the walls.
How Air Moves Through a Pile
Air rises through compost by convection as the pile heats, and it spreads sideways only a short distance from any given air source. Each tube creates a zone of aerated material around itself, roughly cylindrical, that extends outward on the order of a foot or so in each direction depending on how dense the material is. Dense wet greens block airflow fast; fluffy dry browns let it travel further. The spacing you choose has to assume the worst material you will compost, not the best, because the tubes cannot be moved once the bin is full.
Setting the Tube Spacing
A practical starting spacing is roughly twelve to eighteen inches between tubes, measured center to center. Closer spacing suits wet, dense feedstocks like grass clippings and food scraps, where air simply does not travel far. Wider spacing works for chunky yard waste and leaves that are already full of air pockets. Lay tubes in parallel rows at the bottom of the bin and, for bins taller than about three feet, add a second layer of tubes partway up the pile. Stagger the upper layer between the lower rows so no zone sits far from every tube. Overlap the aeration zones rather than leaving gaps, because a gap becomes a smelly dead zone by week two.
Tube Size and Perforation Details
Tubes around two to four inches in diameter carry enough air for typical backyard bins. Smaller tubes clog with fines and compost juices; larger ones waste bin volume. Perforate with holes roughly a quarter to three eighths of an inch, distributed all around the tube, spaced a few inches apart along its length. Cap the ends or screen them to keep rodents and crawling compost out. The tubes should extend slightly beyond the bin walls or terminate in vertical risers above the pile surface so convection can actually draw air in from outside the pile.
Keeping Tubes Working Over Time
Tubes clog. Fine material migrates into the perforations, moisture films over them, and the whole system quietly suffocates. Fight this by laying the tubes on a coarse layer of wood chips or brush at the bin bottom, which keeps fines off the perforations while still passing air. At each emptying, pull the tubes, knock them out, and check that the holes are clear. A tube that was working in spring can be sealed by autumn, so maintenance is not optional. If you notice the pile smelling despite the tubes, the first suspect is blocked perforations, not bad spacing.
Matching Tubes to Bin Shape
Rectangular bins suit straight parallel tubes; round bins suit a radial arrangement from a central vertical tube. Tall narrow bins benefit most from vertical risers because convection runs stronger vertically. Wide shallow bins can often get by with a single tube layer since the pile never gets deep enough to suffocate. Scale the tube layout to the bin you actually built, not the bin you wish you had, and leave the tubes accessible for the inevitable cleaning.
Aeration tubes turn a static bin from a gamble into a process: air everywhere, convection doing the turning, and the core of the pile composting as fast as the outside. Space them for your worst material, keep the perforations clear, and the pile will do the rest.
Related Guides
- Static Aeration Tube Spacing for Winter Compost Bins: Winter composting stalls for one reason: the pile goes anaerobic. Cold slows microbial activity, wet material mats down, and without oxygen the pile
- Passive Induction Vent Sizing for Static Compost Piles: A static compost pile, one that is built and left to cook without turning, lives or dies on airflow. The microbes doing the composting need oxygen
- Aeration Plenum Pipe Perforation Ratios for Hot Bins: A hot compost bin lives or dies on oxygen. The thermophilic bacteria that drive temperatures into the active range need a steady air supply, and in a
- Carbon-to-Nitrogen Balancing for Continuous Tumblers: A continuous compost tumbler, the kind you add to daily and harvest from periodically, lives or dies by its carbon-to-nitrogen ratio. Batch piles can