
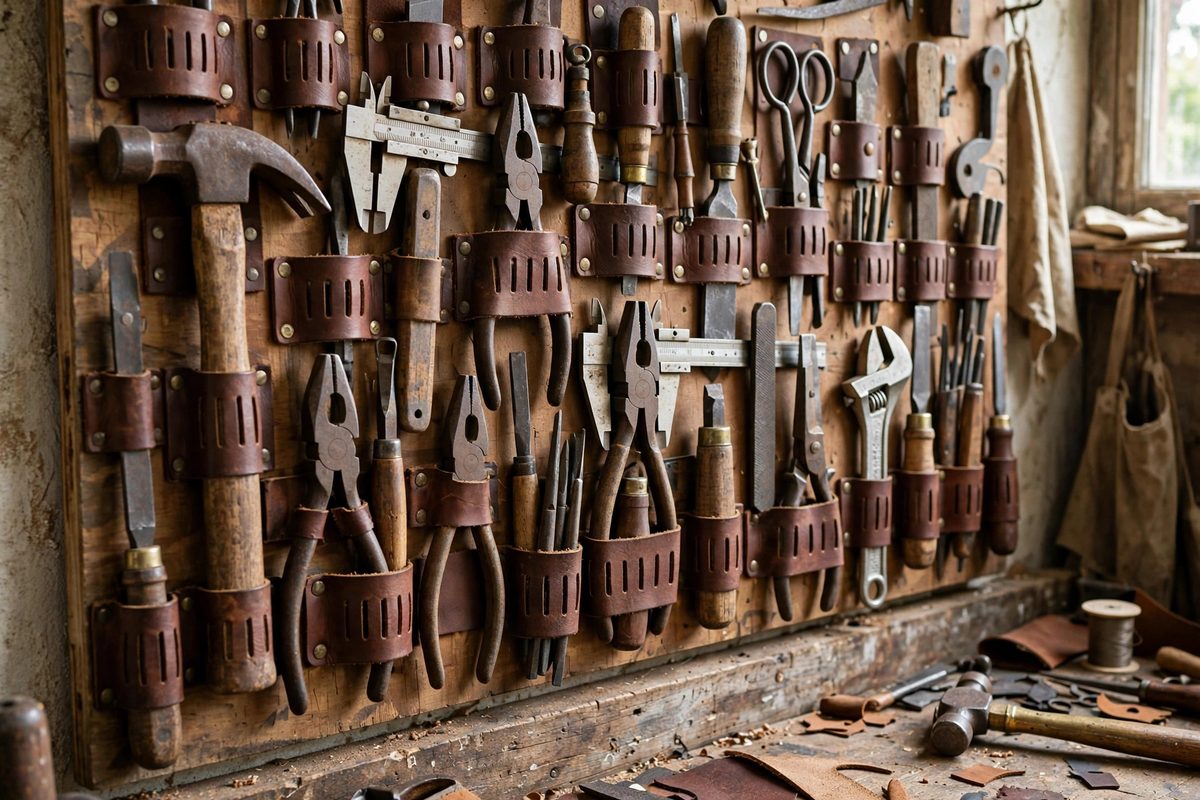
A wall of antique tools deserves better than nails and wire. Slotted leather loops hold each tool securely, look appropriate to the collection, and let you pack tools densely without them knocking together. The technique is simple leatherwork, but the layout thinking is what makes a high-density board work.
Why Leather Loops Suit Antique Tools
Leather grips without scratching, which matters when the tools on the board are the collection. Metal hooks and clips can mar patina and polished surfaces; a leather loop cradles the tool with friction distributed over a wide area. Leather also ages gracefully alongside old tools, developing a patina that looks intentional rather than improvised. For high-density layouts, loops have another advantage: they hold tools flat against the board with minimal projection, so rows can sit close together without handles colliding. A loop sized to the tool holds it firmly enough to survive a bumped wall but releases with a straight pull, which makes the board usable as working storage, not just display.
Designing the Loop
A slotted loop is a leather strap with a slot cut near each end; screws or pegs through the slots fasten it to the board, and the strap arches out to form the loop. Size the strap so the loop grips the tool's handle or body snugly: too loose and the tool rattles, too tight and it is hard to remove. Cut the slots slightly oversized so the fasteners do not bind the leather, which lets the loop flex. Use vegetable-tanned leather in a medium weight, roughly 6 to 8 ounces, which is stiff enough to hold its arch but pliable enough to conform. Skive (thin) the ends slightly so they sit flat under the fasteners. For heavy tools like large planes or saws, use wider straps and consider a double loop, one near each end of the tool, so the weight is shared.
Laying Out a High-Density Board
Density comes from planning, not cramming. Trace each tool's silhouette on paper, cut out the templates, and arrange them on the board outline before drilling a single hole. Group by type or by size, and orient handles consistently so the eye reads the board as organized. Leave enough clearance that each tool can be removed without dragging across its neighbor; a board so tight that tools scratch each other on the way out defeats the purpose. Account for the loop's own footprint, since the fasteners sit to the sides of the tool. Photograph the final paper layout before committing, because you will second-guess the arrangement halfway through mounting.
Mounting to the Board
Use a board with real substance, three-quarter inch plywood or solid lumber, because the loops and tools impose meaningful pull-out loads. Fasten each loop with screws and washers rather than nails; screws hold in the board and allow repositioning. Drive the screws through the slots with a washer under the head to spread the load on the leather. For the heaviest tools, run the screws into the board with the loop's slot ends overlapping a backing area, or add a second screw per end. Keep the loops aligned vertically so tools hang straight; a crooked loop twists the tool and looks sloppy. Step back after mounting each row to check alignment before moving on.
Maintenance and Evolution
Leather stretches slightly under sustained load, so check the loops after the first few months and snug up any that have loosened. A dab of leather conditioner keeps the straps supple, but avoid over-oiling near the tools, since oil migrates. The beauty of the slotted design is adjustability: loosen the screws, shift the loop, retighten, and the board evolves as the collection grows. Label the board or keep a diagram of what hangs where, because a dense board of similar-looking tools becomes a puzzle when one is missing. A well-built leather loop board lasts decades and makes the collection look as cared for as it is.
Leather loops protect the tools, pack them tight, and look right doing it. Template the layout on paper, size each loop to its tool, fasten with screws and washers, and leave room to grow. The board should invite handling, not forbid it.
Related Guides
- Magnetic Tool Bar Polarity Spacing on Pine Boards: Magnetic tool bars are the clean way to display antique tools: the tools hang visible, accessible, and off the bench, with no hooks marring their
- Custom French Cleat Spacing for Vintage Tool Racks: Vintage tools deserve display that respects them: visible, accessible, and held securely without stressing century-old handles and mechanisms. The
- Rare Earth Magnetic Cleats for Vintage Tool Displays: Vintage tools deserve to be seen, and a wall display beats a drawer every time. But screws through a 100-year-old plane body are vandalism, and most
- Recessed Rare Earth Magnet Spacing for Antique Chisels: Displaying antique chisels on a magnetic rack looks clean and keeps the tools accessible, but rare earth magnets are strong enough to be a problem if