
Electrolysis (electrolytic rust removal) cleans antique steel tools by turning rust back into metal at the molecular level: the tool becomes the cathode in a DC circuit, and the rust reduces while the crud lifts off. It is remarkably gentle on sound metal and brutally effective on heavy rust, which makes it ideal for antique tools with surviving markings and patina. The electrolyte solution is simple, but its ratio matters, because too weak wastes time and too strong wastes the setup's efficiency.
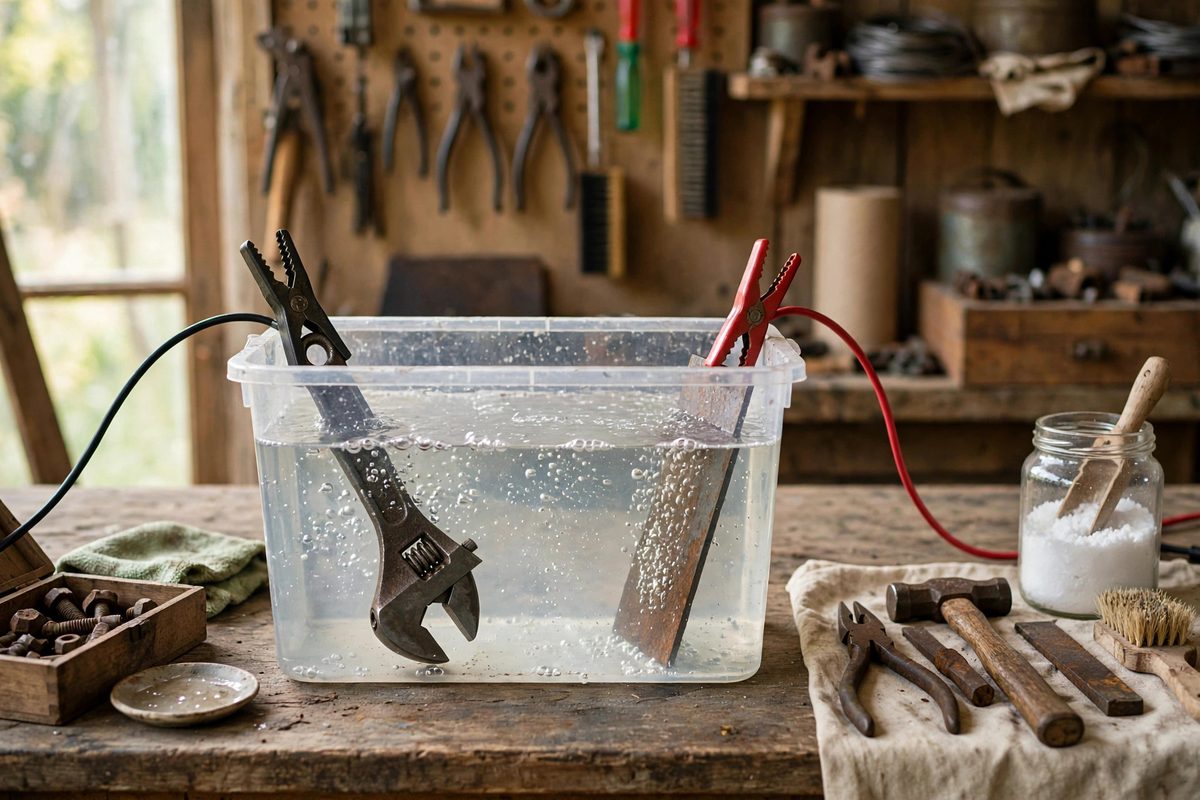
How the Bath Works
A low-voltage DC supply drives current through an alkaline electrolyte between a sacrificial anode (plain steel) and the tool (the cathode). At the cathode, water reduces to hydrogen gas, and the rust (iron oxide) reduces back toward metallic iron or loosens as a black sludge that rinses off. The process does not dissolve good steel the way acids do; it converts the oxide in place. Line of sight matters: surfaces facing the anode clean fastest, so reposition the tool during long soaks for even results.
The Standard Electrolyte Ratio
The classic electrolyte is washing soda (sodium carbonate) in water, at roughly one tablespoon per gallon. This ratio gives enough conductivity for good current flow without the downsides of stronger mixes. More washing soda does not clean proportionally faster; beyond the standard ratio, you mostly increase current draw and anode consumption for diminishing returns. If your supply is current-limited and the bath runs sluggishly, check the connections and anode area before reaching for more soda; poor contact wastes more performance than weak electrolyte ever does.
Water, Container, and Anode Setup
Use plain tap water; distilled is unnecessary and softened water is fine. The container must be non-conductive plastic, sized so the tool is fully submerged with several inches of clearance to the anodes. Arrange sacrificial steel anodes around the tool (rebar or flat bar works) so current reaches all sides, and keep the anodes from touching the tool: contact creates a short that stops the cleaning and can damage the supply. Suspend the tool on wire or rest it on a non-conductive rack, and wire all anodes to the positive lead, the tool to the negative.
Power Supply and Current
A manual battery charger (the old transformer type, not a smart charger that needs to sense a battery) or a bench DC supply works; aim for roughly 2 to 12 volts with enough current capacity for the bath size. Current density around 20 to 50 milliamps per square inch of tool surface is a productive range; more current cleans faster but generates more hydrogen and heats the bath. The process is self-limiting in a useful way: as rust converts, current draw drops, which tells you the bath is finishing. Never use a supply without current limiting or fusing, and never leave a running bath unattended for long stretches.
Duration and Inspection
Light rust may clean in a few hours; heavily encrusted tools can take a day or more. Pull the tool periodically, rinse, and inspect: the converted rust appears as a black coating that wipes off to reveal the metal beneath. Stubborn areas benefit from a soft brush between sessions. Stop when the rust is gone; prolonged electrolysis on clean steel does little harm but wastes time and anode. Tools with surviving japanning, paint, or plating need shorter, watched soaks, since the process can lift loose coatings along with the rust.
After the Bath
Rinse thoroughly, scrub off the black residue with a brush and detergent, and dry immediately; electrolytically cleaned steel flash-rusts aggressively. Neutralize with clean water (the alkaline electrolyte rinses easily), then protect at once with oil or wax. Dispose of the exhausted electrolyte (it contains dissolved metals and loosened paint) responsibly, not down a storm drain. Photograph the tool before and after; antique tool people love the transformation, and your ratio notes make the next bath predictable.
Electrolytic cleaning at the standard washing-soda ratio is the antique tool restorer's workhorse: gentle on markings, ruthless on rust, and cheap to run. Set up the bath right, watch the current, inspect as you go, and protect the steel the moment it comes out; the tool that emerges is the tool as the maker left it, minus a century of neglect.
Safety note: electrolysis produces hydrogen gas, so ventilate the area and keep sparks and flames away. Wear eye protection and gloves, keep the power supply dry and fused, and never reach into a live bath.
Related Guides
- Electrolyte Solution Ratios for Rust Electrolysis: Electrolysis strips rust from iron and steel using a battery charger, a tub of water, and a sacrificial electrode. It reaches into every pit and
- Electrolytic Rust Removal Baths for Antique Planes: An antique plane body caked in decades of rust presents a dilemma: aggressive mechanical cleaning removes the rust but also the patina, the crisp
- Low-Deacidification Soaking for Antique Steel Tools: Antique steel tools often arrive from barns and estate sales carrying more than rust: they carry acidity. Decades of exposure to acidic environments
- Chelating Agent Baths for Delicate Cast Iron Salvage: Delicate cast iron, thin-walled skillets, ornate hardware, antique tools with fine detail, rusts in ways that aggressive restoration destroys. Wire
- Chelating Agent Baths for Delicate Rusted Iron Plating: Delicate ironwork (thin plated items, fine tools, ornamental pieces) presents a restoration dilemma: the rust must go, but every aggressive method