
The granny square is the classic beginner crochet project. It's one small square made from the center out, and once you can make one, you can make a hundred and join them into blankets, bags, scarves, whatever you want. Here's the whole thing, start to finish.
A note on terms: this guide uses US crochet terminology. In US terms, the main stitch here is the double crochet (dc). If you learned UK terms, that same stitch is called a treble crochet (tr). The stitches line up like this: US single crochet = UK double crochet, US double crochet = UK treble crochet, US treble crochet = UK double treble. Everything below is written in US terms.
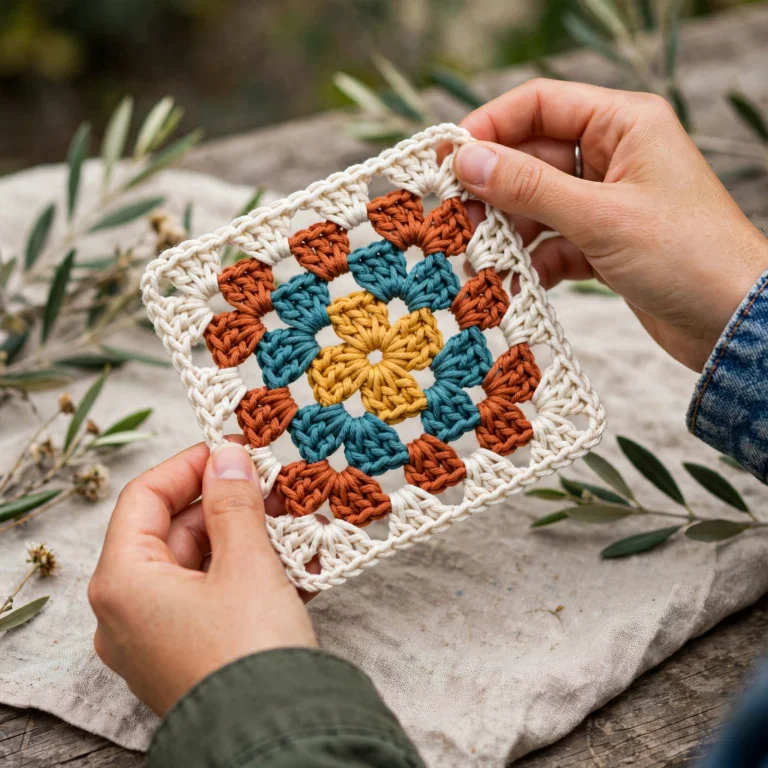
What you need
Medium weight yarn (size 4). Any color. One color per round looks great if you want the classic multicolor square. A 5.0 mm (H/8) or 5.5 mm crochet hook. Scissors. A yarn needle for weaving in the ends.
The stitches you'll use
Three of them, all basic.
- Chain (ch): yarn over, pull through the loop on your hook. This makes one chain stitch.
- Double crochet (dc): yarn over, insert the hook into the stitch or space, yarn over and pull up a loop (3 loops on hook), yarn over and pull through the first 2 loops (2 loops left), yarn over and pull through the remaining 2 loops. One double crochet made.
- Slip stitch (sl st): insert the hook into the stitch, yarn over, and pull that yarn straight through both the stitch and the loop already on your hook in one motion. It makes almost no height, which is why it's perfect for joining rounds invisibly.
That's the entire vocabulary. Everything below is just these three in different combinations.
Step 1: The foundation ring
Make a slip knot and place it on your hook. Chain 4 stitches. Now insert your hook into the very first chain you made, yarn over, and pull through both loops. That's a slip stitch, and it forms a small center circle. Everything builds outward from this ring.
Step 2: Round 1
- Chain 3. This counts as your first double crochet, so don't forget it's there.
- Work 2 double crochets into the center ring. You now have a cluster of 3 (the chain-3 plus the 2 doubles).
- Chain 2. This is your first corner space.
- Work 3 more double crochets into the ring, then chain 2. That's corner two.
- Repeat twice more: 3 double crochets, chain 2.
- You should now have 4 clusters of 3 double crochets with a chain-2 space between each. Those four spaces are your four corners.
- Slip stitch into the top of the chain-3 you started with to close the round.
Round 1 is done. If you're changing colors, fasten off here: cut the yarn leaving a 4-inch tail, yarn over, and pull the tail all the way through the last loop to lock it.
How to join a new color
Changing colors is where the classic granny square look comes from, and it's simple once you've done it once. Take your new yarn and make a slip knot on your hook. Insert the hook into any corner space of the finished round, yarn over with the new yarn, and pull through. Chain 3 (this counts as your first double crochet of the new round). You're in. Work the round normally from there. The join sits inside the corner space where the stitches crowd around it, so it stays hidden.
Step 3: Round 2
- Join your new color in any corner space (or keep going with the same yarn). Chain 3 to count as your first double crochet.
- Work 2 double crochets into that same corner space, chain 2, then work 3 more double crochets into that exact same corner space. Each corner now holds two clusters of 3, separated by a chain-2. That's what turns the corner.
- Chain 1. This short chain is the side space, the flat run between corners. It's shorter than the corner's chain-2 because the side doesn't need to turn, just travel.
- In the next corner space: 3 double crochets, chain 2, 3 double crochets. Chain 1.
- Repeat around all four corners.
- Slip stitch into the top of your starting chain-3 to close the round.
A note on direction: this guide works every round in the same direction (usually clockwise) without turning the work. Some crocheters turn at the end of each round for a slightly flatter square. Both methods work. Pick one and stay consistent within a single square, because mixing them changes the texture of the stitches from round to round.
Step 4: Keep going
Every round after this follows the same logic. Corners always get 3 double crochets, chain 2, 3 double crochets. The flat spaces along each side get a single cluster of 3 double crochets, with a chain 1 between each cluster and the corners. Each round adds one more side cluster per side, so the square grows evenly. Work as many rounds as you want. Three to five rounds makes a nice standard square.
Step 5: Finish it
Slip stitch to close your last round, cut the yarn leaving a few inches of tail, and pull it through. Thread the tail onto your yarn needle and weave it in and out of the back of several stitches so it can't pull loose. Trim the excess. Do the same with your starting tail. If your square curls or the edges wave a little, that's normal. You can block it: dampen it, pin it square on a towel, and let it dry. It'll sit flat. Blocking also evens out size differences between squares, which matters a lot when you join them into a blanket.
Troubleshooting
My square is curling into a bowl. Your corners are too tight or you're missing chain stitches in the corner spaces. The corner chain-2 is what lets the square turn 90 degrees. Double-check every corner has its full chain count.
My square is ruffling like a potato chip. Too many stitches for the space. You probably added an extra cluster somewhere, or your tension loosened up mid-round. Count your clusters: each side should have the same number.
There's a visible gap at the start of each round. You forgot that the starting chain-3 counts as a stitch. It's the number one beginner mistake. That chain-3 is a full member of its cluster.
My corners look different from each other. Inconsistent corner chains. If you chain 2 in the corners on round 1, chain 2 in every corner of every round. Mixed corners make a lopsided square.
I have to rip back a round. That's called frogging (rip it, rip it, like a frog's "ribbit"). It happens to everyone. Pull the yarn out stitch by stitch back to the mistake, put the live loop back on your hook, and carry on. Catching a missed cluster at the end of a round beats frogging three rounds later.
Tips worth knowing
Keep your corner chain count consistent. If you chain 2 in the corners on round 1, chain 2 in the corners every round. Mixed corners make a lopsided square. Count your clusters at the end of each round. Four corners, and the side clusters should match on all four sides. Catching a missed cluster now beats frogging a whole round later. The chain-3 that starts each round counts as a stitch. Forgetting it is the number one beginner mistake, and it leaves a gap in the round.
Switching colors every round gives the classic look, and the fasten-off point hides neatly in the corner. One honest trade-off: every color change means two more yarn ends to weave in. Weave them in as you go and it's painless. Save them all for the end and you'll face a marathon finishing session, so don't let anyone tell you multicolor squares mean less finishing work. They mean more, just spread out.
Conclusion: Now make a hundred
You know the whole system now: the ring, the corner logic, the color joins, the finishing. One square is a coaster. A hundred squares is a blanket. The beautiful thing about the granny square is that the tenth one takes half the time of the first, because your hands learn the rhythm and stop needing your eyes. Make a stack in front of the television. Experiment with color order. When you've got a pile, the joining is its own satisfying project, and your squares will already be blocked and even from following the steps above. The granny square has survived a century of craft trends for one reason: it works, every time, for every skill level. Now go make yours.
Related Guides
- Mattress Stitch Seam Alignment on Dense Granny Blocks: Joining granny squares with a mattress stitch gives an invisible, flexible seam that looks professional, but dense blocks, those worked tightly with little give, fight the needle. This guide covers tension adjustments and stitch placement for clean seams on firm fabric.
- Joining Granny Squares With Mattress Stitch Seams: A pile of granny squares is a promise; the joining is where the promise is kept or broken. The seam between squares decides whether a blanket lies flat or puckers, and this guide walks through the full mattress stitch method for squares that disappear into the fabric.
- Blocking Gauge Symmetry in Joiner Granny Squares: A blanket of granny squares is an assembly problem: dozens of individually crocheted units that must join into a flat, even fabric. Blocking, shaping each square to identical dimensions before joining, is the step that separates a professional result from a wavy one, and this guide covers the measuring and pinning method.
- Corner Triple Treble Stacking in Flat Granny Motifs: The granny square's corner is its structural and visual anchor: the chain space where each round turns 90 degrees and where the motif grows. The triple treble variation stacks taller stitches in the corner for a lacier, more open fabric, and this guide shows how to keep those tall corners from flopping.
- Corner Shell Cluster Spacing for Flat Afghan Squares: A granny square that will not lie flat is almost always a corner problem. The corners have to turn ninety degrees while the sides run straight, and the shell variation, with its fanned clusters, needs wider spacing than the standard. This guide dials in the counts for shells that sit perfectly flat.