
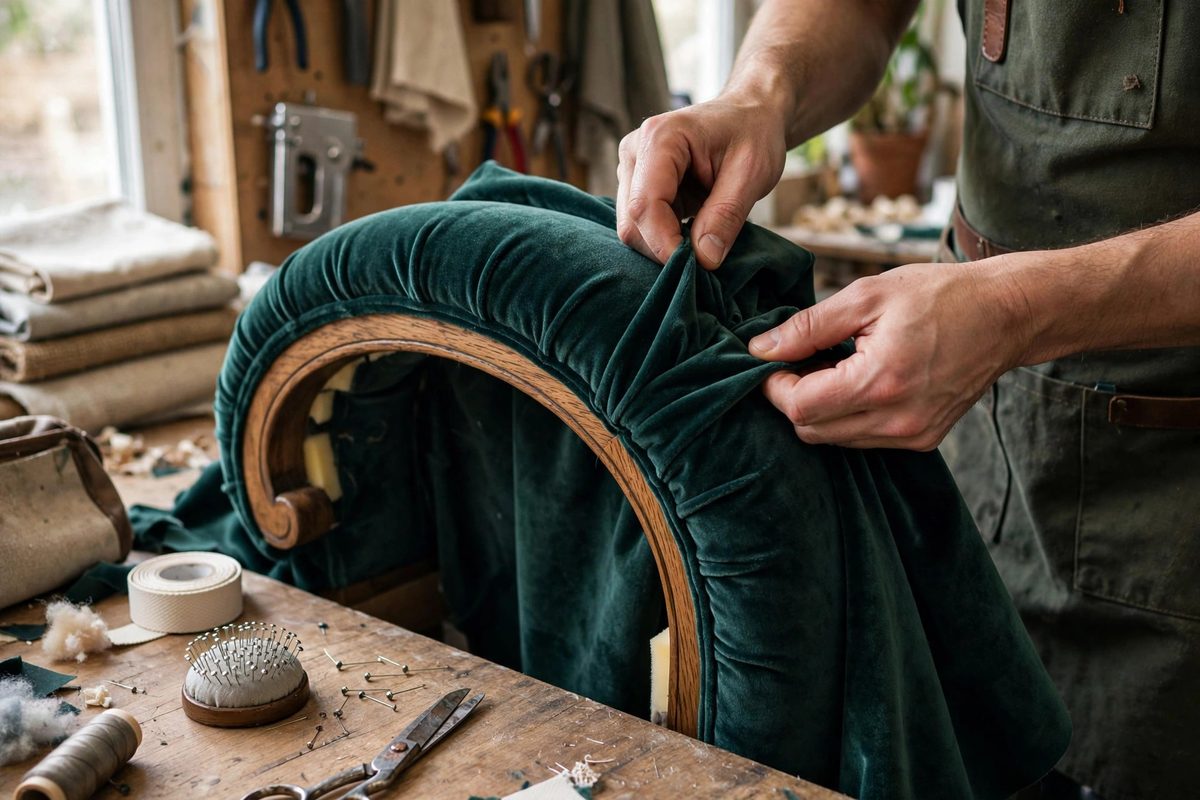
A curved armrest is one of upholstery's honest tests: the fabric must travel around a compound curve, which means it has to go somewhere, and pleats are where it goes. Heavy velvet complicates everything. It is thick, it has a directional pile that shows every handling mark, and it does not ease or stretch the way lighter fabrics do. Pleating velvet around a curve is not about hiding the excess; it is about distributing it so evenly and deliberately that the pleats read as design, not compromise.
Why Velvet Fights the Curve
Velvet's pile is a forest of tiny fibers standing on the backing, and that pile has a nap direction: stroke it one way and it looks dark and rich, stroke it the other and it looks light and pale. Around a curve, the fabric twists, which means the nap direction twists with it, producing visible light-dark banding if the pleats are placed carelessly. Every pleat is also a fold that crushes pile, and crushed pile on velvet shows as a permanent mark.
The weight compounds the problem. Heavy velvet does not gather into soft, forgiving folds; it forms stiff, structural pleats that stand proud of the surface. A pleat that would disappear into a lightweight cotton becomes a ridge in velvet. The pleating plan has to account for the fabric's refusal to be subtle.
Planning the Pleat Layout
Before cutting, map the curve. The outside of a curved armrest needs more fabric than the inside, and the difference has to be absorbed in pleats. Mark the armrest's curve on the fabric's back, then plan pleat positions: evenly spaced pleats of consistent depth give the most professional result, with the pleats oriented to follow the curve's flow rather than fighting it.
Decide the pleat direction deliberately. Pleats generally fold toward the back of the armrest, so the visible front shows the smooth faces of the pleats rather than their openings. Consistent direction is what makes pleats look intentional; pleats folding every which way look like the fabric gave up.
Cutting With the Nap in Mind
Cut all pieces for the armrest with the nap running the same direction, conventionally running downward on vertical surfaces so the pile lies smooth to the downward stroke. Around the curve, perfect nap consistency is impossible, which is exactly why the pleats must be planned: each pleat is a controlled nap transition, and evenly spaced pleats make those transitions rhythmic rather than random.
- Mark the nap direction on the back of every cut piece before assembly; it is invisible from the back once cut.
- Cut velvet with the pile facing down on the cutting table to reduce shifting.
- Allow extra fabric for pleat depth; skimping here produces strained, puckered pleats.
- Steam the velvet before cutting to relax shipping creases; creases compete with your pleats.
Forming the Pleats
Work the fabric onto the armrest progressively, forming each pleat by hand before securing it. Pin or temporarily tack each pleat in place and step back to look: the pleats should graduate smoothly around the curve, deeper where the curve is tighter, shallower where it opens. Adjust before committing, because velvet remembers every pinhole and staple.
Press pleats with care. Velvet crushes under direct iron heat, so press from the back with a press cloth, or use steam without pressure to relax the folds into place. The goal is pleats that lie flat and even, not pleats ironed into sharp creases; sharp creases in velvet look harsh and show pile damage.
Securing Without Showing
Pleats are secured from underneath or behind wherever possible. On an armrest, this usually means tacking or stapling the pleat folds to the frame on the underside, where the fasteners never show. The visible surface should show only the pleated velvet, with no stitching lines or fastener dimples interrupting it.
Where the pleated section meets adjacent panels, the seam should fall in a natural break line: under the armrest's scroll, along the inside edge, or where the arm meets the back. A seam placed mid-curve draws the eye to exactly the place you want it to glide past. Plan the panel breaks as part of the pleat layout, not as an afterthought.
Map the curve, cut with the nap, pleat with consistent direction and depth, and secure from behind. Heavy velvet around a curve is demanding work, but the result, deep even pleats in rich pile, is one of the most luxurious surfaces in upholstery. The fabric does the talking; your job is to give it good lines to say.
Related Guides
- Tufting Button Pull Depth Limits on Heavy Damasks: Deep button tufting on heavy damask is the signature look of traditional luxury upholstery, but the pull depth, how far the button sinks below the
- Needle Punching Horsehair Into Burlap Layers: Traditional upholstery builds its comfort from natural materials layered with intention, and the horsehair-over-burlap sandwich is one of the oldest
- Stripping Lacquer Without Degrading Veneers: Old lacquer finishes fail in familiar ways: they craze, yellow, chip, and go cloudy, and the only real fix is removal. On solid wood, stripping is
- Curled Hair Layering for Resilient Antique Seat Tops: Before foam, upholsterers built seat comfort from curled horsehair, and antique seats stuffed with it can still be comfortable a century later if the
- Solvent Gels for Stripping French Polish Safely: French polish, the traditional shellac finish built up in hundreds of thin layers, eventually needs to come off: alligatored, blackened, or damaged