
When a beam must be longer than the available lumber, the scarf joint splices two timbers end to end with long, overlapping angled cuts. The incline angle of those cuts is the critical design decision: it determines how the joint handles tension, compression, and shear. Get the angle right and the splice approaches the strength of solid timber; get it wrong and the joint is decorative.
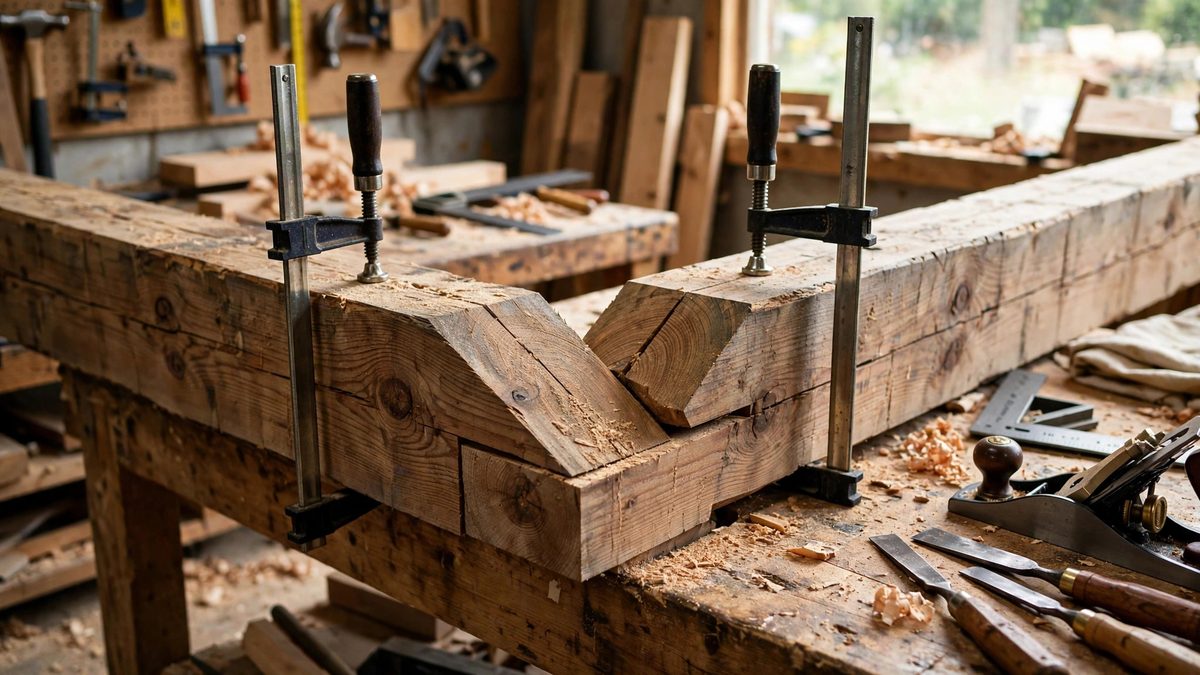
How the Scarf Joint Carries Load
A scarf joint works by gluing or mechanically fastening two long tapered faces together, creating a huge bonding area compared to a butt joint. Under bending load, the top of the beam is in compression and the bottom is in tension; the scarf's long incline puts most of that load into shear along the glued faces rather than tension across them. Wood and glue are both far stronger in shear along the grain than in tension across a joint, which is why the scarf outperforms simpler splices. The incline angle controls the ratio: a shallower angle (a longer scarf) gives more glue area and puts the load more nearly parallel to the grain, while a steeper angle shortens the joint but loads it more severely. Traditional practice favors long scarfs for structural work, often in the range of one in eight to one in twelve slope.
Choosing the Incline Angle
The angle is a trade-off between strength and practicality. Shallower angles are stronger but consume more timber in the overlap and demand more precise cutting; a one-in-twelve scarf on a deep beam is a long, exacting cut. Steeper angles are easier to cut and fit but concentrate stress and reduce the glue area. For structural beams, err toward the shallow side; the extra work in cutting pays back in capacity and in forgiveness of minor fit imperfections. The angle should also suit the loading: a beam loaded primarily in bending wants the longest practical scarf, while a post loaded in pure compression can tolerate a steeper joint since compression across the incline is well handled. Whatever angle you choose, cut both halves identically; a scarf that fits tightly along its full length is strong, while one that bears only at the ends is not.
Cutting and Fitting the Scarf
Lay out the scarf with a sharp pencil and a straightedge, marking the full incline on both timbers. Cut with a saw guided to the line, then refine with a hand plane; the faces must be flat and true along their entire length, since gaps in the glue line are weak spots. Test-fit dry: the two halves should slide together with even contact and no rocking. A useful check is to hold the joint up to a light and look for gaps along the incline. Small imperfections can be corrected with the plane, but a scarf cut at mismatched angles will never fit and must be recut. Take the time to get the fit right dry; glue covers nothing.
Glue, Clamping, and Reinforcement
Use a structural adhesive appropriate for the service conditions; modern epoxies and resorcinol-type glues develop the shear strength a scarf needs, while ordinary wood glue is adequate only for light, dry-service applications. Apply glue evenly to both faces, assemble, and clamp along the full length of the scarf with enough pressure to close the joint but not so much that all the glue squeezes out. Cauls distribute the clamping pressure over the long incline. For critical structural splices, add mechanical reinforcement: through-bolts, pegs, or a fishplate over the joint. The traditional hooked scarf with wedged keys is a mechanical solution that needs no glue at all, though it demands superb craftsmanship. Reinforcement is cheap insurance on a beam that carries real load.
Placement of the Splice in the Beam
Even a perfect scarf is weaker than solid timber, so place splices where the bending stress is lowest: near the supports rather than at midspan. In a simply supported beam, the moment is zero at the supports and maximum at the center, so a splice near a support carries mostly shear, which the scarf handles well. Never splice at the point of maximum moment unless the design specifically accounts for it. Also stagger splices in built-up beams so they do not align vertically through the laminations. A well-placed, well-cut scarf in a properly reinforced beam is a legitimate structural connection with centuries of precedent behind it.
The scarf joint's incline angle sets its strength: shallow angles for structural bending loads, precise matching cuts, structural adhesive with full-length clamping, and placement near the supports. Cut it long, fit it tight, and the splice disappears into the beam's strength.
Related Guides
- Calculating Tie Beam Tension in Heavy Timber Trusses: The tie beam is the unsung hero of the timber truss: while the rafters push outward under roof load, the tie beam pulls inward, holding the walls
- Point Load Transfer Through Bearing Partition Walls: Most walls in a house carry distributed loads: the weight of the floor or roof above spread along their length. But beams, girders, and headers
- Cantilever Deck Joist Overhang Limits and Ratios: A cantilevered deck joist extends past its supporting beam, creating the clean, post-free overhang that makes decks look like they float. It is an
- Squaring Heavy Timber Posts With Plumb Bobs: A heavy timber post does not forgive being out of plumb. Once it is set and the joinery is cut, a lean you can barely see at the base becomes inches
- Cantilever Joist Deflection Ratios for Balconies: A balcony framed as a cantilever, joists extending past the building's support with no posts at the outer edge, is an elegant structure and an