
A DIY condenser microphone is a high-impedance circuit sitting next to a sensitive capsule, and both of them are antennas for every hum, buzz, and radio signal in the room. Shielding and internal baffling in the capsule enclosure are what separate a mic that sounds clean from one that sounds like a science experiment. The good news is that the fixes are mechanical and cheap.
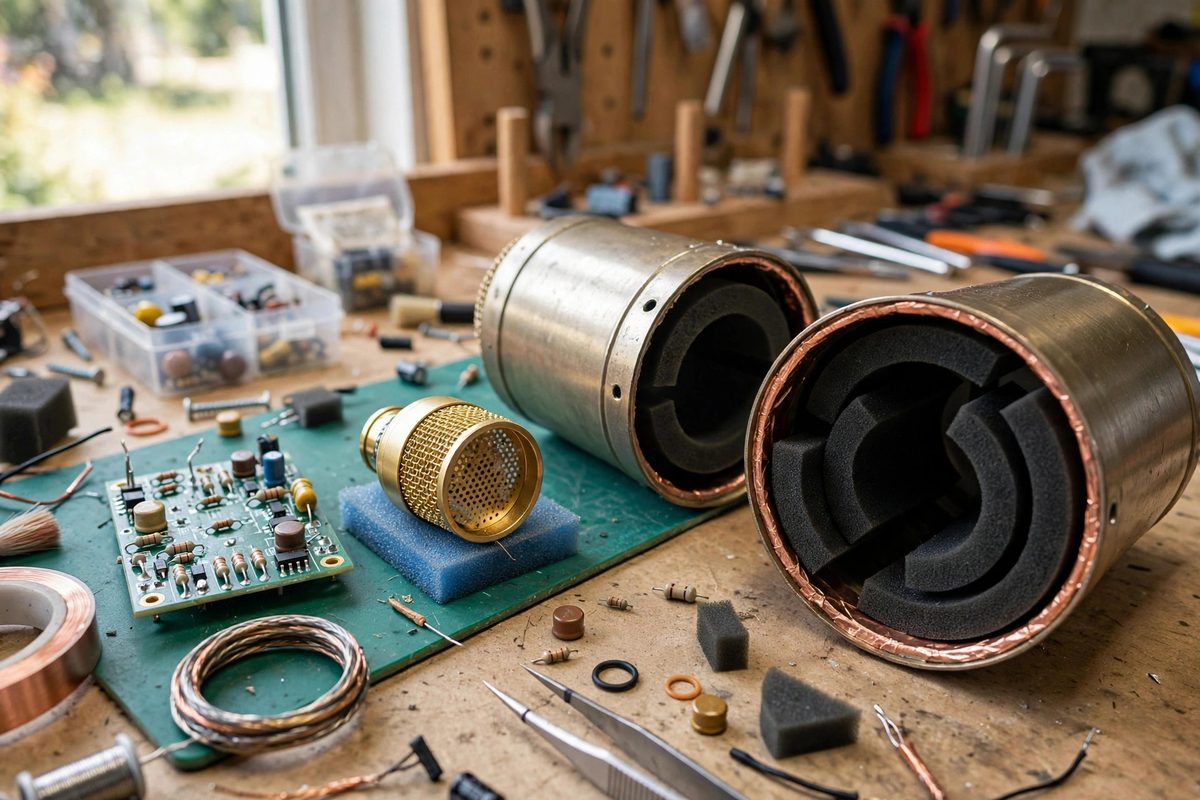
Why the Capsule Enclosure Needs Shielding
The capsule and the first stage of electronics operate at impedances high enough that stray electric fields couple straight into the signal. Mains hum from nearby wiring, switching noise from power supplies, and RF from phones and routers all find their way in. A conductive enclosure tied to ground forms a Faraday cage that blocks electric fields; the key word is continuous, because a cage with gaps is a cage with doors. The enclosure should surround the capsule and the high-impedance circuitry completely, with all parts of the shield electrically connected to each other and to the cable ground.
Building an Effective Shield
Metal bodies are naturally shielding, which is why classic mic designs use brass or aluminum tubes. For DIY builds in non-metal enclosures, copper foil tape or conductive paint applied inside the body works, as long as every piece overlaps and connects. Pay special attention to joints: the seam where the body meets the headbasket and the entry point of the cable are the classic leak points. A star washer or a dedicated ground lug guarantees the connection where foil meets metal. Test continuity with a meter after assembly; a shield that is not connected to ground is just decoration.
Baffling Against Internal Reflections
Shielding blocks interference from outside, but the enclosure also shapes sound from the inside. Sound entering the headbasket reflects off the interior walls and reaches the back of the capsule slightly delayed, which colors the response with comb filtering. Internal baffling, rings, mesh layers, or absorptive material placed around the capsule, breaks up those reflections. The goal is not to deaden the enclosure completely but to scatter and absorb the reflections that arrive late enough to smear the sound. Thin felt or open-cell foam in the right spots tames the harshness without killing the air.
Headbasket Design Tradeoffs
The headbasket is a compromise between protection, shielding, and acoustics. Fine mesh shields better against RF and blocks wind and pops, but dense mesh also reflects more sound internally and slightly dulls the highs. Coarse mesh sounds more open but shields less and lets more plosive energy through. A double-layer basket with spacing between the layers gets much of the best of both: the outer layer takes the physical abuse and the inner layer handles the fine shielding. Keep the basket symmetrical around the capsule so reflections arrive evenly rather than from one dominant direction.
Grounding and Hum
Hum in a DIY condenser usually traces to grounding, not to the capsule. Ground the shield at one point to the cable shield, and make sure the circuit ground connects there too, avoiding loops where current can circulate. Keep the high-impedance capsule leads as short as physically possible; every millimeter of exposed high-impedance conductor is an antenna. If hum persists after the shield is verified, look at the power supply and cable before blaming the mic; phantom power with ripple or a damaged cable injects noise that no enclosure can fix.
A clean DIY condenser is mostly a shielding and baffling job: a continuous grounded enclosure, a thoughtfully layered headbasket, short high-impedance runs, and a single solid ground point. Get the metal right and the circuit gets to do its job undisturbed.
Related Guides
- Electret Capsule Diaphragm Dampening for DIY Mics: Electret condenser capsules are the tiny microphones inside nearly every inexpensive mic, headset, and phone: cheap, sensitive, and surprisingly
- Phantom Power Ripple Filtering for Condenser Mics: Phantom power, the 48 volts that travels up the microphone cable to energize a condenser mic, is supposed to be pure DC. In practice, cheap supplies
- Tuning JFET Bias Voltage in DIY Condenser Mics: The JFET (junction field-effect transistor) is the heart of most DIY condenser microphone circuits: it converts the capsule's tiny, high-impedance
- Center-Tapped Transformer Balancing in Ribbon Mics: A ribbon microphone produces a tiny, delicate signal from a thin metal ribbon moving between magnets, and the transformer sitting right behind that
- Center-Tapped Isolation Transformers in DIY Mics: A microphone's output transformer does quiet, critical work: it isolates the mic electrically from the preamp, balances the signal for long cable